Name the Parts of a Cube
Make a paper cube model, identify and label its faces, edges, and vertices, and count them to learn three dimensional shapes.


Step-by-step guide to name the parts of a cube
Step 1
Gather all materials and clear a flat workspace so you have room to draw and fold.
Step 2
Use your ruler and pencil to draw six equal squares in a cross shape: four squares in a row with one square attached above the second square and one square attached below the second square.
Step 3
Cut out the net carefully around the outside edges to separate it from the rest of the paper.
Step 4
Score every line between the squares by running the dull side of the scissors or the ruler along the line so the paper folds easily.
Step 5
Fold along every scored line to make crisp creases so the net starts to bend into a cube shape.
Step 6
Put glue or tape on the small tab on the net to prepare it for assembly.
Step 7
Press the edges together and attach the glued or taped tab so the net becomes a closed cube; hold until the glue sets or the tape sticks.
Step 8
Use your colouring materials to give each face a different color or write a different number on each face so they are easy to tell apart.
Step 9
Mark each edge with a small number or short line and label them E1 through E12 so you can count them one by one.
Step 10
Put a dot at each corner and label the corner dots V1 through V8 so each vertex is easy to find.
Step 11
Count the labeled faces and write the total number on a scrap of paper.
Step 12
Count the labeled edges and write the total number on your scrap of paper.
Step 13
Count the labeled vertices and write the total number on your scrap of paper.
Step 14
Check your counts to see that you have identified every face edge and vertex correctly.
Step 15
Take a photo or write a short note about what you discovered and share your finished cube model and findings on DIY.org
Help!?
What can we use instead of a ruler, scissors, or glue if we don't have them?
If you don't have a ruler, use the straight edge of a book to draw the squares in step 2, replace scissors with a craft knife (with adult help) or carefully tear along the outline in step 3, and use clear tape instead of glue on the tab in step 6.
My cube won't fold or the edges don't meet—what should I do?
If the cube won't close in step 7, re-score the fold lines from step 4 more deeply with the dull side of the scissors or ruler, ensure the six squares from step 2 are exactly equal, and trim any uneven outer cuts from step 3 before gluing the tab in step 6.
How can I adapt this activity for younger or older children?
For younger kids, pre-draw and pre-cut the net after step 2, use thicker card and stickers for labeling in steps 8–12, while older kids can design their own net in step 2 and extend steps 11–13 by proving Euler's formula for the cube.
How can we extend or personalize the finished cube?
Personalize the colored cube from step 8 by turning it into a custom dice with pips or pictures, add textured tape or raised labels to the edges in step 9 and vertices in step 10, or build several cubes to compare counts before sharing in step 15.
Watch videos on how to name the parts of a cube
How to Solve A Rubiks's Cube - EASY to follow Step-by-step Beginners Tutorial
4 Videos
How to Solve A Rubiks's Cube - EASY to follow Step-by-step Beginners Tutorial
How To Solve A Rubik's Cube (Beginner Method) | Cubeorithms
How to Solve the Rubik's Cube: An Easy Tutorial
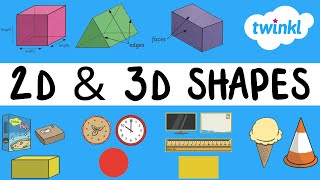
2D and 3D Shapes for Kids | Geometry for Kids | Twinkl USA
Facts about geometry and 3D shapes
🧊 The cube has 6 faces, 12 edges, and 8 vertices — count them on your paper model!
🎲 A cube is a regular hexahedron and one of the five Platonic solids.
🧮 Euler's formula (V - E + F = 2) works for convex polyhedra — for a cube: 8 - 12 + 6 = 2.
✂️ There are 11 different nets (flat layouts) that fold into a cube — try making a few to see which you like best!
🏗️ Cubes show up everywhere: dice, boxes, building blocks, and even some crystals form cube shapes.
How do you do the "Name the Parts of a Cube" activity?
What materials do I need for the cube labeling activity?
What ages is this activity suitable for?
What are the benefits of naming parts of a cube?


