Make a Mini Photo Book
Make a mini photo book by cutting and folding paper, arranging favorite photos or drawings, decorating pages, and learning basic layout and storytelling skills.


Step-by-step guide to make a mini photo book
Step 1
Gather all your materials on a clean table so everything is ready to use.
Step 2
Pick 6 photos or drawings you want to include in your mini photo book.
Step 3
Take three sheets of plain paper and fold each sheet in half like a little book.
Step 4
Stack the three folded sheets together with their folded edges lined up neatly.
Step 5
Cut a long thin strip of paper about finger-width wide to use as the book spine.
Step 6
Spread glue along the folded edge of the stacked pages using the glue stick.
Step 7
Press the paper spine strip onto the glued folded edge and smooth it so it sticks well.
Step 8
Trim any uneven page edges with scissors so all pages match evenly.
Step 9
Lay out your photos or drawings on the pages in the order you want without gluing them yet.
Step 10
Glue one photo or drawing onto each page in the order you chose.
Step 11
Decorate each page with colouring materials or stickers to make them fun.
Step 12
Write a short caption or sentence on each page to tell the story of your pictures.
Step 13
Make a front cover with a title and your name and glue it to the front of the book.
Step 14
Share your finished mini photo book by posting it on DIY.org
Help!?
What can I use instead of a glue stick, printed photos, or special paper if I can't find them?
If you don't have a glue stick, printed photos, or plain paper, use double-sided tape or a thin line of school glue for Steps 5 and 10, and replace photos with drawings, magazine cut-outs, or printed images on regular paper.
My spine won't stick or pages keep coming loose — what should I do?
If the paper spine doesn't stick or pages come loose after Step 6, apply another thin layer of glue to the folded edge in Step 5, press the spine under a heavy book for 10 minutes, and trim uneven edges in Step 7 before gluing photos in Step 10.
How can I adapt this mini photo book activity for different ages?
For preschoolers, use pre-folded construction paper, larger stickers, and help with cutting and glue in Steps 3–7, while older kids can add extra folded sheets, trim pages themselves in Step 7, and write longer captions in Step 12.
How can we extend or personalize the mini photo book beyond the basic instructions?
To personalize and extend the mini photo book, make a laminated front cover and glue a ribbon into the paper spine during Step 6, add interactive pockets or hidden flaps on pages before Step 11, and share photos of the finished book on DIY.org as suggested in Step 13.
Watch videos on how to make a mini photo book
How to Make an Easy Seamless Lay Flat DIY Photo Book - Tutorial
4 Videos
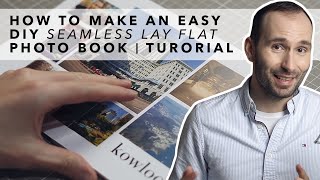
How to Make an Easy Seamless Lay Flat DIY Photo Book - Tutorial
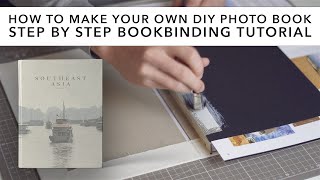
How to make your own DIY photo book | Step by Step Bookbinding Tutorial
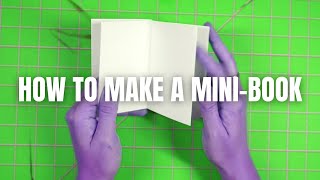
How to Make a Mini-Book with One Sheet of Paper
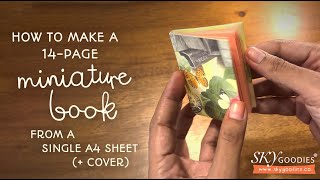
Very Easy-To-Make Mini Book, from a single sheet of A4 or Letter Size Paper! Easiest Miniature Book!
Facts about bookmaking and paper crafts
📷 People take more photos now than ever — over a trillion photos a year worldwide, so mini photo books are perfect for saving favorites.
📚 The idea of collecting photos in albums goes back to the 1800s when Victorian families pasted prints into keepsake books.
✂️ You can fold a single sheet of paper into an 8-page mini-book with just folds and one cut — no glue needed!
🧠 Adding short captions to photos helps your brain remember the story and details better — great practice for storytelling skills.
🎨 Decorating with stickers, washi tape, and recycled scraps makes each mini book unique and eco-friendly.
How do I make a mini photo book with my child?
What materials do I need to make a mini photo book?
What ages is a mini photo book suitable for?
What are some safe variations and tips for making a mini photo book?


