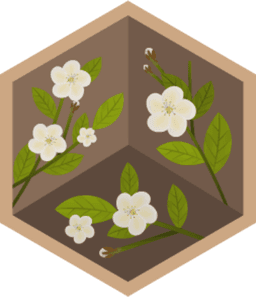
Make a Decoupage Necklace
Create a decoupage necklace by decorating a wooden or metal pendant with paper, glue, and sealer, then attach it to a cord.


Step-by-step guide to make a decoupage necklace
How to Make A Shell Necklace | Decoupage
Step 1
Gather all your Materials Needed and clear a clean flat workspace to work on.
Step 2
Wipe the pendant with a clean dry cloth to remove dust and oils from the surface.
Step 3
Lightly sand the front of the pendant with fine sandpaper to make the surface a little rough for better glue grip.
Step 4
Place the pendant face down on the decorative paper and use a pencil to trace its outline on the paper.
Step 5
Cut out the traced paper shape leaving a tiny border so you can wrap the paper over the pendant edges.
Step 6
Use the paintbrush to apply a thin even coat of decoupage glue to the front of the pendant.
Step 7
Place the cut paper on the glued pendant with the design facing up and center it carefully.
Step 8
Smooth the paper gently from the center outward with your finger or brush to remove air bubbles and wrinkles.
Step 9
Trim any extra paper hanging over the edges with scissors so the paper sits neatly on the pendant.
Step 10
Brush a thin even coat of clear sealer over the top and around the edges of the paper to protect it.
Step 11
Let the sealer dry completely for at least 30 minutes before handling the pendant.
Step 12
Use pliers to open a jump ring and attach it through the pendant hole then close the jump ring securely.
Step 13
Thread the necklace cord or chain through the jump ring and tie or fasten the cord to your preferred length.
Step 14
Take a photo of your finished decoupage necklace and share your creation on DIY.org
Help!?
What can I use if I don't have decoupage glue or fine sandpaper?
If you don't have decoupage glue you can use watered-down white school glue for step 6, and if you lack fine sandpaper use an emery board to lightly roughen the pendant surface in step 3.
What should I do if the paper gets air bubbles or wrinkles when I place it on the pendant?
If you get air bubbles or wrinkles when placing the cut paper (step 6–7), gently lift the paper, apply a bit more decoupage glue to the pendant, then smooth again from the center outward with your finger or a brush.
How can I adapt the activity for different ages?
For younger kids have an adult do the sanding and tracing and use pre-cut decorative paper or stickers for steps 3–7, while older kids can try layered papers, intricate trimming, and multiple sealer coats for a more advanced pendant.
How can we personalize or improve the finished necklace?
To personalize the finished pendant after trimming, add tiny charms or a sprinkle of craft glitter on top and then brush on the clear sealer, or swap the sealer for jewelry resin for a durable glossy finish.
Watch videos on how to make a decoupage necklace
How To Decoupage For Beginners: A Step-by-step Tutorial
4 Videos

How To Decoupage For Beginners: A Step-by-step Tutorial
Decoupage Made Easy: 27 Step-by-Step Tutorials
DIY Decoupage and Crackle Finish Step-by-Step Guide for BEGINNERS
Beginner's Guide to Decoupage Scallop Shells | Easy DIY Craft Tutorial
Facts about jewelry making for kids
🎨 Decoupage is the art of decorating objects with cut paper and has been popular in Europe since the 1700s.
🧴 Mod Podge is a well-known craft brand often used by crafters as glue, finish, and sealer in one product.
✂️ Paper napkins are extra thin and many crafters use only the top printed layer for super-smooth decoupage.
🔗 A decoupage pendant can be strung on leather, waxed-cotton, ribbon, or a metal chain to change its style.
💦 A clear sealer protects your design from smudges and light splashes—but most decoupage pendants aren't meant to be soaked.
How do I make a decoupage necklace?
What materials do I need for a decoupage necklace?
What ages is this activity suitable for?
What are some safety tips and variations for decoupage necklaces?


