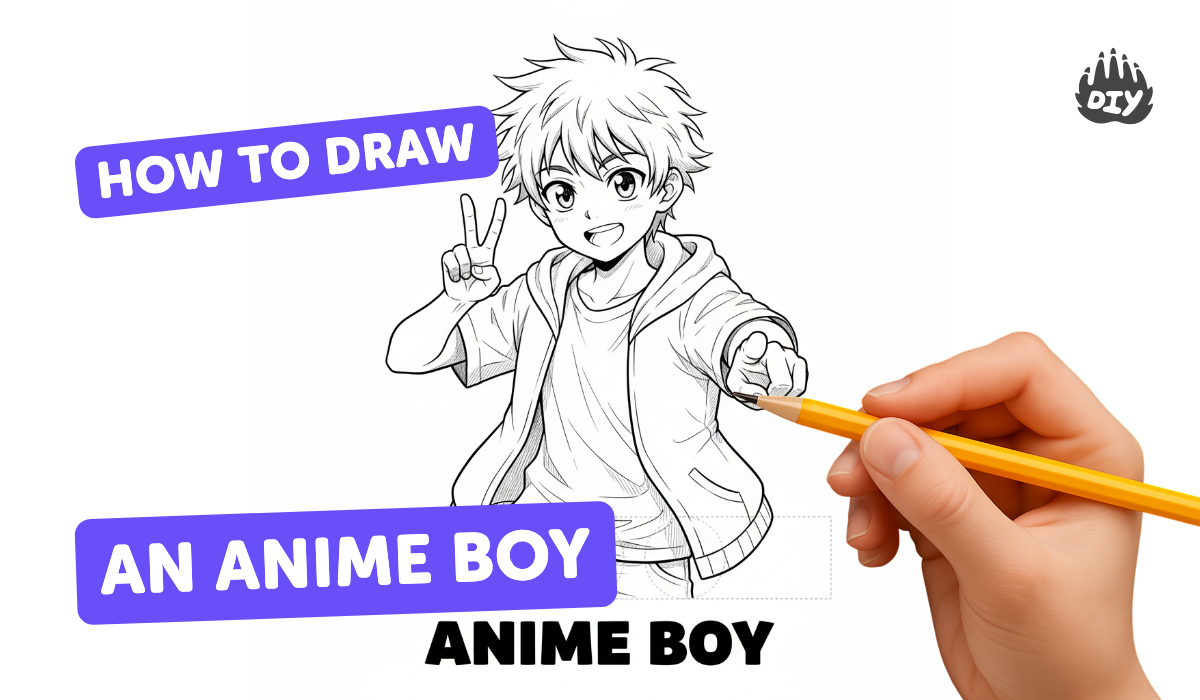
How to draw an anime boy - a free anime boy drawing guide
Draw an anime boy step by step using simple shapes, facial expressions, and hairstyles. Practice proportion, linework, and shading techniques.


Instructions
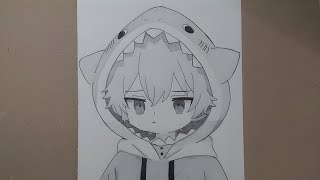
How to Draw an Anime Boy Step by Step || Easy Anime Drawing || Pencil Sketch Art
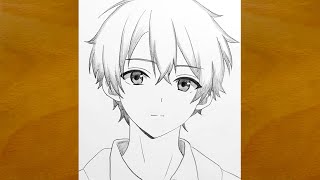
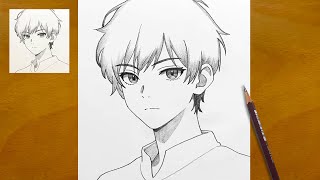
Step 1
Draw a circle for the top of the head to make the basic head shape.
Step 2
Add a vertical center line and a horizontal eye line across the circle as simple face guidelines.
Step 3
Draw the jaw and chin by adding two lines from the sides of the circle that meet at a soft point.
Step 4
Draw a short neck and two sloping lines for the shoulders under the jaw.
Step 5
Draw two large almond-shaped eyes on the eye line spaced about one eye-width apart.
Step 6
Draw a small nose with a short mark on the center line below the eyes.
Step 7
Draw a simple curved mouth a little below the nose.
Step 8
Add eyebrows above the eyes and draw the ears at the sides of the head between the eye and nose lines.
Step 9
Sketch the hair outline using big clumps and bangs that follow the head shape.
Step 10
Add smaller hair strands and details to show the hair’s direction and texture.
Step 11
Sketch a simple shirt collar and a few clothing lines on the shoulders and chest.
Step 12
Trace over your chosen final lines with a darker pencil or fine liner and vary pressure for thicker outer lines.
Step 13
Gently erase the extra guideline marks so the drawing looks clean.
Step 14
Add shading where the light would not hit such as under the chin hair and inside folds using soft strokes or hatching.
Step 15
Color your anime boy with colored pencils or markers if you like and then share your finished creation on DIY.org.
Help!?
I don't have a fine liner or colored pencils—what can I use instead?
Trace your chosen final lines with a darker HB or 2B pencil or a gel/ballpoint pen instead of a fine liner, and use crayons, washable markers, or watercolor pencils in place of colored pencils or markers when you color your anime boy, then gently erase guidelines as instructed.
My eyes look uneven or my jaw is too pointy—how can I fix that?
Use the vertical center line and horizontal eye line to reposition the 'two large almond-shaped eyes' one eye-width apart, and soften the jaw by erasing and redrawing the 'jaw and chin' lines so they meet at a gentler point.
How can I adapt this drawing for different ages or skill levels?
For younger kids, pre-draw the 'circle' and 'eye line' and let them place sticker eyes and color, while older kids can add the 'smaller hair strands and details', practice 'shading', and vary line weight when tracing final lines for more realism.
What are simple ways to personalize or extend the activity after finishing the basic drawing?
Change the 'hair outline' and 'bangs', add unique patterns to the 'simple shirt collar' or background scenes, experiment with extra 'shading' for mood, and then share your finished creation on DIY.org.
Related videos
Easy Anime Drawing || How to Draw a Cute Anime Boy for Beginners || Simple Step-by-Step Guide
4 Videos
Easy Anime Drawing || How to Draw a Cute Anime Boy for Beginners || Simple Step-by-Step Guide
How to Draw an Anime Boy Step by Step || Easy Anime Drawing || Anime Art Tutorial
How to Draw Anime Boy Step by Step || Easy Anime Sketch Tutorial || Original Anime Drawing
How to draw cute anime boy step by step | anime drawing
Get inspired with these


Fun Facts
🎨 Many anime characters are built from simple shapes — circles for heads and ovals for bodies — which makes drawing step-by-step much easier.
👀 Anime eyes often take up a large portion of the face to make emotions super readable; changing the eye shape can instantly change a character's personality.
✏️ Some professional manga artists (mangaka) work on weekly magazines and produce a new chapter almost every week, which is a very demanding schedule.
🧑🎨 Osamu Tezuka is often called the "God of Manga" for helping shape the look and storytelling style of modern anime and manga.
📏 Proportions vary: chibi characters are usually 2–4 heads tall, while more realistic teen anime characters are often drawn 6–8 heads tall.
How do I draw an anime boy step by step?
What materials do I need to draw an anime boy?
What ages is drawing an anime boy suitable for?
What are the benefits of drawing anime boys for kids?


