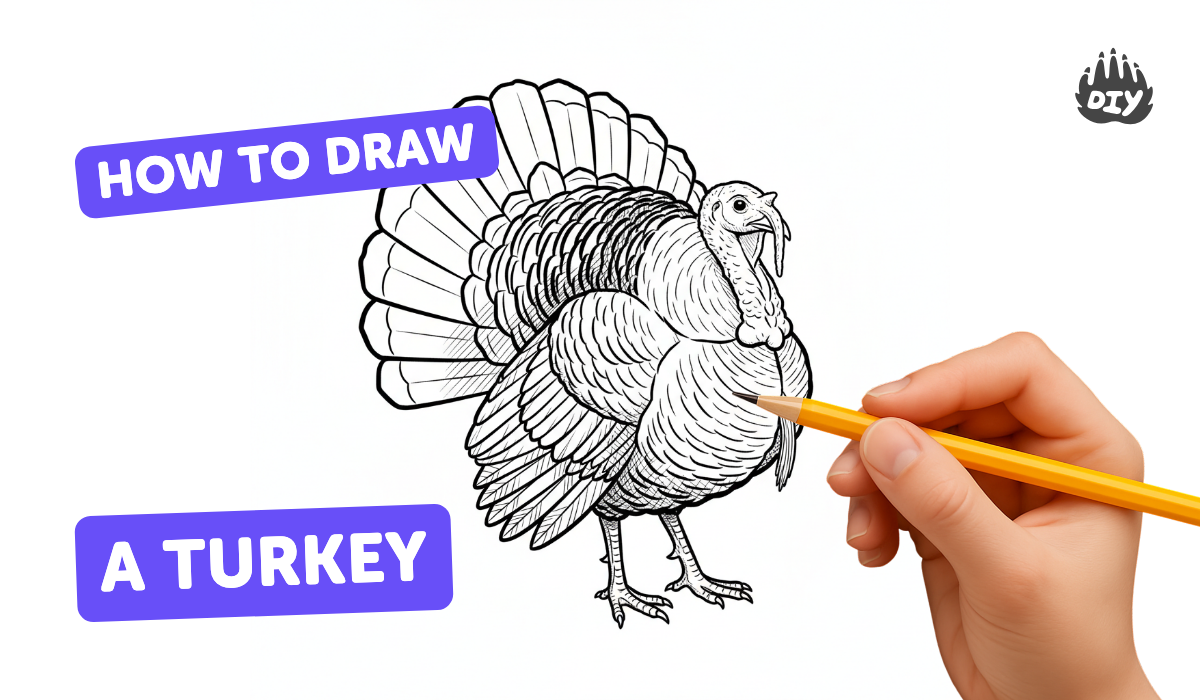
How to draw a turkey - a free turkey drawing guide
Draw a simple turkey step by step using basic shapes, lines, and colors. Practice proportions, tracing, and coloring to create your own turkey.

Drawing Apps
Get inspired with these


Instructions
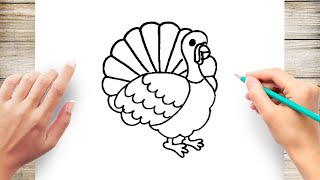
How To Draw A Turkey
Step 1
Put your paper on a flat table so it does not wobble.
Step 2
Place the cup or lid near the middle of the paper and trace around it to make a big circle for the turkey body.
Step 3
Draw a smaller circle touching the top of the big circle to make the turkey's head.
Step 4
Draw a small triangle on the head for the beak.
Step 5
Draw a little teardrop shape under the beak for the wattle.
Step 6
Draw two round eyes on the head and add a small dot inside each eye for pupils.
Step 7
Draw a teardrop shaped wing on the side of the body.
Step 8
Draw five big teardrop shapes fanned out behind the body to make the tail feathers.
Step 9
Draw two straight lines down from the bottom of the body for the legs.
Step 10
Draw three short lines at the end of each leg to make the turkey's toes.
Step 11
Add short curved lines inside each tail feather and on the wing to show feather texture.
Step 12
Lightly erase any extra tracing or guide lines you do not want to keep.
Step 13
Go over the final outline with a black marker or press harder with your pencil to make the lines clear.
Step 14
Color the turkey's body head beak wattle and feathers using your coloring materials.
Step 15
Share your finished turkey drawing on DIY.org.
Help!?
What can we use if we don't have the cup or lid or a black marker mentioned in the steps?
If you don't have a cup or lid to trace for the big circle, use any round object like a cereal bowl, jar lid, or tape roll, and substitute a dark crayon or felt-tip pen if you don't have a black marker to go over the final outline.
My circles and tail feathers keep slipping or smudging—what should we do during tracing and coloring?
Tape the paper to the flat table and hold the cup or lid steady while drawing lightly so you can erase extra guide lines before pressing harder or using a black marker, and let marker ink dry fully before coloring to avoid smudges.
How can we change the instructions to suit different ages or skill levels?
For younger kids, pre-trace the big circle and head for them and let them add the beak, eyes, wattle, and color with crayons, while older kids can draw all five teardrop tail feathers and add the short curved feather texture lines and shading before going over the outline.
What are simple ways to extend or personalize our turkey drawing after following the steps?
Glue cut-out colored paper teardrop feathers behind the traced body, add a patterned background or glitter to the wing and wattle, write your name, and then go over outlines with a black marker before sharing the finished turkey drawing on DIY.org.
Related videos
How to Draw a Turkey | Thanksgiving Art for Kids | Step by Step Lesson
4 Videos

How to Draw a Turkey | Thanksgiving Art for Kids | Step by Step Lesson

🎨🦃 How To Draw A Cute Turkey - Easy Step-by-Step Guide For Kids | Chiki Doodle ✏️🧒
How to Draw Turkey Step by Step for Kids Easy
How to Draw a Turkey | Easy Drawing Tutorial for Kids | Drawing Eazy
Fun Facts
🦃 Wild turkeys can run up to 25 mph (40 km/h) and can fly short distances to escape danger.
🔺 A turkey drawing is easy when you break it into basic shapes like circles, ovals and triangles.
🪶 Turkeys have thousands of feathers (around 5,000–6,000) that help make their tail fan so impressive.
✍️ Tracing practice boosts hand-eye coordination and helps kids learn correct proportions quickly.
🍽️ Turkeys became closely linked to the U.S. Thanksgiving tradition in the 1800s, so they're a popular seasonal drawing subject.
How do you draw a simple turkey step by step?
What materials do I need to draw a turkey?
What ages is drawing this turkey suitable for?
What are the benefits and fun variations for drawing a turkey?


