How to draw a police car - a free police car drawing guide
Draw a police car step-by-step using basic shapes, adding windows, wheels, siren, and markings. Practice proportion, perspective, and coloring techniques.

Drawing Apps
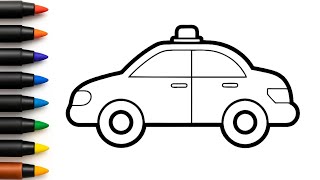
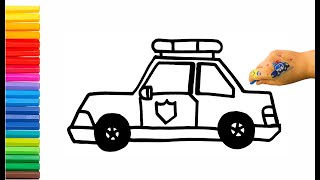
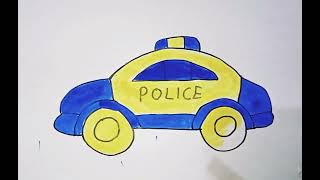
Photos of police car drawing examples


Step-by-step guide to draw a police car
How To Draw A Police Car Simple And Easy Lesson For Kids - Drawing Police Car Easy Step by step
Step 1
Lightly draw a long horizontal rectangle near the middle of your paper for the car body.
Step 2
Draw a smaller rectangle on top of the back half of the first rectangle to make the cabin roof.
Step 3
Smooth the rectangles into a single car shape by drawing curved lines around the edges.
Step 4
Draw two circles under the body for wheels and make the far wheel slightly smaller to show perspective.
Step 5
Draw a smaller circle inside each wheel to make the hubcaps.
Step 6
Draw the front windshield as a slightly slanted rectangle at the front of the cabin.
Step 7
Draw a rounded rectangle behind the windshield to make the side window.
Step 8
Draw a small rectangle on top of the roof for the siren light.
Step 9
Draw a long horizontal stripe along the side of the car for the police marking.
Step 10
Write POLICE or draw a star badge inside the stripe to label the car.
Step 11
Draw headlights at the front and taillights at the back as small ovals.
Step 12
Draw a short ground line under the wheels and add a faint shaded area for shadows to show perspective.
Step 13
Erase the light pencil guide lines so only your final car lines remain.
Step 14
Color your police car using lighter shades for highlights and darker shades for shadows and keep your strokes in the same direction for smooth color.
Step 15
Share your finished police car drawing on DIY.org.
Help!?
What can we use if we don't have colored pencils or markers to color the police car?
Use crayons or watercolor paints to color the police car, applying lighter washes for highlights and darker layers for shadows while keeping your strokes in the same direction as the instructions.
My car looks flat—what step should I check to fix perspective or size issues?
Make the far wheel slightly smaller when you draw the two circles under the body, add the short ground line and a faint shaded area under the wheels to reinforce perspective, and erase guide lines only after those marks are in place.
How can we adapt this drawing activity for different age groups?
For younger kids, simplify by tracing coins for wheels and smoothing one big rectangle into a car shape before coloring, for elementary kids follow all steps including the slanted windshield and hubcaps, and for older kids add refined highlights, shadows, and detailed badge or stripe work.
How can we extend or personalize the police car drawing after finishing the basic steps?
Personalize the car by writing a custom police number on the stripe or drawing a star badge inside it, add a city skyline or road scene behind the short ground line, and try metallic pens on the siren before sharing the finished drawing on DIY.org.
Watch videos on how to draw a police car
🚓 How to Draw a Police Car | Easy Police Car Drawing for Kids
4 Videos

🚓 How to Draw a Police Car | Easy Police Car Drawing for Kids
How to draw police car step by step 🚓 | Easy Drawing for Kids
Let's Draw and Color a Police Car for Kids 🚓🎨 Easy Drawing Tutorial!
How to Draw cute and easy Police Car | Easy Drawing, Painting and Coloring for Kids & Toddlers
Facts about drawing and art techniques for kids
🚗 Start with simple shapes — most car drawings begin as rectangles for the body and circles for the wheels.
🔺 Two-point perspective makes a car look 3D: put two vanishing points on the horizon and angle the lines toward them.
🕰️ Motorized police cars started appearing in the early 1900s, replacing horse-drawn patrols and making response times faster.
🚨 Red and blue lights are common because different colors stand out better against different backgrounds and at different times of day.
🎨 Shiny surfaces like car paint and windows use small white highlights and soft shadows to look reflective and realistic.
How do I teach my child to draw a police car step-by-step?
What materials do I need to draw a police car with my child?
What ages is this police car drawing activity suitable for?
What are the benefits of drawing a police car with my child?


