Drill and screw
Build a small wooden birdhouse using pre-cut wood, a hand drill and screws, learning measuring, steady drilling, and safe tool handling with adult supervision.


Step-by-step guide to build a small wooden birdhouse
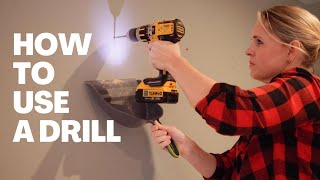
How to Drive a Screw Using a Hand Drill 🔩 | Easy DIY Tips
Step 1
Put on your safety goggles so your eyes stay safe while you work.
Step 2
Lay out the pre-cut wood pieces on your table and point out which is the base back sides front and roof.
Step 3
Place the base flat on your work surface so it is steady.
Step 4
Stand the back piece upright against the rear edge of the base so the edges meet.
Step 5
Measure and mark two screw positions along the meeting edge with your pencil so the holes will line up.
Step 6
Apply a thin line of wood glue to the base edge where the back will sit to help hold the pieces together.
Step 7
Clamp the back piece to the base so the glued edge stays tight while you work.
Step 8
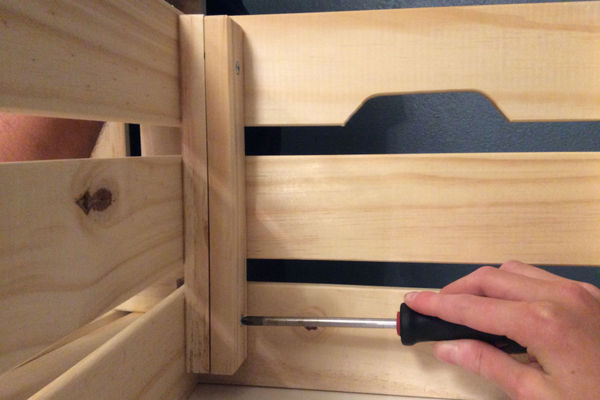
Use the hand drill with a small drill bit to make pilot holes at the pencil marks so the screws go in easily.
Step 9
Use the screwdriver bit and the drill to drive the screws into the pilot holes until they are snug but not sunk too deep.
Step 10
Repeat Steps 4 to 9 one piece at a time to attach each side piece and then the front piece so the box is complete.
Step 11
Sand any rough edges and joints with sandpaper so the birdhouse feels smooth and safe.
Step 12
Place the roof pieces on top to check how they sit and make sure they overhang a little to keep rain out.
Step 13
Apply a thin line of wood glue to the top edges of the walls where the roof will sit to add strength.
Step 14
Use the hand drill to make pilot holes through the roof into the walls and then drive screws to secure the roof so everything is tight.
Step 15
Take a photo and share your finished birdhouse creation on DIY.org so everyone can see your work.
Help!?
What can I use instead of clamps or a power hand drill if I don't have them?
If you don't have clamps or a hand drill, use heavy books or strong masking tape to hold the back while the glue sets (Step 6) and make pilot holes with an awl or nail and finish the screws with a manual screwdriver (Steps 7–9).
Why might the wood split when I drive a screw, and how do I prevent it?
If the wood splits when inserting screws, be sure to drill proper pilot holes at your pencil marks with a small bit (Step 7), consider a slightly larger pilot or countersink, and drive screws only until snug—not sunk too deep—while clamping the joint (Steps 6 and 9).
How can I adapt this drill-and-screw birdhouse activity for different age groups?
For younger children have an adult pre-drill the pilot holes and let the child do measuring and gluing (Steps 5 and 6) plus sanding (Step 10) with supervision, while older kids can measure, drill, and drive screws themselves (Steps 5–9) wearing safety goggles (Step 1).
What are simple ways to enhance or personalize the finished birdhouse before sharing it?
After sanding (Step 10) and securing the roof with glue and screws (Steps 11–12), personalize the birdhouse by adding a small wooden perch under the entrance, painting with outdoor paint and a clear sealer for weatherproofing, and attaching a nameplate before taking your photo for DIY.org (Step 14).
Watch videos on how to build a small wooden birdhouse
How to drive screws with a drill
4 Videos
How to drive screws with a drill
How to Use a Drill/Driver | RYOBI Tools 101
How to Use a Power Drill: A Beginner's Complete Guide | Woodworking 101
BEGINNER'S GUIDE TO USING A DRILL - STEP-BY-STEP
Facts about woodworking for kids
🐦 Dozens of bird species, like bluebirds and chickadees, will happily use a well-made nest box.
🛠️ 'Measure twice, cut once' is a centuries-old woodworker's proverb that helps avoid mistakes.
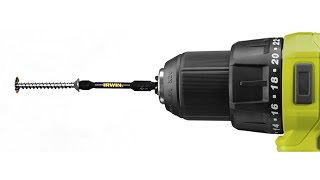
🔩 Wood screws work by turning rotational force into linear pulling power with their angled threads.
🔧 Hand drills and bow drills were used by ancient craftsmen thousands of years ago to bore holes without electricity.
🧤 With adult supervision, learning to drill and screw builds confidence and teaches important safety habits.
How do I build a small wooden birdhouse using pre-cut pieces, a hand drill, and screws?
What materials and tools do I need for the drill-and-screw birdhouse activity?
What ages is the drill-and-screw birdhouse activity suitable for?
What safety tips should I follow when children use a hand drill and screws?


