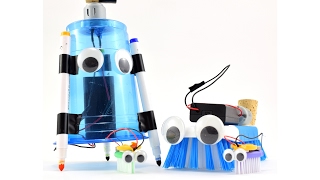
Complete a chore with a robot arm
Build and control a simple robot arm to pick up and put away small household items, learning basic mechanics and safe operation.


Step-by-step guide to complete a chore with a robot arm
Let's Build A Garbage Truck Robot Arm! | Gecko's Garage | Educational Videos For Toddlers
Step 1
Gather all the Materials Needed and move to a clear workspace with an adult.
Step 2
Cut a cardboard square about 20 cm by 20 cm to make a sturdy base.
Step 3
Make two arm segments by taping two popsicle sticks end-to-end for the upper arm and two for the forearm.
Step 4
Push a wooden skewer through the cardboard near one edge to create a shoulder pivot and slide the upper arm segment onto the skewer so it can rotate.
Step 5
Push a second skewer through the end of the upper arm and through the start of the forearm so the two segments form a rotating elbow joint.
Step 6
Attach the clothespin to the end of the forearm using tape or a rubber band so it faces outward as a gripper.
Step 7
Tie one end of a short string to the back of the clothespin and tie the other end to a pencil to make the gripper control.
Step 8
Tape a second string along the top of the arm from the shoulder over the elbow and tie its free end to a second pencil to make the lift control.
Step 9
Gently pull each pencil to test the gripper and the arm lift and adjust the string lengths or tape until the movements are smooth.
Step 10
Place a small lightweight object on the table and use the two pencil controls to pick it up and put it away in a box.
Step 11
Share a photo or video of your finished robot arm on DIY.org.
Help!?
What can we use instead of wooden skewers, popsicle sticks, or a clothespin if we can't find them?
Use a bamboo chopstick or a sturdy straw pushed through the cardboard for the shoulder/elbow pivots, replace popsicle sticks with cut cardboard strips or craft sticks taped end-to-end for the arm segments, and swap the clothespin gripper for a small binder clip attached with tape as in the 'Attach the clothespin' step.
My arm won't rotate smoothly or the gripper won't close properly—what should I try?
If the shoulder or elbow sticks, widen the cardboard holes a little or add a tiny spacer (a scrap of tape or bead) around the skewer and then follow 'Gently pull each pencil to test' to adjust string lengths and tape until the arm lift and gripper move smoothly.
How can I adapt this robot arm activity for younger or older kids?
For preschoolers, have an adult pre-cut the 20 cm cardboard base and pre-thread the skewers while the child tapes the popsicle sticks and practices pulling the pencil controls, and for older kids, challenge them to lengthen the segments, add a third joint, or replace a pencil control with a simple pulley mechanism.
What are some easy ways to extend or personalize the finished robot arm?
Decorate and label the 20×20 cm base, reinforce the clothespin gripper with a rubber band for stronger holds, add color-coded strings or a third pencil control for more complex pick-and-place tasks, and then share a photo or video on DIY.org as the final outcome.
Watch videos on how to complete a chore with a robot arm
4 Easy Robot Science Projects for Kids
4 Videos
4 Easy Robot Science Projects for Kids

Simple Machines -Screw- Lesson for Kids-Kindergarten,Preschoolers,Toddlers

What is a Pulley- Lesson for Kids -Kindergarten,Preschoolers

Machines for Kids - Simple and Complex Machines
Facts about robotics for kids
🤖 A DIY robot arm with 3 servos can reach most spots on a small desk—perfect for picking up pencils and small toys!
🏭 The first industrial robot, Unimate, began work in 1961 and helped start the age of factory automation.
⚙️ Servo motors report their angle back to the controller so the arm always knows where its parts are pointing.
🔌 Arduino microcontrollers are used in thousands of beginner robot projects because they’re cheap and easy to program.
🛡️ Safe robot design uses slow speeds, rounded edges, and a big emergency stop so playtime stays accident-free.
How do we build and control a simple robot arm to pick up small household items?
What materials and tools do I need to make a kid-friendly robot arm at home?
What ages is this robot arm activity suitable for?
What safety tips should parents follow when kids build and use a robot arm?


