How to draw a rose - a free rose drawing guide
Draw a rose using simple shapes, step-by-step petal layers, and basic shading. Practice observation, fine motor skills, proportion, and coloring to complete your rose.


Drawing Apps
Get inspired with these


Instructions
How to Draw a Rose | Easy Step-by-Step Drawing for Kids | DIY.ORG
Step 1
Place your paper on a flat surface where you can draw comfortably.
Step 2
Put your pencil and eraser next to the paper so they are easy to reach.
Step 3
Lightly draw a small circle near the top center of the page for the rose center.
Step 4
Draw a tiny spiral inside the circle to make the inner petals.
Step 5
Sketch three or four curved petal shapes around the center to start the bloom.
Step 6
Add a second layer of larger petals around the first petals to build the flower shape.
Step 7
Draw two slightly curved parallel lines down from the base of the bloom to make the stem.
Step 8
Draw two teardrop shaped leaves on opposite sides of the stem.
Step 9
Draw a central vein in each leaf and add a couple of short side veins.
Step 10
Darken the final outlines of the petals and the stem with firmer pencil strokes.
Step 11
Erase any stray sketch lines gently to clean up your drawing.
Step 12
Shade the petals with soft short pencil strokes where petals overlap to add depth.
Step 13
Shade the stem and leaves with light strokes and add slightly darker tones near edges for contrast.
Step 14
Color the petals and leaves with your coloring materials using light layers to keep texture.
Step 15
Share your finished rose drawing on DIY.org
Help!?
What can we use if we don't have a pencil, eraser, or coloring materials?
If you don't have a pencil use a ballpoint pen or fine-tip marker for firm final outlines, replace the eraser with a clean soft cloth or kneaded eraser to gently lift stray sketch lines, and use crayons or markers in light layers to color the petals and leaves.
My petals look flat — how can I fix the shading and petal overlap?
To fix flat petals, darken the final outlines sparingly, add soft short pencil strokes where petals overlap as in the instructions, and blend those overlap shadows with a fingertip or blending stump while keeping outer petal edges lighter.
How can I adapt this activity for younger or older kids?
For younger children simplify by letting them trace a pre-drawn small circle and spiral and color inside bold outlines, while older kids can add extra petal layers, detailed leaf veins, and advanced shading techniques before sharing on DIY.org.
How can we personalize or extend the rose drawing after finishing the basic steps?
Personalize or extend the drawing by adding multiple blooms and a background, painting tiny water droplets on shaded petals, experimenting with colored pencils or watercolors in light layers for extra texture, and photographing it to share on DIY.org.
Related videos
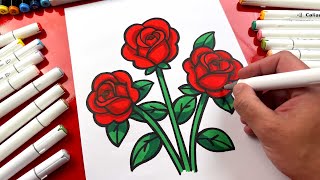
How to Draw a Rose step by step Easy
4 Videos

How to Draw a Rose step by step Easy

How to Draw + Color a Rose Super EASY Realistic
How To Draw Roses for All Ages
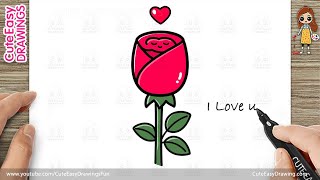
How to Draw a Cute Rose, Easy Drawing and Coloring for Kids and Toddlers
Fun Facts
🌹 Wild roses most often have five petals, while garden roses can have dozens because of selective breeding.
🌵 What we call a rose's 'thorn' is usually a prickle — a different kind of plant outgrowth than a true thorn.
✏️ Shading techniques like hatching and cross-hatching help petals look curved and three-dimensional on paper.
🔬 Botanical illustrators in the 18th and 19th centuries drew plants so precisely scientists could identify species before photography.
💡 Placing a single light source (often top-left) and keeping it consistent makes your rose look more realistic when shading.
How do I draw a detailed rose step-by-step with petals, stem, and leaves?
What materials do I need to draw and shade a realistic rose with simple coloring?
What ages is drawing a detailed rose suitable for?
What are the benefits of teaching children to draw a detailed rose?
