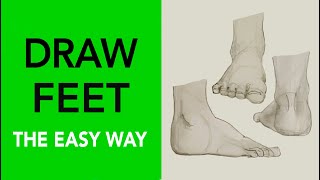
How to draw feet - a free feet drawing guide
Draw realistic feet step by step using simple shapes, learn proportions, toe placement, and basic shading. Practice observation and improve figure drawing.


Drawing Apps
Get inspired with these


Instructions
How to Draw Feet for Kids Easy
Step 1
Place your drawing paper and pencil on a flat table where you can sit comfortably.
Step 2
Choose a reference photo or look at your own foot so you can study the shapes carefully.
Step 3
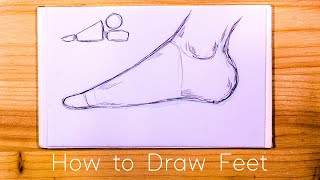
Lightly sketch the foot’s basic shapes to map proportions using simple blobs for the heel midfoot and toe block.
Step 4
Draw a center line from the ankle to the toes to show the foot’s angle and direction.
Step 5
Divide the toe block into five toe shapes with light curved lines to set each toe’s size and position.
Step 6
Refine the outer contour by smoothing the basic shapes into the real edge of the foot.
Step 7
Erase the construction lines you no longer need so the outline looks clean.
Step 8
Add key details like the ankle bone the heel curve and the creases at the joints using gentle strokes.
Step 9
Decide where the light is coming from and lightly mark the darkest shadow areas on the foot.
Step 10
Shade the shadow areas gradually with soft pencil strokes building the tone slowly.
Step 11
Blend the shaded areas gently with a tissue or cotton swab to make smooth transitions.
Step 12
Add small textures like skin wrinkles and toenail lines with a sharp pencil for realism.
Step 13
Share your finished foot drawing on DIY.org
Help!?
What can I use if I don't have a tissue or cotton swab for blending?
If you don't have a tissue or cotton swab, use a soft paper towel or a clean fingertip to gently blend the shaded areas from the 'Blend the shaded areas gently with a tissue or cotton swab' step.
My toes look weird or out of proportion—what should I fix?
If proportions or toe placement look wrong, erase or lighten construction lines, recheck the center line from the ankle to the toes, and adjust the initial blobs for the heel, midfoot, and toe block before refining the outer contour.
How can I adapt this activity for younger or older kids?
For younger children simplify by having them look at their own foot and lightly trace or draw the basic blobs and divide the toe block into five, while older kids can add the gradual shading, blending with a tissue or cotton swab, and small textures like skin wrinkles and toenail lines.
How can we extend or personalize the finished foot drawing?
To extend or personalize the drawing try changing the light direction in the 'Decide where the light is coming from' step for dramatic shadows, add colored pencils after erasing construction lines, or turn the foot into a character and share the finished drawing on DIY.org.
Related videos
How to Draw Feet | Easy Step-by-step Drawing Tutorial
4 Videos
How to Draw Feet | Easy Step-by-step Drawing Tutorial
Feet Drawing Tutorial(EASY METHOD) How to draw Foot for Beginners | Basic Sketch drawing Lesson
How to Draw Feet for Beginners + Free Worksheet

How to draw a Foot | Foot Easy Draw Tutorial
Fun Facts
🦴 The human foot has 26 bones — both feet together make 52 bones, about a quarter of the bones in your body!
🦶 Your big toe (hallux) does most of the push-off when you walk or run, so it's key for realistic foot poses.
📐 Linear perspective uses vanishing points to make objects (including feet) look like they're receding into space.
✏️ Hatching and cross-hatching are pencil techniques artists use to build up texture and shading on skin and toes.
📏 Many artists measure with the head as a unit (adult bodies ≈ 7–8 heads tall) to place feet and proportions correctly.
How do you draw realistic feet step-by-step?
What materials do I need to draw realistic feet?
What ages is drawing realistic feet suitable for?
What are the benefits of practicing realistic foot drawing?
