Write the first half of your 8 page comic story!
Create and draw the first four pages of an eight-page comic, planning characters, panels, dialogue, and basic layouts to tell your story.

Step-by-step guide to write the first half of your 8-page comic story
Step 1
Think of a fun story idea and say it out loud in one sentence.
Step 2
Write your main character's name and three quick traits on a sticky note.
Step 3
Decide the main problem or goal your character will face in the story.
Step 4
Sketch a simple 8 page story outline on a scrap sheet using one short sentence for each page.
Step 5
Choose which events will happen on pages 1 to 4 and write each event on its own sticky note.
Step 6
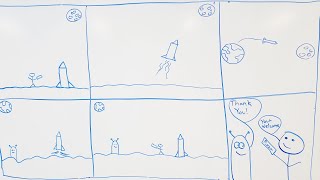
Make small thumbnail sketches for pages 1 to 4 on scrap paper to plan panel layouts and action.
Step 7
Pick how many panels each of the first four pages will have and write the number on the top corner of each thumbnail.
Step 8
Draw panel boxes on four clean sheets of paper using a ruler to match your thumbnails.
Step 9
Write the dialogue and sound effects for each panel on a separate sheet so you can copy them neatly later.
Step 10
Pencil sketch the characters and backgrounds inside the panels on pages 1 to 4.
Step 11
Ink over your pencil lines with a black pen or marker and let the ink dry.
Step 12
Erase any leftover pencil marks after the ink is dry.
Step 13
Add speech bubbles and neatly letter the dialogue into each bubble.
Step 14
Add basic colours or shading to bring your pages to life.
Step 15
Take a photo or scan your finished four pages and share your creation on DIY.org
Help!?
If we don't have sticky notes or a black marker, what can we use instead?
Use small index cards or cut pieces of scrap paper taped to the page in place of the 'sticky note' steps and swap the 'black pen or marker' for a fine-tip liner, Sharpie, or even a dark ballpoint when you 'ink over your pencil lines'.
My ink smudged or the pencil lines won't erase after inking — what should I do?
Follow the instruction to 'let the ink dry' fully, then gently erase leftover pencil marks with a soft eraser and, if smudging occurred, clean up edges with a new pen or retrace clean lines before adding 'speech bubbles' and lettering.
How can I change the activity for younger or older children?
For younger kids simplify by using fewer, larger panels (when you 'pick how many panels'), pre-drawn panel boxes, and crayons for 'basic colours', while older kids can expand thumbnails, add more complex panel layouts, detailed backgrounds during 'pencil sketch', and scan pages for digital coloring.
What are easy ways to extend or personalize my four finished pages before sharing?
After finishing pages 1–4, plan pages 5–8 on a scrap sheet, design a title page or character bio to go with the 'main character's name and three quick traits', create a consistent lettering style for your 'dialogue and sound effects', and bind or photograph the set neatly before you 'share your creation on DIY.org'.
Watch videos on how to write the first half of your 8-page comic story
How to Draw a Storyboard for Kids ⭐ How to Make a Comic Storyboard ✏️
4 Videos
How to Draw a Storyboard for Kids ⭐ How to Make a Comic Storyboard ✏️

How to ACTUALLY make your First Comic?
How To Make A Comic from Start to Finish
How to make a comic step by step - Comic book tutorial
Facts about comic creation for kids
🖼️ Comics use panels to control pacing — more panels usually make action feel faster, fewer panels slow things down.
✏️ Many artists start with tiny thumbnail sketches of pages to try layouts quickly before drawing the final art.
🗨️ Speech balloons let characters speak right inside the art, a technique used in comics since the 19th century.
📚 A graphic novel is basically a long-form comic that tells a complete story in one book.
😄 Facial expressions and body language in a single panel can show big emotions — sometimes even more than words.
How do I create the first four pages of an eight-page comic?
What materials do I need to write and draw the first half of an 8-page comic?
What ages is this comic-making activity suitable for?
What are the benefits of writing and drawing the first half of an eight-page comic?
