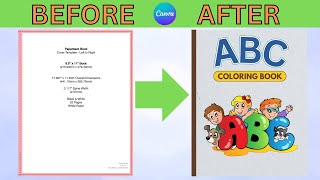
What's your favourite book cover?
Design and create your favourite book cover using paper, markers, collage materials, and simple measuring; explain the title, main image, and colour choices.


Step-by-step guide to design and create your favourite book cover
Step 1
Pick your favourite book and decide the one idea or feeling you want the cover to show.
Step 2
Choose whether your cover will be portrait or landscape and pick a paper size to use.
Step 3
Use the ruler and pencil to measure and lightly draw the front-cover rectangle with a 1 cm margin around the edges.
Step 4
Lightly mark a spot near the top where the title will go and draw a small guiding box for the title.
Step 5
Lightly sketch the main image in the center area of the cover using simple shapes and pencil.
Step 6
On a scrap piece of paper make small colour swatches and choose three main colours to use on the cover.
Step 7
Colour the title area using your chosen colours to make the words bold and clear.
Step 8
Colour the main image with your chosen colours and stay inside your pencil lines.
Step 9
Cut out any collage pieces you want to use and arrange them on the cover before gluing.
Step 10
Glue the collage pieces onto the cover and press them flat until secure.
Step 11
Trace over any pencil lines and add fine details or outlines using a marker.
Step 12
Flip the paper over and write a short two to three sentence explanation that tells the title the main image and why you chose those colours.
Step 13
Share your finished book cover on DIY.org.
Help!?
What can we use if we don't have a ruler, marker, or glue?
Use a hardcover book or the cereal-box cardboard as a straight edge to measure and draw the 1 cm margin, coloured pencils or a fine-tip pen instead of a marker to trace details, and a glue stick or double-sided tape to attach collage pieces.
My colours keep going outside the pencil lines or the collage pieces won't stick — how do I fix that?
Test and practise your three main colours on the scrap paper swatches and colour lightly to stay inside your pencil lines, and if collage pieces won't stick, spread glue thinly, press them flat and weigh them down until secure as the instructions say.
How can I adapt this book-cover activity for different ages?
For younger children pre-draw the front-cover rectangle, 1 cm margin and title box and let them use stickers and crayons; for elementary kids have them measure with the ruler, sketch the main image and choose three colour swatches; for older kids encourage detailed pencilling, marker outlines, layered collage pieces and a careful two-to-three sentence explanation on the back.
How can we extend or personalise the finished cover to make it more special?
Turn it into a full wraparound cover by adding a glued-on spine and back, layer textured collage pieces before gluing and trace with metallic pens when you add fine details, then flip it over, write the two-to-three sentence explanation and scan or photograph it to share on DIY.org.
Watch videos on how to design and create your favourite book cover
How to Create Kid's KDP Book Cover in Canva in 18 Minutes
4 Videos
How to Create Kid's KDP Book Cover in Canva in 18 Minutes

How to Make Book Covers Using AI | 5 STEPS to Create Your Own Book Covers
How to Design a Book Cover in Canva (Beginner Cover Design Tutorial)
How to Design a Book Cover That STANDS OUT
Facts about book cover design and illustration
🎨 Book covers mix art, typography, and marketing to show a book's mood in one glance.
📚 Dust jackets — the illustrated removable covers — became common in the mid-19th century to protect and advertise books.
🧠 Designers use color psychology: warm tones (reds, oranges) feel energetic, cool tones (blues, greens) feel calm.
✂️ Collage and mixed-media covers let designers combine photos, paper textures, and hand-drawn elements for unique looks.
🌟 Chip Kidd is a famous cover designer known for bold, clever covers — he designed the iconic U.S. paperback Jurassic Park cover.
How do I help my child design and create their favourite book cover?
What materials do I need to design a favourite book cover at home?
What ages is the 'What's your favourite book cover?' activity suitable for?
What are the benefits of designing a favourite book cover with my child?
