Use your imagination to draw animal eyes
Draw imaginative animal eyes using pencils, markers, and reference photos. Explore shapes, shading, highlights, and expressions to create unique eye designs.

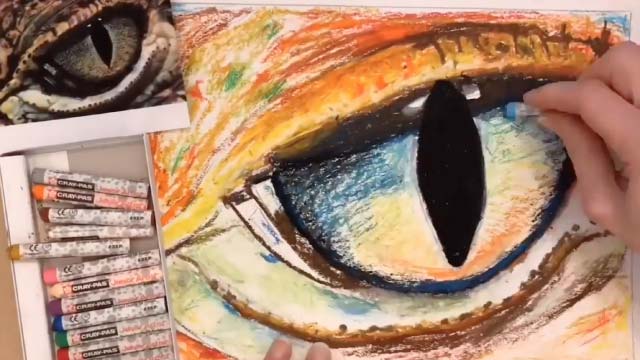
Step-by-step guide to draw imaginative animal eyes
Step 1
Gather your paper pencil eraser and colouring materials.
Step 2
Choose three animal eye photos from your references to study.
Step 3
Look closely at the first eye and say three things you notice about its shape size and shine.
Step 4
Lightly sketch the basic outline shape of the first eye with your pencil.
Step 5
Draw the pupil and the iris shapes inside the outline.
Step 6
Add the eyelid lashes and a few lines to show fur scales or skin around the eye.
Step 7
Shade the iris lightly to create depth while leaving a spot blank for a highlight.
Step 8
Draw a bright highlight and tiny reflections to make the eye look shiny.
Step 9
Create a second eye using one imaginative change like a star shaped pupil a split color iris or extra lashes.
Step 10
Create a third eye by mixing features from two different animals in your references.
Step 11
Trace final lines with markers and colour and blend shadows with your colouring materials then erase stray pencil marks.
Step 12
Share your finished animal eye designs on DIY.org.
Help!?
What can we use if we can't find markers or certain colouring materials listed in the instructions?
If you don't have markers, use coloured pencils, crayons, or watercolor washes to trace final lines, shade the iris, blend shadows with your colouring materials, and then erase stray pencil marks as the instructions direct.
My eye looks flat or I accidentally shaded the highlight—how can I fix it?
If the highlight is shaded over or the iris looks flat, gently lift a tiny spot with your eraser (a kneaded eraser works best) to recreate the bright highlight, then deepen surrounding shading to increase contrast while remembering to lightly sketch the basic outline first.
How do I change the activity difficulty for younger or older kids?
For younger kids, simplify by tracing the basic outline from a photo and using stickers or a white crayon for the highlight, while older kids can attempt the star-shaped pupil or split-color iris, mix features from two animals, and add finer shading before tracing final lines with markers.
What are ways to extend or personalize the animal eye designs once they're finished?
Extend the activity by creating a whole creature series using mixed features from your three reference photos, adding backgrounds or textures before you colour and blend shadows, and finally sharing the finished animal eye designs on DIY.org.
Watch videos on how to draw imaginative animal eyes
How to Draw a Cat Eye Step By Step | Eyes Animal Drawing
4 Videos
How to Draw a Cat Eye Step By Step | Eyes Animal Drawing
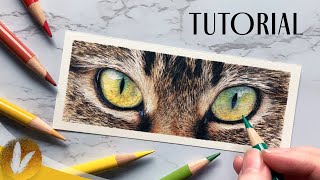
How To Draw A Cat's Eyes With Colored Pencils, Cat Fur l Drawing Tutorial
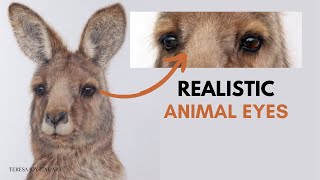
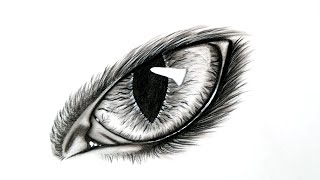
How to Draw Animal Eyes - Kangaroo - Drafting Film - Beginner Coloured Pencil Tutorial #petportrait
(fast-version) How to Draw Kitten (Super Cute Eyes) Step by Step Tutorial
Facts about drawing and sketching for kids
👁️ Many animals have very different pupil shapes — goats have rectangular pupils and cats have vertical slits, great inspiration for unique eye designs!
🐱 Cats (and some other animals) have a tapetum lucidum, a reflective layer that makes their eyes glow in the dark — fun for drawing luminous eyes!
🦅 Birds of prey have enormous eyes for their head size and incredible detail vision — try tiny irises or intense highlights to mimic that sharp stare!
🎨 Artists often add a small white highlight on the iris or pupil to make an eye look wet and alive — one tiny dot can change the whole expression!
✏️ Simple shading around the eyelid and a soft shadow under the eyeball makes an eye pop off the page — blending pencil marks adds realistic depth.
How do I draw imaginative animal eyes?
What materials do I need to draw imaginative animal eyes?
What ages is this activity suitable for?
What are the benefits of drawing imaginative animal eyes?


