Use Stippling to Shade an Object
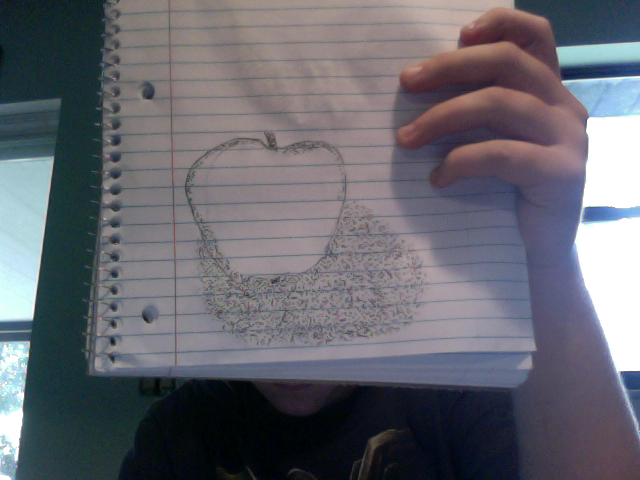
Use stippling to shade a simple object like an apple or leaf, creating light and shadow with dots while practicing patience and observation.
About this tutorial
Use stippling to shade a simple object like an apple or leaf, creating light and shadow with dots while practicing patience and observation.
What you need
Instructions
- 1
Step 1
Gather your materials and bring them to your workspace.
- 2
Step 2
Place the paper flat on a table.
- 3
Step 3
Put your apple or leaf on the table near the lamp or window so it casts a clear shadow.
- 4
Step 4
Look at the object for one minute and notice the brightest spot and the darkest shadow.
- 5
Step 5
Lightly draw the outline of the apple or leaf on the paper with your pencil.
- 6
Step 6
Lightly mark with pencil where the darkest shadow shapes and the highlight spot are on your drawing.
- 7
Step 7
Use your black pen to make many tiny dots close together in the darkest shadow area.
- 8
Step 8
Make dots with more space between them in the midtone areas to show lighter shading.
- 9
Step 9
Use very few or no dots in the highlight area so it stays bright.
- 10
Step 10
Gradually reduce the number of dots as you move from dark to light to make a smooth transition.
- 11
Step 11
Add small textured dots for details like the stem or leaf veins with your pen.
- 12
Step 12
Gently erase any visible pencil marks without touching your pen dots.
- 13
Step 13
Share your finished creation on DIY.org.
Fun facts
How do you use stippling to shade an object like an apple or leaf?
Start with a light pencil outline of the apple or leaf and decide where the light hits. Using a fine-tipped pen, add dots sparsely in the highlight areas and gradually increase dot density toward the shadowed parts. Build layers slowly—more dots equals darker tones. Rotate the paper to keep a steady hand, work in small sections, and take breaks. Encourage the child to observe subtle value changes and be patient; stippling is about layering dots to suggest form and depth.
What materials do I need for a stippling shading activity with my child?
You’ll need smooth drawing paper or heavyweight sketch paper, a few fine-liner pens (0.1–0.5 mm) or a good ballpoint pen, and a pencil with an eraser for the initial outline. Optional items: a magnifier for very small dots, a light source (lamp) to show highlights and shadows, colored fine liners if you want color stippling, and a scrap sheet for testing dot density. No fancy supplies are required—simple tools work well.
What ages is stippling shading suitable for children?
Stippling is suitable for children roughly ages 5 and up, depending on fine motor skills and attention span. Young children (5–7) can practice larger, spaced-out dots and shorter sessions. Older kids (8+) can work with finer pens and longer layering for subtle shading. Always supervise little ones with pen tips, and adapt the size of the subject and session length to keep it fun rather than frustrating.
What are the benefits of teaching children stippling shading?
Stippling strengthens fine motor control, concentration, and observational skills as children learn to see value and light. It teaches patience and step-by-step problem solving, and helps them understand depth without blending. The repetitive, focused nature can be calming and boost confidence when they see gradual progress. It also introduces basic art concepts—value, contrast and texture—that apply to many creative activities.
Watch & Learn
Need help?
What can we use if we don't have a black pen, lamp, or a real apple/leaf?
If you don't have a black pen, use a fine-tipped permanent marker, dark gel pen, or a very sharp graphite pencil to make tiny dots on the paper, use a sunny window instead of a lamp to cast a clear shadow, and substitute a toy fruit or a pressed leaf from outside for the apple or leaf.
My stippling looks patchy and the transitions aren't smooth—what should I check or change?
Check that you're following the steps to make many tiny dots close together in the darkest shadow area and gradually reduce dot density toward the highlight, practice making smaller, closer dots for midtones, and let ink dry fully before gently erasing pencil marks so pen dots don't smudge.
How can I modify this activity for younger children or make it more challenging for older kids?
For younger children, simplify by lightly tracing the apple or leaf outline and using larger, widely spaced dots with a felt-tip marker while skipping fine textures, and for older kids, use fine-tipped black pens, work on very gradual dot-density transitions, and add detailed stippled veins and stem texture as described.
What are some ways to extend or personalize the stippling project after finishing the basic shading?
To enhance and personalize your work, try stippling with colored pens for colored shadows, add a patterned or gradient background around the apple or leaf, create a series from different light angles, and photograph and share your finished creation on DIY.org.