Try the cross hatching technique
Practice the cross hatching drawing technique using pencil and paper to create shading, texture, and depth while experimenting with different line directions and pressures.

Drawing Apps
Step-by-step guide to practice cross-hatching drawing with pencil and paper
Step 1
Gather all materials and put them on a flat table or desk.
Step 2
Sharpen your pencil until it has a nice point.
Step 3
Place a scrap paper and draw five light straight parallel lines about one centimeter apart to warm up.
Step 4
Draw five light curved parallel lines on the scrap paper to practice curved hatching.
Step 5
On the scrap paper, draw a second set of lines crossing the first set at a different angle to make cross-hatching.
Step 6
Make a small value scale of five boxes and fill each box with cross-hatching using progressively harder pencil pressure to make darker values.
Step 7
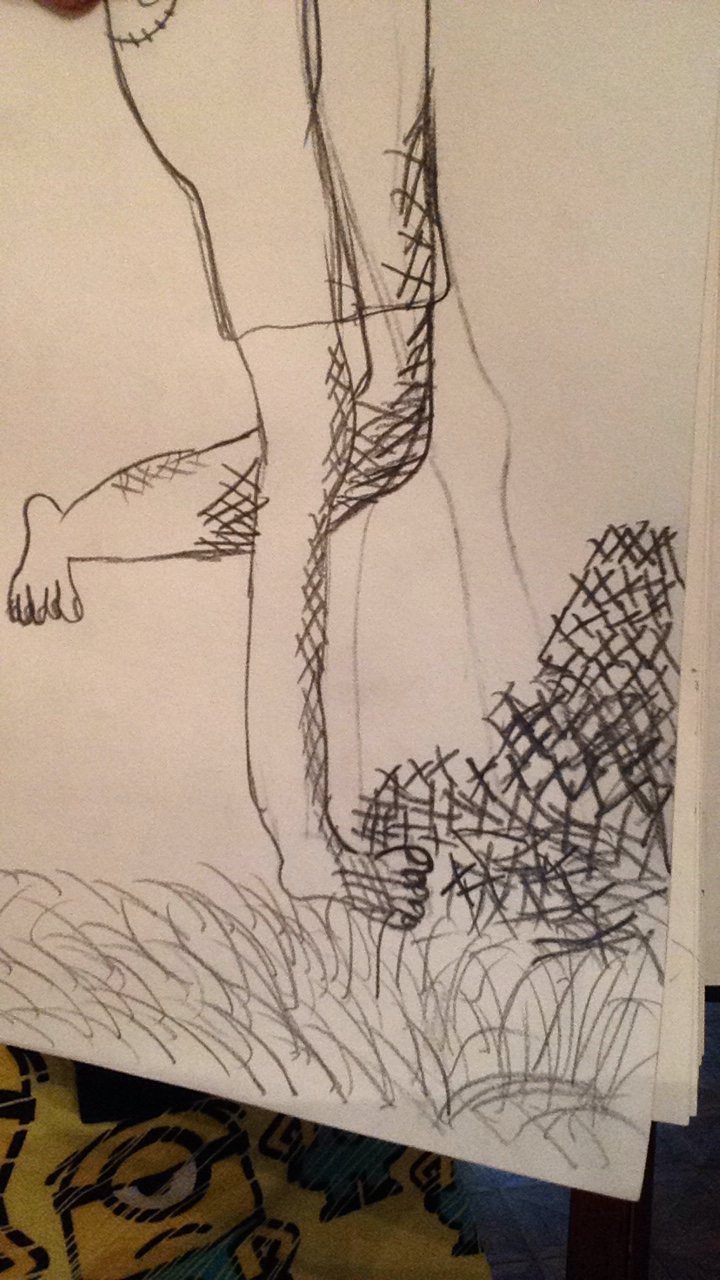
Lightly sketch a simple shape on your main paper like a circle or a box to be shaded.
Step 8
Shade your sketched shape using cross-hatching and change the line directions and pencil pressure to show light and shadow.
Step 9
Use the eraser to lift tiny areas for highlights and clean up any stray marks around your drawing.
Step 10
Take a photo or upload your finished cross-hatching drawing and share it on DIY.org.
Help!?
What can we use if we don't have a wooden pencil or sharpener?
Use a mechanical pencil with a fine lead or carefully sharpen a pencil with a knife, and substitute scrap paper with printer paper or a cereal-box cardboard for the warm-up lines.
My cross-hatching looks smudged or uneven—what should I do?
Practice the five light parallel and curved lines on the scrap paper, fill the five-box value scale to control pressure, hold the pencil farther back for lighter lines, and place a clean scrap paper under your hand to avoid smudging.
How can I make this activity easier for a preschooler or more challenging for a teen?
For younger children use larger simple shapes, wider spaced hatching, and thicker crayons or markers on the scrap paper, while teens can use multiple pencil grades (HB–6B), tighter cross-hatching, subtler values on the five-box scale, and more complex shapes to shade on the main paper.
How can we extend or personalize the finished cross-hatching drawing?
Combine pencil cross-hatching with ink or colored pencils for texture, expand the five-box value scale into a larger chart, add personal details to the sketched shape, then photograph and upload the finished drawing to DIY.org.
Watch videos on how to practice cross-hatching drawing with pencil and paper
How to use the cross hatching technique | Drawing for Kids | #doitwithdiy
4 Videos
How to use the cross hatching technique | Drawing for Kids | #doitwithdiy

Cross Hatching for Beginners - Art Challenge #9

Cross-Hatching Drawing Lesson
What is Crosshatching? - Pen and ink drawing for beginners
Facts about pencil shading and cross-hatching techniques
✏️ Cross-hatching can produce a full range of tones — from light gray to deep black — just by varying line density, thickness, and pressure.
🎨 Albrecht Dürer's 16th-century engravings are famous examples of masterful hatching and cross-hatching that artists study even today.
🕰️ Cross-hatching became essential in printmaking (engraving and etching) because lines transfer well to metal plates and paper prints.
🔄 Changing the angle and direction of your lines (e.g., 45° then -45°) creates smoother-looking shading and believable texture.
🧠 Tiny repeated lines blend in your viewer's eye — a visual trick called optical blending — so linework reads as continuous tone.
How do I practice the cross-hatching drawing technique with kids?
What materials do I need for a child to try cross-hatching?
What ages are suitable for learning cross-hatching?
What are the benefits of practicing cross-hatching and fun variations to try?
