Trail a quarry
Build a small model quarry from clay, gravel, and cardboard, then create and label a safe walking trail map to explore rock layers.


Step-by-step guide to build a model quarry and map a safe walking trail
Quarry Trail Adventure 2025 Epic Hike, Swim & Kids Fun
Step 1
Collect all Materials Needed and bring them to a clean table.
Step 2
Cut a piece of cardboard to about the size of a small book to use as your quarry base.
Step 3
Cut four narrow strips of cardboard and glue or tape them upright around the base to form low quarry walls.
Step 4
Flatten modeling clay into thin even slabs with your hands to make rock layers.
Step 5
Place the first clay slab into the bottom of the cardboard base and press it gently so it sticks.
Step 6
Make a second clay slab and place it on top of the first to form another rock layer.
Step 7
Make a third clay slab and place it on top to add another layer so you have at least three visible layers.
Step 8
Sprinkle small gravel onto one or two layers to show loose or crushed rock.
Step 9
Press the gravel lightly into the clay so the stones stay in place.
Step 10
Cut small rectangles of paper to make label flags for each rock layer.
Step 11
Write short layer names or notes on each paper flag using the marker.
Step 12
Tape each paper flag to a toothpick and insert it into the matching layer in your model.
Step 13
On a clean sheet of paper draw a trail map showing the quarry outline and draw a clear safe walking path with arrows.
Step 14
Color the safe path a bright color mark dangerous zones with a different color and add a small legend explaining the colors and symbols.
Step 15
Take a photo or write a short description and share your finished quarry model and trail map on DIY.org.
Help!?
What can I use instead of modeling clay or gravel if I can't find them?
If you don't have modeling clay for steps 4–6, use playdough or air-dry clay, and swap gravel from step 9 with coarse sand, crushed eggshells, or small aquarium gravel so you can still press it into the layers in step 11.
My clay layers won't stick to the cardboard base or fall apart when I add gravel — what should I do?
Lightly dampen the cardboard in step 5 before pressing the first slab, press each clay slab firmly into the base and into the previous layer (steps 5–7), and secure loose gravel from step 9 with a thin dab of white glue so the stones stay in place.
How can I modify the activity for younger or older kids?
For younger children, pre-cut the cardboard base and quarry walls and limit them to two clay layers with adult help inserting toothpick label flags (steps 2–3, 4–7, 12), while older kids can add more stratified layers, detailed labels with dates, and a scaled trail map with measurements (steps 6, 12–16).
How can we extend or personalize the quarry model and trail map?
Personalize the model by painting dried clay layers, gluing tiny found 'fossils' or painted pebbles into specific strata and labeling them with the paper flags (steps 4–12), then expand the trail map (steps 14–16) with a photographed journal to upload to DIY.org (step 17).
Watch videos on how to build a model quarry and map a safe walking trail
Quarry Hiking Trail in Auburn CA
4 Videos
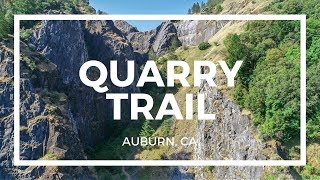
Quarry Hiking Trail in Auburn CA
Quarry Trail Hike - Auburn, CA - Sacramento Outdoors
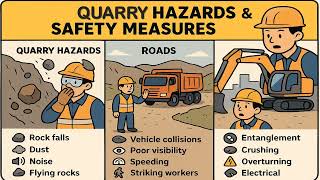
Quarry Hazards and Safety Measures (Incld. Quarry Roads and Heavy Machines)
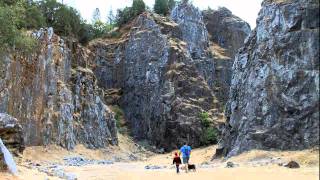
Hiking the Quarry Rock Trail in Deep Cove, British Columbia
Facts about geology and mapmaking for kids
🪨 Quarries often reveal rock layers stacked like a giant cake — some layers are millions of years old!
🦴 Sedimentary layers can trap fossils, so a little rock sandwich might hide ancient plants or shells.
🗺️ Geologic maps use colors to show different rock types and ages — geologists read them like treasure maps.
🥾 Marking safe trails keeps explorers away from loose rock and helps protect important rock exposures.
🧱 Clay, gravel, and cardboard are perfect model materials — students and scientists build models to test ideas before big digs.
How do I build a small model quarry and create a safe walking trail map to explore rock layers?
What materials do I need to make a model quarry from clay, gravel, and cardboard and draw a trail map?
What ages is this model quarry and trail-mapping activity suitable for?
What safety tips should I follow when making a model quarry and planning a real walking trail?
