The Newspaper Challenge
Make a sturdy newspaper hat and matching wristbands by folding, cutting, and taping. Practice measurements, sequential steps, and creative decoration.


Step-by-step guide to make a sturdy newspaper hat and wristbands
Step 1
Lay out your materials on a clean table so everything is easy to reach.
Step 2
Cut a long strip of newspaper about 4 inches wide to use for measuring your head.
Step 3
Wrap the strip gently around your head and mark where the ends meet with your pencil.
Step 4
Measure the marked length with the ruler and write the number on the strip.
Step 5
Take a full newspaper sheet and fold it in half so the short edges meet to make a rectangle.
Step 6
Fold the top two corners down toward the center line so the paper forms a triangle with a rectangle below.
Step 7
Fold the bottom front rectangular flap up once so it becomes the front brim of the hat.
Step 8
Fold the bottom back rectangular flap up to match the front brim so the hat holds its shape.
Step 9
Put the hat on your head to check how it fits.
Step 10
Tuck or fold any extra paper inside the brim until the hat fits the measurement you wrote.
Step 11
Reinforce the inside triangle seams with strips of tape to make the hat sturdy.
Step 12
Cut two wristband strips from newspaper about 2 inches wide and the length of your wrist measurement.
Step 13
Fold each wristband strip into thirds lengthwise and secure the open edge with tape to make them stronger.
Step 14
Decorate your hat and wristbands with colouring materials stickers or drawings to make them super cool.
Step 15
Share your finished creation on DIY.org.
Help!?
What can we use if we don't have newspaper, tape, or a ruler?
If you don't have newspaper use brown kraft paper or recycled printer paper cut to the same sizes, substitute a glue stick or stapler for tape to secure the inside triangle seams and wristband folds, and use a string or printable ruler on a phone to measure the length for the 4-inch head strip.
My hat keeps coming apart or doesn't hold its shape—what step should I fix?
If the hat won't hold its shape, follow the step to 'reinforce the inside triangle seams with strips of tape' and add extra tape under the folded brims or a thin strip of cardboard inside the brim before tucking extra paper to match the measurement you wrote.
How can I adapt the activity for different ages or skill levels?
For younger children have an adult pre-cut the 4-inch head-measuring strip and pre-fold the top corners, while older kids can cut the 2-inch wristband strips themselves, fold them into thirds, and use colouring materials and stickers for more detailed decoration.
How can we make the hat and wristbands stronger or more creative?
To improve durability and personalization glue a lightweight piece of cardboard inside the brim, add an elastic loop under the brim to help the hat stay on, and use colouring materials, stickers, or drawings from the decoration step before sharing your finished creation on DIY.org.
Watch videos on how to make a sturdy newspaper hat and wristbands
Strong Newspaper Structures | Design Squad
4 Videos
Strong Newspaper Structures | Design Squad
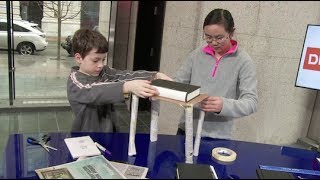
Paper Bridge Challenge | Science of Strong Shapes
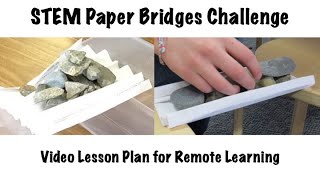
Paper Bridges STEM Challenge Lesson Plan for Students
Sycamore School / Middle School Egg Drop Challenge
Facts about paper crafts for kids
📰 Newspapers have been delivering printed news to the public since the 1600s — people have been folding and sharing them for centuries!
✂️ One sheet of newspaper can be transformed into many crafts — hats, wristbands, flowers, and more — with just folds, cuts, and tape.
♻️ Crafting with old newspapers is a form of recycling: it gives paper a second life and reduces waste.
📏 Measuring head and wrist circumferences before cutting is a simple way kids practice real-world math and fine motor skills.
🛰️ Folding techniques inspired by origami are used by engineers to pack things like satellite solar panels and medical devices.
How do you make a sturdy newspaper hat and matching wristbands?
What materials do I need for the Newspaper Challenge?
What ages is the Newspaper Challenge suitable for?
What are the benefits, safety tips, and fun variations for the Newspaper Challenge?
