Tell DIY About Your Favorite Movie
Make a small diorama or storyboard that retells your favorite movie using simple craft materials, then present the story to family or friends.


Step-by-step guide to make a diorama or storyboard retelling your favorite movie
❄️ Frugal Christmas Gift Idea! 🎅Trending Craft Idea 2025 🎄 DIY Cozy Movie Watching Kits! 🎁Under $5
Step 1
Pick your favorite movie and choose 3 to 5 key moments you want to show in your diorama or storyboard.
Step 2
Gather all the materials listed and bring them to a clear workspace.
Step 3
Turn the shoebox on its side so the open part faces you to make a little stage.
Step 4
Use the pencil to trace pieces of construction paper that will cover the back and floor of the box.
Step 5
Cut the traced construction paper pieces to size with safety scissors.
Step 6
Glue the cut paper into the back and floor of the box to make the background and ground.
Step 7
Draw and color your movie characters and props on construction paper using your coloring materials.
Step 8
Cut out the characters and props carefully with safety scissors.
Step 9
Tape or fold small paper tabs to the characters and props so they can stand up in the box.
Step 10
Place your characters and props inside the box in the order of the story moments you picked.
Step 11
Practice telling your movie story out loud while moving the characters through the scenes.
Step 12
Present your diorama or storyboard to family or friends and then share your finished creation on DIY.org
Help!?
What can we use instead of a shoebox or construction paper if we don't have them?
Use a clean cereal or shipping box turned on its side as the 'little stage' and substitute plain printer paper colored with crayons or wrapping paper to cover the back and floor.
My characters keep falling over—how can we fix that so they stand in the box?
Make stronger tabs by folding a wider strip of construction paper into an L-shaped tab and secure it with tape or a glue stick to the bottom of each cut-out so they stand inside the box as described in the 'tape or fold small paper tabs' step.
How can I adapt this project for younger or older kids?
For younger kids, limit to 1–2 key moments and pre-trace or pre-cut the construction paper and characters so they can color and place pieces with help, while older kids can show 3–5 moments with layered backgrounds, movable tabs, and written captions and then practice a longer narration.
What are some ways to personalize or extend the diorama before sharing it on DIY.org?
Add small LED tea lights or fabric scraps for texture, create simple moving parts with paper fasteners, record your narration during the 'practice telling your movie story' step, and include a photo or short video when you present or upload to DIY.org.
Watch videos on how to make a diorama or storyboard retelling your favorite movie
10 Creative and Easy Kids Craft | Fun Crafts for Kids | Handmeyd Treasures
4 Videos
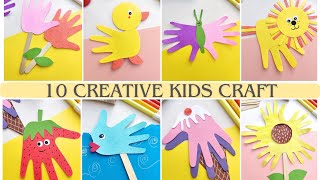
10 Creative and Easy Kids Craft | Fun Crafts for Kids | Handmeyd Treasures
Mind-Blowing DIY Crafts Your Kids Will Actually Love
Super Easy Craft Activities for you | DIY Creative Kids Crafts that ANYONE Can Make
18 EASY CRAFT IDEAS | Fun DIY Crafts for School & Gifts
Facts about storytelling and craft projects for kids
🎬 Storyboards help filmmakers plan shots — blockbuster films can use hundreds or even thousands of storyboard panels.
🏛️ The diorama was invented in 1822 by Louis Daguerre and Charles‑Marie Bouton as a dramatic, painted theatrical display.
🧭 Most stories follow a three‑act structure (beginning, middle, end) — a handy shortcut for turning a movie into a short diorama or storyboard.
🗣️ Practicing your presentation out loud boosts memory and confidence — rehearsing is a filmmaker's and storyteller's secret weapon.
🎭 Puppetry is ancient: simple puppet storytelling has been part of human cultures for over 3,000 years and can bring your diorama characters to life.
How do you do the "Tell DIY About Your Favorite Movie" activity?
What materials do I need for this movie diorama or storyboard activity?
What ages is the "Tell DIY About Your Favorite Movie" activity suitable for?
What are the benefits of making and presenting a movie diorama or storyboard?
