Take Your Lettering Up A Notch
Improve decorative lettering by learning basic calligraphy strokes, blending markers, and designing a personalized poster or greeting card to display.


Step-by-step guide to Take Your Lettering Up A Notch
Beginner Hand Lettering Tutorial | 10 Things I Wish I Knew As A Beginner | Learn How To Hand Letter
Step 1
Gather all your materials and set them on a flat table with plenty of light.
Step 2
On a scrap paper draw three long parallel rows with your pencil to use for practice strokes.
Step 3
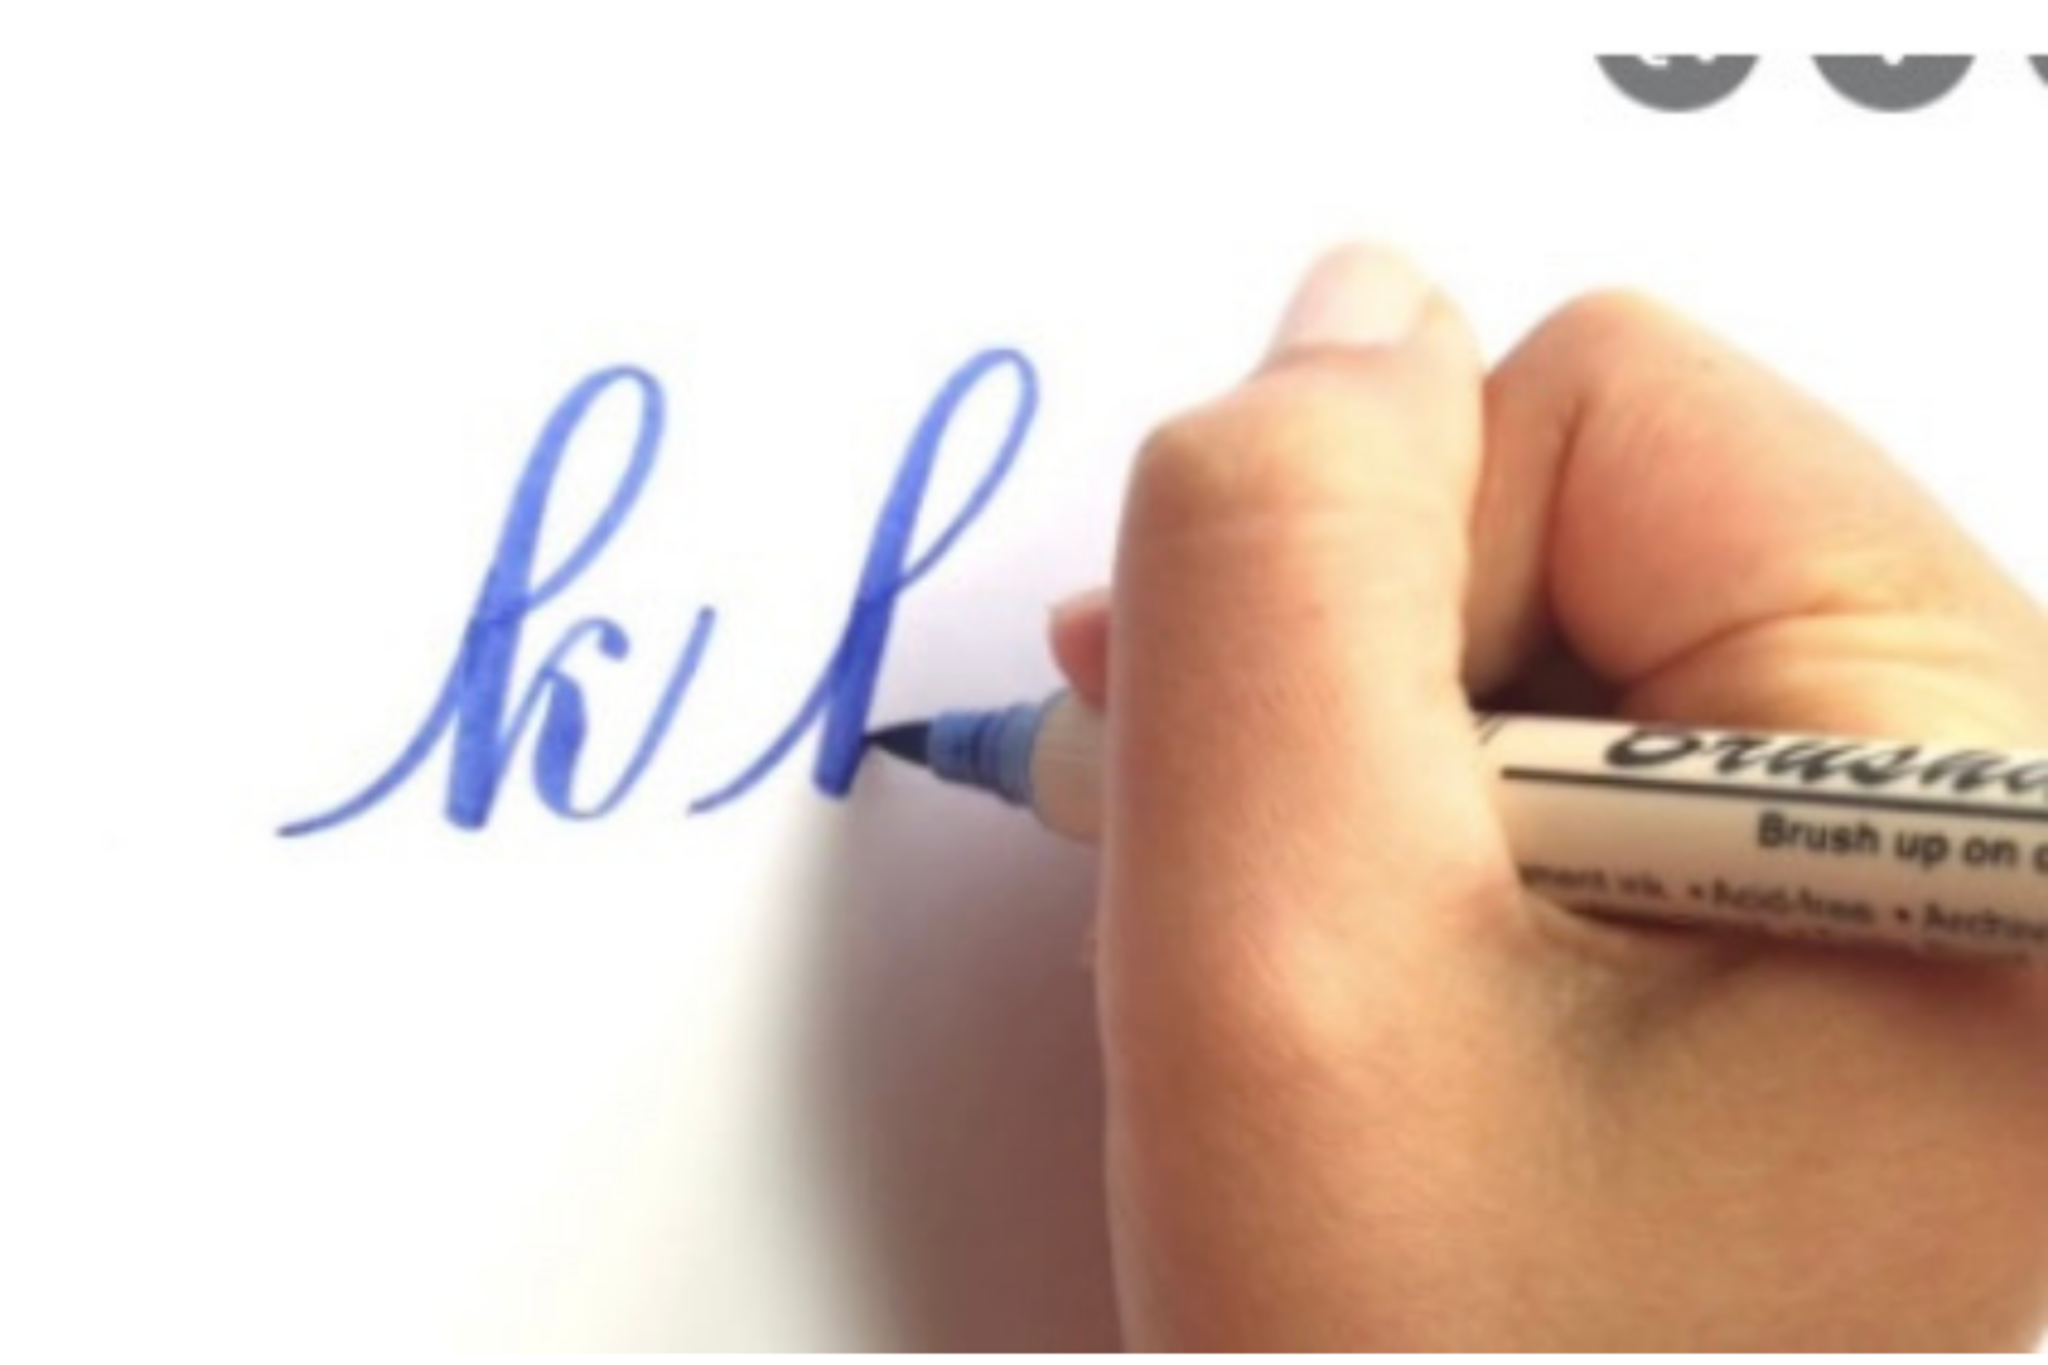
Practice thin upstrokes by lightly drawing short upward strokes along the first row about 20 times.
Step 4
Practice thick downstrokes by pressing a bit harder and drawing downward strokes along the second row about 20 times.
Step 5
Practice joining upstrokes and downstrokes to form simple letters like a n o by repeating each letter several times on the third row.
Step 6
Try a blending test on scrap: touch the tip of a darker brush pen to the tip of a lighter brush pen for three seconds, then draw a stroke to see the color blend.
Step 7
Write your name once on scrap paper using your calligraphy strokes and the blending trick to get comfortable.
Step 8
Use your ruler and pencil to draw light guidelines and margins on your poster or card to plan where the lettering will go.
Step 9
Sketch your final word or short phrase in pencil on the poster or card using the calligraphy strokes you practiced.
Step 10
Trace over your pencil letters with a brush pen using thin upstrokes and thick downstrokes for each stroke.
Step 11
Add blended color to the letters by repeating the tip-to-tip blending trick and applying the color along the base of each letter for a gradient.
Step 12
Use your fine-tip black pen to add outlines or a drop shadow to make the letters pop.
Step 13
Wait until all ink is completely dry then gently erase the pencil guidelines.
Step 14
Decorate around your letters with small drawings or color accents and sign your name on the artwork.
Step 15
Take a picture and share your finished lettering poster or card on DIY.org.
Help!?
What can we use if we don't have brush pens or special colored pens?
If you don't have brush pens, use flexible felt-tip markers or a small paintbrush with watered-down watercolor or acrylic paint and practice your thin upstrokes and thick downstrokes on the scrap paper rows first.
My strokes are shaky or the blended colors look muddy — what should I do?
Steady your hand by resting your forearm on the table, redo the thin upstrokes and thick downstrokes on the practice rows, and repeat the tip-to-tip blending on scrap paper while making lighter passes along the base of each letter so the gradient doesn't become muddy and be sure to wait until all ink is completely dry before erasing pencil guidelines.
How can I adapt the activity for younger kids or older kids?
For younger kids, simplify to single upstrokes and downstrokes with chunky markers and pre-drawn guidelines on the poster, for middle kids follow the three-row practice and try the tip-to-tip blending on scrap, and for older kids add fine-tip black pen outlines, drop shadows, and more detailed decorations around the letters.
How can we extend or personalize our finished lettering poster or card?
Personalize it by experimenting with multi-color gradients using the tip-to-tip blending trick, adding small themed drawings or color accents around the letters from the decoration step, and mounting the final piece on colored cardstock before signing and photographing for DIY.org.
Watch videos on how to Take Your Lettering Up A Notch
Teaching Kids How to Write The Alphabet Letters A-Z | Learning the Uppercase Letters Handwriting
4 Videos
Teaching Kids How to Write The Alphabet Letters A-Z | Learning the Uppercase Letters Handwriting
5 Fun Activities to Improve Children's Handwriting | Handwriting Improvement for Kids
10 Fun Writing Activities for Kids: Creative Exercises to Improve Writing SKills
5 Essential Handwriting Practices for Kids | Handwriting Heroes
Facts about hand lettering and basic calligraphy
🖋️ The word "calligraphy" comes from Greek: kalos (beautiful) + graphein (to write) — it literally means "beautiful writing".
✍️ Most modern lettering styles are built from just a few basic strokes — thin upstrokes and thick downstrokes are the secret sauce!
🎨 Brush pens and water-based markers can be blended with a wet brush or a water brush to make watercolor-like gradients.
✨ Medieval illuminated manuscripts often used real gold leaf to make decorated letters sparkle on the page.
🧠 Many people find practicing hand lettering calming — it’s a creative way to build focus, patience, and fine motor skills.
How do I help my child improve decorative lettering and make a personalized poster or greeting card?
What materials do I need to take my lettering up a notch?
What ages is this decorative lettering activity suitable for?
What are the benefits of practicing calligraphy and decorative lettering with kids?
