Swap, barter or buy
Organize a mini market to swap, barter, or buy items using play money. Learn negotiation, value, and fair trading through hands on roleplay.


Step-by-step guide to organize a mini market to swap, barter, or buy items
Kids Learn How to Barter, Instead of Buy!
Step 1
Bring all the Materials Needed to the place where you will set up your mini market.
Step 2
Set up stalls by placing boxes or baskets on the table or on the floor.
Step 3
Make a fun sign for each stall using a sticky note and a pen.
Step 4
Put the items you want to trade on each stall so buyers can see them easily.
Step 5
Label each item with a price on a sticky note using pretend play money values.
Step 6
Give each player the same amount of play money to start the market.
Step 7
Agree together on three simple market rules such as how long each trade can take whether bartering is allowed and snack rules.
Step 8
Decide who will be a seller and who will be a buyer for the first trading round.
Step 9
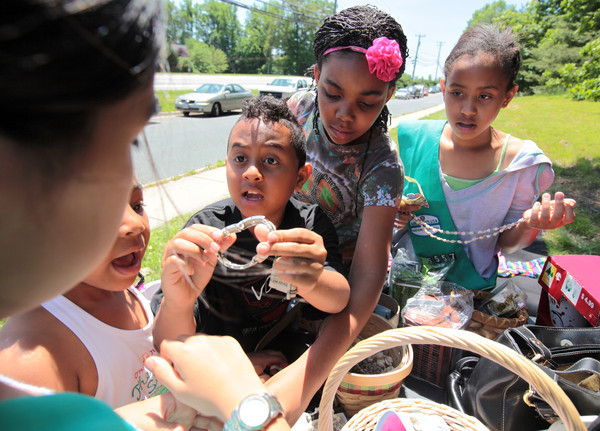
Start the trading round and let buyers visit stalls to swap barter or buy using play money while practicing polite negotiation.
Step 10
When the round ends count your play money and check which items you gained or lost.
Step 11
Talk with each other about one trade that felt fair and one trade that did not and explain why.
Step 12
Take a photo or write a short description of your mini market and share your finished creation on DIY.org.
Help!?
What can I use if we don't have sticky notes, play money, or baskets for stalls?
Use index cards or folded paper taped as price tags instead of sticky notes, cut paper into coins or use buttons/beans for play money, and use shoeboxes, plastic bowls, or placemats as stalls.
What should we do if bargaining takes too long or kids argue during trading rounds?
Set a visible kitchen timer for each trade, remind players of the agreed three market rules from the instructions, and have an adult step in to enforce turn order or simplify trades so you can still finish and count play money at the end.
How can I adapt this activity for a 3‑year‑old versus a 10‑year‑old?
For 3‑year‑olds use fewer, larger items with picture price tags on sticky notes and physical token money with adult help counting, while for 10‑year‑olds add written price lists, allow bartering rounds, and track profit/loss when you count play money after each round.
How can we extend or personalize the mini market for more learning or fun?
Have kids design custom currency and fun stall signs with markers, add a receipt notebook to record trades, create themed markets, and then take the photo or write the short description to share on DIY.org as the final step.
Watch videos on how to organize a mini market to swap, barter, or buy items
The History of Money: From Bartering to Banknotes 💰 Economy for Kids | @HappyLearningENG
4 Videos
The History of Money: From Bartering to Banknotes 💰 Economy for Kids | @HappyLearningENG

Interest rate swaps finally made easy! In under 20 minutes, learn Andrew's simple 4-step method

What Are Examples Of Bartering? - Pocket Friendly Adventures

How to Speak with a 🛒 Supermarket Cashier | English Conversation Practice
Facts about money, value, and trading
🐄 People used barter long before coins — ancient civilizations swapped grain, livestock, and tools for what they needed.
🪙 Playing with toy money helps kids practice counting, making change, and planning — great early money skills!
🤝 Negotiation is all about give-and-take: small, fair concessions often help both sides reach an agreement.
🏷️ Presentation changes value — items that are tidy, labeled, or have a fun story often seem worth more.
🧒 Mini markets and classroom-economy projects teach teamwork, responsibility, saving, and fair trading in a hands-on way.
How do I organize a mini market where kids swap, barter, or buy items using play money?
What materials do I need to run a swap, barter, or buy mini market for children?
What ages is a swap and barter mini market suitable for, and how can it be adapted?
What are the benefits of doing a swap, barter, or buy mini market with children?
