Stitch a straight line!
Learn to stitch a straight line by threading a plastic needle and sewing simple running stitches on fabric, practicing spacing, tension, and patience.


Step-by-step guide to stitch a straight line
Step 1
Gather all the materials and put them on a flat table so everything is easy to reach.
Step 2
Use the ruler and fabric marker to draw a straight line across the fabric where you will stitch.
Step 3
Tape the edges of the fabric to the table with masking tape so the fabric stays flat and does not move.
Step 4
Cut a length of floss or yarn about 18 inches long with the scissors.
Step 5
Push one end of the thread through the eye of the plastic needle so the thread goes all the way through.
Step 6
Tie a small knot at the other end of the thread so it won’t pull through the fabric.
Step 7
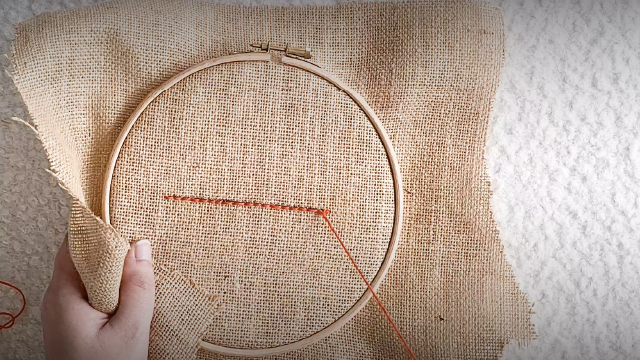
From the underside of the fabric place the needle at the start of the line and push it up until the tip comes out on top.
Step 8
Pull the thread gently until the knot stops at the underside of the fabric.
Step 9
Insert the needle down through the fabric about 1 centimeter ahead on the line to make the first stitch.
Step 10
Bring the needle up through the fabric about 1 centimeter from where it went down to finish the stitch.
Step 11
Keep repeating the down then up motions using the same 1 centimeter spacing until you reach the end of the line.
Step 12
Push the needle through to the underside a little past the last stitch so the thread is on the back side.
Step 13
Tie a small knot on the underside to secure the thread by looping the thread and pulling it tight.
Step 14
Cut off the extra thread close to the knot with the scissors.
Step 15
Share your finished stitched straight line on DIY.org.
Help!?
What can we use if we don’t have a plastic needle or embroidery floss?
If you don't have the plastic needle from the materials list, use a blunt tapestry needle or an adult-threaded metal sewing needle and, instead of embroidery floss, use doubled regular thread or thin yarn and then follow the step that says 'Push one end of the thread through the eye of the plastic needle.'
My stitches keep getting uneven or the thread pulls through—what should I check and fix?
If stitches are uneven, re-check the ruler marks and keep the 1 centimeter spacing as you repeat the down-and-up motions, and if the thread pulls through despite 'Tie a small knot at the other end,' tie a larger or double knot and press a tiny piece of masking tape over the knot on the underside before stitching.
How can I adapt this straight-line stitching activity for younger or older kids?
For ages 3–5, shorten the drawn line, use thick yarn and a large blunt needle with an adult to cut the 18-inch thread and help tie the starting knot, while older kids can stitch a longer line, use multiple strands of floss, or practice tighter 1 cm spacing to improve precision.
How can we extend or personalize the finished stitched straight line?
To enhance the project, stitch parallel lines in different colored floss using the same 1-centimeter spacing, add beads threaded onto the yarn before making a stitch, and then photograph the finished stitched straight line to share on DIY.org as suggested.
Watch videos on how to stitch a straight line
How to Sew a Straight Line-Easy Beginner Sewing Lesson-Practical Sewing Tip-Beginner Sewing Tutorial
4 Videos
How to Sew a Straight Line-Easy Beginner Sewing Lesson-Practical Sewing Tip-Beginner Sewing Tutorial
3 TIPS for Sewing Straight & Curved Lines | Sewing Machine Basics
How to Sew Basic Straight Stitches on a Sewing Machine | Beginner Lesson
How To: Straight Stitch (Sewing for Beginners)
Facts about hand-sewing for kids
🪡 The running stitch is one of the oldest hand-sewing stitches and shows up in ancient clothing repairs.
🧵 Archaeologists have found bone and ivory sewing needles dating back around 50,000 years — people have been stitching for ages!
🧒 Plastic needles are perfect for beginners and kids because they have blunt tips and larger eyes, making them safer and easier to thread.
🎯 Evenly spaced stitches look neater and help seams hold together stronger — little consistent gaps go a long way.
⏳ Gentle, even tension keeps fabric flat; pull too tight and the cloth puckers, pull too loose and the stitches gap.
How do I teach my child to stitch a straight line?
What materials do I need to stitch a straight line with a child?
What ages is stitching a straight line suitable for?
What are the benefits of practicing straight stitches?
