Snowboard in Procreate
Design and draw a colorful snowboard scene in Procreate using layers, brushes, and simple shading tools to learn digital art techniques and composition.

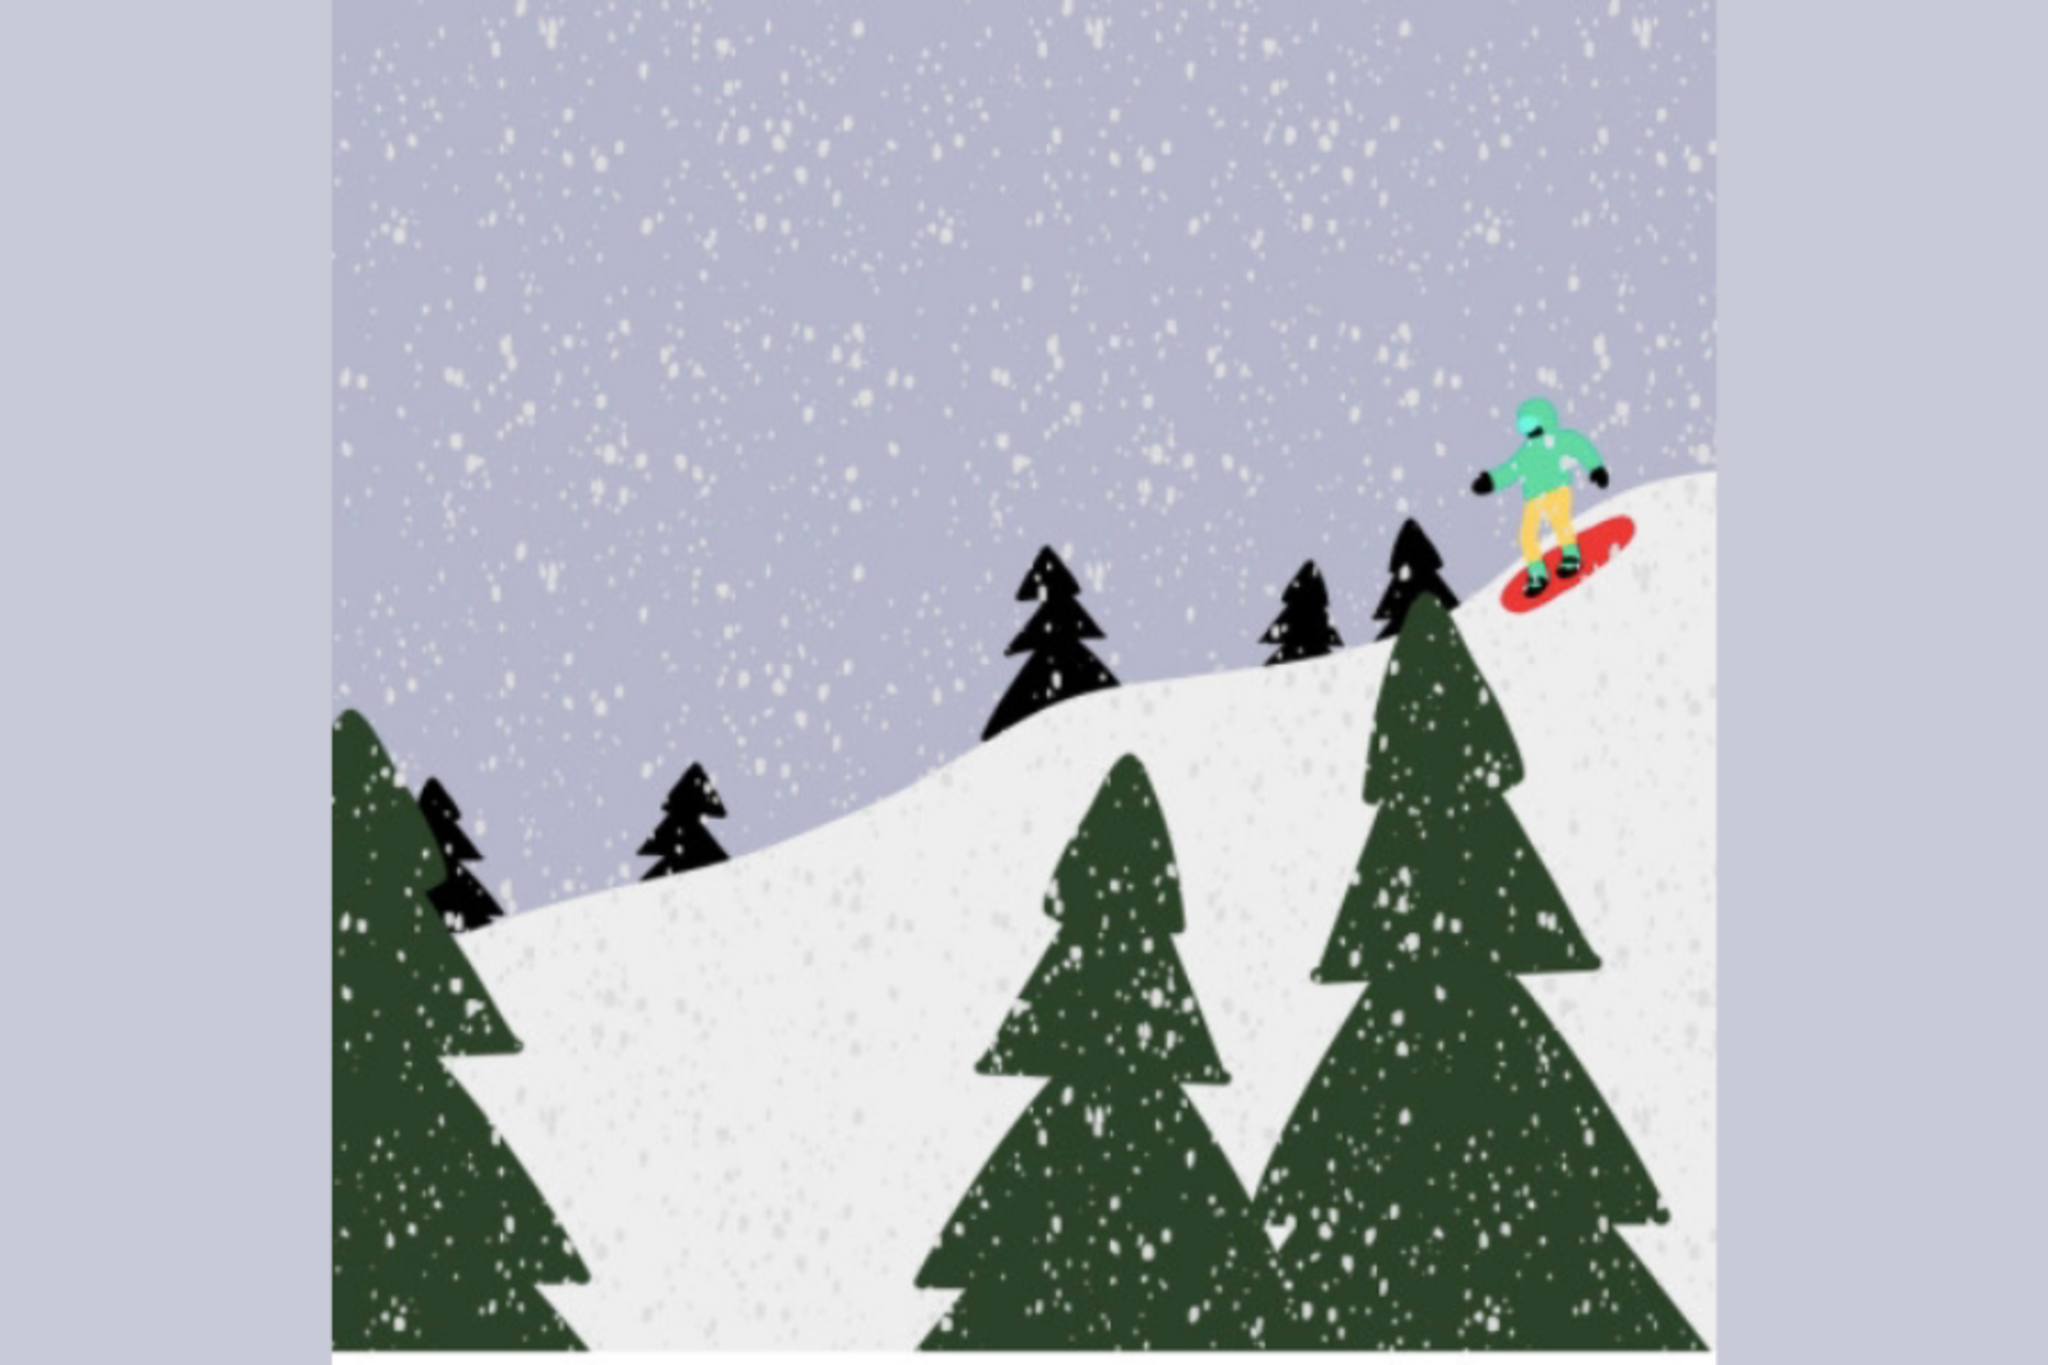

Step-by-step guide to design a snowboard scene in Procreate
CAN A PRO SNOWBOARDER LEARN HOW TO SKATEBOARD?
Step 1
Open Procreate and tap the + button to create a new canvas.
Step 2
Choose a landscape canvas size like 2048 x 1536 for lots of drawing space.
Step 3
Add a new layer and use a sketching pencil brush to draw a simple layout of your snowboard scene.
Step 4
Create and name three layers: Background; Snow; Rider.
Step 5
Select the Background layer and fill it with a base sky color using a large brush or Color Fill.
Step 6
Select the Snow layer and paint the main snow shapes in white or light blue.
Step 7
Select the Rider layer and block in flat colors for the person and the snowboard.
Step 8
Add a new layer above the Rider layer and make that new layer a Clipping Mask.
Step 9
Use a soft airbrush on the Clipping Mask layer to paint shadows where clothes and the board bend or overlap.
Step 10
Add another new layer above the shadows and set its blend mode to Add or Overlay.
Step 11
With a small brush on the highlight layer paint bright highlights on edges and on the snowboard design.
Step 12
Add finishing details like snow spray or tracks on a new top layer using a splatter or texture brush.
Step 13
Export your artwork as a PNG or JPEG using Procreate’s Share menu and save it to your Photos.
Step 14
Upload and share your finished snowboard scene on DIY.org.
Help!?
I don’t have Procreate or an iPad — what can I use instead to follow these steps?
Use another layer-based app like Autodesk SketchBook, Krita, or MediBang on a tablet or computer and follow the same steps (create Background, Snow, Rider layers, use a large brush for a Color Fill equivalent, add clipping-like masks, then export as PNG/JPEG).
My shadows on the Clipping Mask layer aren’t showing up — how do I fix that?
Make sure the shadow layer is directly above the Rider layer and set as a Clipping Mask so the soft airbrush shadows only affect the Rider’s flat colors, and check the shadow layer’s opacity and brush opacity if they look faint or invisible.
How can I adapt this activity for different ages or skill levels?
For younger kids, simplify by using only Background and Rider layers and large basic brushes to block colors and add a single highlight layer, while older kids can add extra detail layers, custom brushes, and use Clipping Masks plus Add/Overlay blend modes for advanced shading and highlights.
What are fun ways to extend or personalize the snowboard scene after finishing the steps?
Add a custom snowboard design on a new layer clipped to the board, use a splatter or texture brush on the top layer for unique snow effects, try Procreate’s Animation Assist to animate falling snow or spray, and export a PNG with transparency to composite the rider into a photo background before uploading to DIY.org.
Watch videos on how to design a snowboard scene in Procreate
Making a Snowboard Movie is Easy - The Art of Flight Teaser
4 Videos
Making a Snowboard Movie is Easy - The Art of Flight Teaser
The process of making a luxury snowboard, crafted by a former professional snowboarder.
How To Draw A Cartoon Snowboarder

How To Draw A Snowman Snowboarding
Facts about digital drawing and Procreate
🎨 Procreate was created by Savage Interactive and launched for iPad in 2011, quickly becoming a go-to app for digital artists of all ages.
🖌️ Procreate lets you import and create custom brushes and has a huge community sharing brush sets and textures to try.
🪂 Modern snowboarding grew from the 1960s 'Snurfer' and became an official Olympic sport at the 1998 Nagano Winter Games.
🧩 Digital layers let you stack, hide, and edit parts of your artwork independently so you can experiment without ruining other parts.
🌈 Using complementary colors (opposite on the color wheel) makes your snowboard design pop and look extra vibrant.
How do I design and draw a colorful snowboard scene in Procreate?
What materials and tools do I need to create a snowboard scene in Procreate?
What ages is designing a snowboard scene in Procreate suitable for?
What are the benefits of drawing a snowboard scene in Procreate for kids?
