Share Your Sunset Photography!
Take and edit sunset photos using a phone or camera with an adult, explore angles and colors, create a mini gallery to share.


Step-by-step guide to Share Your Sunset Photography
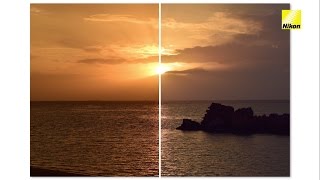
Sunset Photography for Beginners - Gear, Settings and More
Step 1
Ask an adult to join you and pick a safe outdoor spot to watch the sunset.
Step 2
Plug in your phone or camera to charge until the battery is high.
Step 3
Ask your adult to help you open a simple photo-editing app on your device.
Step 4
Turn on gridlines in your camera settings.
Step 5
Set your camera to the highest photo quality or resolution.
Step 6
Arrive at the spot 20 minutes before sunset and watch how the sky changes.
Step 7
Take a wide landscape photo of the sky as your first shot.
Step 8
Move closer to the ground or crouch and take a low-angle photo of the sunset.
Step 9
Place a person or object between you and the sky and take a silhouette photo.
Step 10
Find a reflective surface like water or a window and take a reflection photo.
Step 11
Edit one photo in the app by increasing brightness or boosting color once.
Step 12
Choose your favorite 4–6 photos and arrange them on paper or in a digital album to make a mini gallery.
Step 13
Share your finished mini gallery on DIY.org with your adult's help.
Help!?
If I don't have the exact camera or phone mentioned, what can I use instead so I can still follow the steps?
If you don't have a phone or camera to plug in in step 2, use a tablet, a basic point‑and‑shoot, or borrow an adult's smartphone so you can still turn on gridlines (step 4), set high resolution (step 5), and edit in the app (step 3).
My photos come out blurry or too dark during the sunset—what should I try to fix that while I'm there?
If shots are blurry or underexposed during your wide, low‑angle, or silhouette photos (steps 6–8), steady the device on a bench or backpack like a tripod, tap the screen to lock focus before shooting, and slightly increase exposure in the editing app as in step 10.
How can I change the activity for younger kids or make it more challenging for older kids?
For younger kids, simplify by taking just a wide landscape and one silhouette and have the adult handle charging and the editing app (steps 2–3) while older kids can use manual camera settings at highest quality (step 5), shoot more frames, and do advanced edits before making the mini gallery (step 11).
What are some ways to personalize or expand the mini gallery project after I've picked my 4–6 photos?
To enhance the mini gallery in step 11, add handwritten captions with the time and location, print and mount photos on colored paper, include a time‑lapse sequence from 20 minutes before sunset (step 5), or make a themed collage using the single boosted color edit from step 10.
Watch videos on how to Share Your Sunset Photography
How To Paint a Sunset with Palm Trees --Art Lesson for Kids
3 Videos

How To Paint a Sunset with Palm Trees --Art Lesson for Kids
Photography for beginners - Shooting spectacular sunsets (DSLR tips & tricks)

Best Camera Settings For Sunsets - Learn Them Today!
Facts about photography for kids
🌅 Sunsets look red and orange because Earth's atmosphere scatters blue light more when the Sun is low.
⏰ The "golden hour"—about an hour before sunset—gives soft, warm light that photographers love.
📱 Many smartphones use HDR (High Dynamic Range) to capture bright skies and dark foregrounds in one photo.
📐 Framing your subject along the rule of thirds lines often makes images feel more balanced and dynamic.
🌊 Reflections in water or glass can double the sunset colors and create striking, mirror-like photos.
How do I do the Share Your Sunset Photography activity with my child?
What materials do I need for the Share Your Sunset Photography activity?
What ages is the Share Your Sunset Photography activity suitable for?
What safety and privacy tips should we follow when sharing sunset photos?
