Share Anything Holiday-Related DIY Challenge!
Create a holiday-themed handmade ornament from recycled materials; design, decorate, and share your finished ornament with family or friends to spread seasonal cheer.


Step-by-step guide to Share Anything Holiday-Related DIY Challenge!
4 Quick and Easy Christmas Crafts for Kids | Hobbycraft
Step 1
Gather all your Materials Needed and bring them to a clear workspace.
Step 2
Pick a holiday and decide what ornament shape you want to make.
Step 3
Draw a simple sketch of your ornament idea on paper with a pencil.
Step 4
Place your sketch on a piece of recycled cardboard and trace the outline.
Step 5
Cut out the traced shape from the cardboard using scissors.
Step 6
Make a small hole near the top of the ornament for hanging.
Step 7
Color or paint the cardboard base using your coloring materials and let it dry if needed.
Step 8
Glue on small decorations like buttons beads bottle caps or sequins to decorate your ornament.
Step 9
Thread string or ribbon through the hole and tie a knot to make a hanger.
Step 10
Show your finished ornament to family or friends to spread some seasonal cheer.
Step 11
Share your finished ornament on DIY.org to complete the Share Anything Holiday Related DIY Challenge.
Help!?
What can I use instead of recycled cardboard or sequins if I don’t have them?
Substitute a cereal-box panel, cardstock, or an old greeting card for the recycled cardboard base and use punched foil, torn magazine scraps, or sticker dots in place of sequins when gluing decorations in step 7.
My scissors can’t cut the cardboard cleanly and the hole ripped—what should I do?
For thick cardboard, have an adult cut the traced shape in step 4 with a craft knife on a cutting mat and make the hanger hole in step 5 with a hole punch or reinforce a scissors-made hole with tape or a glued-on paper washer before threading the string in step 8.
How can I adapt this ornament project for different ages?
For toddlers, pre-cut the cardboard shapes and let them color and stick large buttons or stickers (steps 3–7) with supervision, for elementary kids encourage tracing their own sketch and using beads or bottle caps (steps 2–7), and for teens add layered pieces, painting details, or a varnish finish and then photograph for DIY.org (steps 3–9).
How can we personalize or make the ornament more special?
Personalize by writing the child’s name and year on the painted cardboard in step 6, adding a small LED tea light or glitter sealant, or turning bottle caps into mini photo frames before gluing them on in step 7 and then share the finished ornament on DIY.org in step 9.
Watch videos on how to Share Anything Holiday-Related DIY Challenge!
5 Easy Christmas Crafts for Kids
4 Videos

5 Easy Christmas Crafts for Kids

20+ Easy and nice Christmas art and crafts ideas for kids
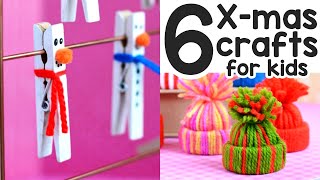
6 Christmas Craft for Kids - Christmas Crafting Ideas
DIY Christmas Crafts for Kids | Easy Christmas Tree Decoration Ideas & Holiday Fun!
Facts about holiday and recycled crafts
🎄 Christmas tree decorating started in 16th-century Germany — families used apples, nuts, and baked goods before glass baubles became popular.
♻️ Upcycling turns 'trash' into treasures — crafters often make festive ornaments from bottle caps, fabric scraps, old cards, and leftover ribbon.
🧵 Papier-mâché has been used worldwide for centuries to make lightweight decorations — it's a kid-friendly material for handmade ornaments.
✨ Handmade ornaments often become keepsakes — many families pass favorite decorations down through generations.
🌎 Using recycled materials for holiday crafts helps reduce seasonal waste from single-use decorations and gift wrap.
How do I do the Share Anything Holiday-Related DIY Challenge to make a recycled ornament?
What materials do I need for a recycled holiday ornament DIY challenge?
What ages is the recycled holiday ornament challenge suitable for?
What are the benefits of making recycled holiday ornaments and how can I vary the challenge?
