Share a picture of your microphone
Make a simple microphone from recycled materials or find a real one, take a clear photo, and share it with your classmates.


Step-by-step guide to share a picture of your microphone
Step 1
Gather all materials and bring them to a clear flat workspace.
Step 2
Decide whether you will build a recycled microphone or use a real microphone.
Step 3
If you are building, wrap a small square of aluminum foil around one end of the tube and secure it with tape.
Step 4
If you are building, push a small foam ball or a cotton ball onto the foil-covered end and tape it so it stays in place.
Step 5
If you are building, decorate the tube with colouring materials and stickers.
Step 6
If you are using a real microphone, ask an adult to help get it and check that it is clean and safe.
Step 7
Place your microphone on a plain background and make sure the area is bright and well lit.
Step 8
Ask an adult to help you with taking photos if you need help using a camera or phone.
Step 9
Take several clear photos of your microphone from different angles.
Step 10
Choose the best photo that shows your microphone clearly.
Step 11
Share your finished microphone photo with your classmates on DIY.org
Help!?
What can we use if we can't find aluminum foil, a foam ball, or a cardboard tube?
If you don't have aluminum foil use a clean candy wrapper or baking parchment, replace a foam or cotton ball with a crumpled tissue or pom‑pom, and swap the tube for a paper towel roll or sturdy cardboard straw, then secure parts with tape as directed.
My foam or cotton ball keeps falling off the foil-covered end — how can I fix it?
Push the foam or cotton ball farther onto the foil-covered end, wrap extra tape around the seam, or add a small dab of non-toxic glue so the ball stays in place as the instructions require.
How can I adapt this activity for younger or older kids?
For younger children, have an adult prepare the foil-covered tube, push the ball on, and help with camera use while the child decorates with colouring materials and stickers, and for older kids let them build independently, check a real microphone's safety, and take several photos from different angles.
How can we make the microphone more special or extend the activity?
Personalize the tube with extra decorations using colouring materials and stickers, add a removable strap or small stand so it can be a prop, experiment with plain backgrounds and bright lighting when taking several photos, and then share the finished microphone photo on DIY.org.
Watch videos on how to share a picture of your microphone
How to Use a Microphone with Arduino (Lesson #12)
4 Videos
How to Use a Microphone with Arduino (Lesson #12)
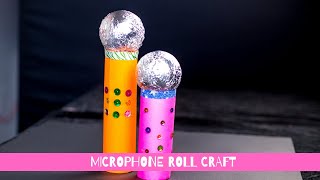
HOW TO MAKE A MICROPHONE WITH A PAPER ROLL. Easy recyclable craft that kids love!
DJI Mic Mini | Full Setup Tutorial: Part 1
Best Microphone for YouTube Videos (For ALL Budgets!)
Facts about recycled crafts for kids
🎤 Microphones turn tiny air vibrations into electrical signals — that’s how your voice becomes sound on a computer or speaker.
♻️ You can build a simple microphone from recycled parts like an old earbud, a paper cup, and some wire — great for upcycling!
🔊 Different types of microphones (dynamic, condenser, electret) are chosen for singing, talking, or recording instruments.
📸 A clear photo helps your classmates see how you built your mic — try good lighting and a plain background for the best shot.
🧪 Modern MEMS microphones are so small they can fit inside smartphones and hearing aids, but DIY mics can be made with simple parts.
How do I make and share a microphone photo with my class?
What materials do I need to make a simple recycled microphone and photograph it?
What ages is this microphone photo activity suitable for?
What are the benefits of making a recycled microphone and sharing a photo?
