Shape a Snail!
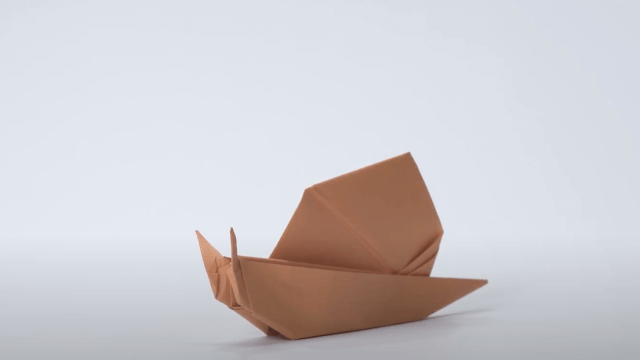
Shape a snail from air-dry clay or playdough, sculpting shell spirals and body details while learning symmetry, texture, and simple sculpting techniques.
About this activity
Shape a snail from air-dry clay or playdough, sculpting shell spirals and body details while learning symmetry, texture, and simple sculpting techniques.
What you need
Step by step
- 1
Step 1
Lay the wax paper or tray on the table to protect your workspace.
- 2
Step 2
Tear off a golf-ball-sized piece of your chosen air-dry clay or playdough.
- 3
Step 3
Knead the piece of clay until it feels soft and easy to shape.
- 4
Step 4
Roll the clay into a long log about twice the length of your palm to make the snail's body.
- 5
Step 5
Pinch one end of the log to form the snail's head.
- 6
Step 6
Tear off a slightly larger piece of clay and roll it into a round ball for the shell.
- 7
Step 7
Gently press the ball into a flat disc with your palm.
- 8
Step 8
Starting at the disc's edge roll the clay inward toward the center to make a spiral shell.
- 9
Step 9
Press the spiral shell gently onto the middle of the snail's back to attach it.
- 10
Step 10
Roll two very thin short sausages to make the snail's eye stalks.
- 11
Step 11
Press each tiny stalk onto the top of the head to attach them.
- 12
Step 12
Use a toothpick or tool to add a spiral pattern to the shell and little lines or bumps on the body for texture.
- 13
Step 13
If using air-dry clay leave your snail on the tray to dry for 24 hours.
- 14
Step 14
When dry or if you used playdough immediately add color with your coloring materials.
- 15
Step 15
Share your finished snail creation on DIY.org.
Fun facts
How do I shape a snail from air-dry clay or playdough?
To shape a snail from air-dry clay or playdough, start by rolling a medium ball for the shell and a smaller ball for the body. Flatten and elongate the body into a teardrop shape, attach the rounded end to the shell. Make the shell by rolling a rope of clay and spiraling it into a coil or by flattening a disc and wrapping it into a spiral. Add antennae with two thin coils, texture with a toothpick, smooth seams with a damp fingertip, and let air-dry.
What materials do I need to make a sculpted snail?
You'll need air-dry clay or playdough; a clean work surface; plastic knife or modeling tools; rolling pin; toothpicks or clay tools; water and a damp cloth for smoothing; small bowls for mixing colors; protective mat or newspaper; optional acrylic paints and brushes for after drying; varnish or glue; googly eyes or beads for decoration. Choose non-toxic materials and supervise small parts for young children.
What ages is shaping a snail suitable for?
Shaping snails suits many ages: toddlers (2–3) can roll simple shapes and press parts with close supervision; preschoolers (3–5) can shape basic bodies and shells, practicing fine motor skills; school-age children (6–10) can add detailed textures, symmetry, and paint finished pieces; older kids and teens can experiment with sculpting techniques and advanced finishes. Adjust tools and supervision for safety and complexity based on each child's ability.
What are the benefits and variations for a snail sculpting activity?
Benefits include improved fine motor skills, hand-eye coordination, spatial awareness, and creativity; making a snail also teaches symmetry and texture recognition. Variations: use salt dough, oven-bake clay, or recycled paper pulp; make tiny snail families, add painted patterns, or turn finished snails into magnets or garden markers. Safety tip: choose non-toxic materials, supervise small decorations, and follow drying/baking instructions—help younger children with cutting or using tools.
Watch & Learn
Need help?
What can we use if we don't have air-dry clay or playdough?
If you don't have air-dry clay or playdough, use homemade salt dough (flour, salt, water) or regular modeling clay and follow the same steps like tearing a golf-ball-sized piece, kneading it, and rolling the body and spiral shell.
My clay keeps cracking or the shell won't stick—what should I do?
If the body cracks while you roll it or the shell won't attach, knead the clay longer to warm and soften it, smooth cracks with a little water or clay 'slip', and score both the snail's back and the spiral shell before pressing them together as instructed.
How can I adapt this activity for different ages?
For toddlers, pre-roll the long log and disc and let them press and add chunky eye stalks, while older children can make thinner sausages, add toothpick details, and paint a dried air-dry clay snail for finer decoration.
How can we enhance or personalize our snail after making it?
Personalize your snail by pressing beads or seeds into the spiral shell before drying, painting and varnishing the air-dry clay after the 24-hour dry time, or making a small clay leaf base to display multiple snails before sharing on DIY.org.