Sew a collection
Sew a collection of simple fabric items—scrunchies, mini-pouches, and sachets. Learn basic stitches, measuring, cutting, and safe hand-sewing skills independently.


Step-by-step guide to sew a collection of fabric items (scrunchies, mini-pouches, and sachets)
Learn to sew, Kids! Teach your children to sew with Debbie Shore
Step 1
Gather all Materials Needed and set up a flat well-lit workspace.
Step 2
Thread a needle and tie a small knot at the end of the thread.
Step 3
Practice a running stitch on a scrap fabric until your stitches feel even and comfortable.
Step 4
Measure and cut these pieces: scrunchie 45 cm by 10 cm; mini-pouch 12 cm by 15 cm; sachet two squares 9 cm by 9 cm.
Step 5
Fold the scrunchie piece lengthwise with the right sides together.
Step 6
Sew the long edge of the scrunchie piece with a running stitch leaving both short ends open.
Step 7
Turn the scrunchie tube right side out using a finger or a blunt tool.
Step 8
Attach a safety pin to an elastic hair tie and push the hair tie through the scrunchie tube until it comes out the other end.
Step 9
Tuck the hair tie ends inside the tube and sew the short opening closed with small tight running stitches.
Step 10
Fold the mini-pouch fabric in half with right sides together so the 12 cm edges meet.
Step 11
Sew along the two side edges of the folded pouch leaving the top open and trim any extra thread.
Step 12
Turn the pouch right side out and press the top edge flat with your fingers.
Step 13
Place the two sachet squares right sides together and sew around three sides leaving a 2 cm opening.
Step 14
Turn the sachet through the opening, fill with stuffing or dried lavender, and sew the opening closed with small tight stitches.
Step 15
Share photos of your scrunchies mini-pouches and sachets on DIY.org to show your finished sewing collection.
Help!?
What can we use if we don't have a safety pin, elastic hair tie, or stuffing like dried lavender?
If you don't have a safety pin or elastic hair tie for the scrunchie, push a 10–12 cm ribbon through the scrunchie tube with a blunt knitting needle instead of the safety pin and tie the ends, and substitute cotton balls or uncooked rice for stuffing the sachet in place of dried lavender.
My scrunchie tube won't turn right side out and my stitches look uneven—how can I fix that?
Re-practice the running stitch on scrap fabric as instructed, make smaller even stitches when you sew the long edge of the 45 cm by 10 cm scrunchie piece, and use a finger or a blunt tool like a chopstick to gently push the tube right side out.
How can I adapt the sewing collection for different age groups?
For younger children, use pre-cut 12 cm by 15 cm pouch pieces, a large plastic needle and yarn to practice the running stitch and skip threading the elastic, while older kids can add a zipper to the mini-pouch or try decorative topstitching on the scrunchie after turning it right side out.
What are some ways to personalize or extend the scrunchies, mini-pouches, and sachets?
Embroider initials on the mini-pouch before sewing the side edges, sew on buttons or add beads to the scrunchie elastic, scent the sachet with mixed dried lavender and a drop of essential oil before closing the 2 cm opening, and then share photos on DIY.org to show your finished sewing collection.
Watch videos on how to sew a collection of fabric items (scrunchies, mini-pouches, and sachets)
Let's Sew A Quick, Beginner Friendly Kid's Outfit!! Super EASY and CUTE!!
4 Videos

Let's Sew A Quick, Beginner Friendly Kid's Outfit!! Super EASY and CUTE!!
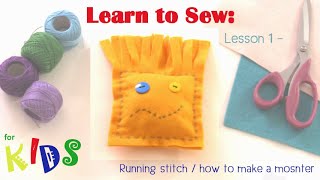
Learn to Sew with Debbie Shore, Kids! Lesson 1
Tips For Teaching Children How To Sew (Ages 2-11+) | Paige Handmade

How to Sew an Easy Fabric Purse + Tips on Teaching Kids to Sew
Facts about hand-sewing for kids
🧵 Sewing is one of humanity's oldest crafts — archaeologists have found sewing needles made from bone that are over 40,000 years old.
✂️ Measuring carefully matters: many fabrics shrink after their first wash, so pre-washing saves you from too-small scrunchies and pouches.
🪡 The modern scrunchie was invented in 1986 by Rommy Revson and became a huge 1990s trend before enjoying a comeback in the 2010s.
🎀 Thimbles protect your finger when pushing a needle and were once made from precious metals and collected as keepsakes.
🌿 Sachets stuffed with lavender or herbs have been used for centuries to scent drawers and help keep moths away from clothes.
How do I teach my child to sew a collection of scrunchies, mini-pouches, and sachets?
What materials do I need to sew scrunchies, mini-pouches, and sachets?
What ages is this sewing activity suitable for?
What safety tips should I follow when kids sew scrunchies, pouches, and sachets?
