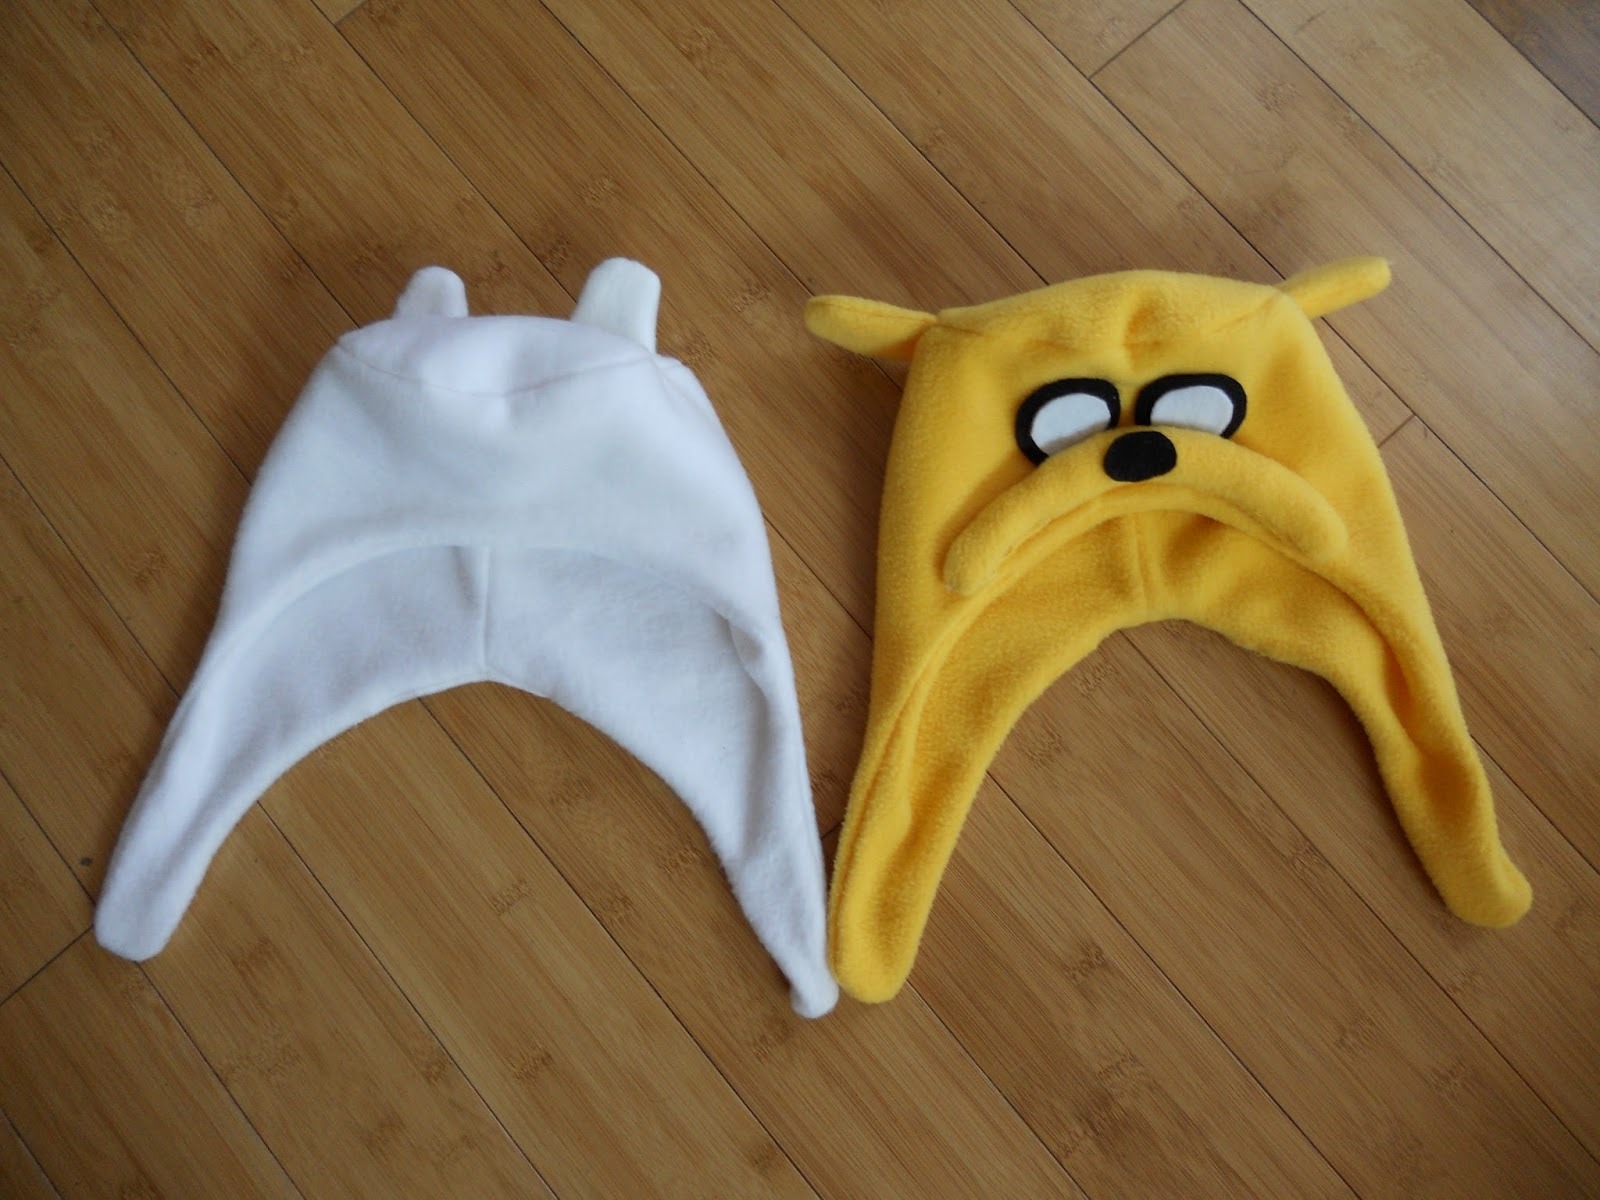
Sew a character hat
Sew a soft character hat from felt using simple patterns, basic stitches, and safe tools, then decorate it to personalize a wearable character.


Step-by-step guide to sew a character hat
DIY 5 panel Camp Hat STEP BY STEP INSTRUCTIONS + Printable PDF Pattern (EASY TO FOLLOW PROJECT)
Step 1
Measure the head circumference with the measuring tape to know how wide the hat needs to be.
Step 2
Draw a rectangle on the paper with length = head measurement + 2 cm seam allowance and height = 20 cm and add small paper shapes for eyes ears and nose.
Step 3
Cut out the paper rectangle and the small face and ear shapes to make your paper patterns.
Step 4
Lay each paper pattern on a felt sheet and trace around the shapes with your pencil.
Step 5
Cut out all the traced felt pieces carefully using safety scissors.
Step 6
Fold the felt rectangle lengthwise so the long edges meet to form the hat tube.
Step 7
Clip the long edge together with clothespins or fabric clips to hold it while you sew.
Step 8
Thread the plastic needle with yarn or embroidery floss making sure the thread is long enough for the seam.
Step 9
Tie a small knot at the end of the thread so your stitches will hold.
Step 10
Sew along the clipped long edge with a simple running stitch to close the tube and then tie off the thread securely.
Step 11
Turn the sewn tube right side out so the hat shape appears with the seam hidden inside.
Step 12
Arrange the flat felt eyes nose and ears on the hat until you like the character’s face and clip them in place.
Step 13
Sew each felt piece onto the hat with small stitches and knot the thread on the inside when each piece is secure.
Step 14
Take a picture of your soft character hat and share your finished creation on DIY.org
Help!?
What can we use instead of felt, a plastic needle, or a measuring tape if we don't have them?
Substitute felt with fleece or an old T‑shirt cut using your paper pattern, replace the plastic needle with a blunt tapestry or darning needle threaded with yarn, and measure the head by wrapping a piece of string around it then measuring the string against a ruler for the first step.
The long seam keeps puckering or I can't turn the hat tube right-side-out—what should I try?
If the seam puckers while sewing the long edge, use more clothespins or fabric clips, take smaller running stitches or switch to a backstitch with your yarn, and if you can't turn the tube right-side-out gently push the closed end through with a chopstick or blunt pencil.
How can I adapt this activity for different ages or skill levels?
For younger children, pre-cut the paper and felt shapes and use fabric glue instead of sewing while an adult handles the needle, and for older kids encourage designing more complex paper patterns, practicing decorative stitches with embroidery floss, or adding a fabric lining before sewing the long edge.
What are some ways to extend or personalize the character hat beyond the basic instructions?
Add pom-poms, button eyes, embroidered details with floss, a contrasting felt lining, or a chin elastic for a secure fit, then take a picture of your finished soft character hat and share it on DIY.org as suggested in the final step.
Watch videos on how to sew a character hat
How to Sew the Perfect Hat (Free Pattern + Full Tutorial!) | DIY 5-Panel Cap
4 Videos
How to Sew the Perfect Hat (Free Pattern + Full Tutorial!) | DIY 5-Panel Cap
It's Sew Easy! Stylish Pom Pom Hats. Step by Step Tutorial
DIY Bucket Hat STEP BY STEP INSTRUCTIONS + Printable PDF Pattern (EASY TO FOLLOW PROJECT)
DIY Hedge Witch Hat (Free Pattern!)
Facts about sewing and felt crafts
🐑 Felt is one of the oldest textiles — people have made felt from animal fibers for over 5,000 years.
🧵 Simple hand stitches like the running stitch and whipstitch are often all you need to sew a soft felt hat.
✂️ Felt doesn’t fray, so you usually don’t need to hem edges — perfect for quick, kid-friendly projects.
🎨 Adding eyes, ears, and patches instantly turns a plain hat into a wearable character kids can personalize.
🧠 Sewing builds fine motor skills, patience, and creativity — great benefits for young makers.
How do I sew a soft character hat from felt for my child?
What materials do I need to sew a felt character hat?
What ages is sewing a character hat suitable for?
What safety tips should I follow when kids sew a character hat?


