Sculpt with sand
Make small damp sand sculptures using cups, spoons, and plastic carving tools to learn about texture, moisture, and structural stability through hands-on exploration.


Step-by-step guide to sculpt with sand
How to build a sand sculpture (Beginners Demonstration)
Step 1
Gather all materials from the list and bring them to your workspace.
Step 2
Place the flat tray or board on a level surface to make a stable base.
Step 3
Take a small handful of sand from your pile.
Step 4
Squeeze the sand in your hand to test whether it holds shape.
Step 5
If the sand crumbles, spray one or two pumps of water onto the sand.
Step 6
Mix the sand gently with your hands until it feels like damp putty.
Step 7
Pack the damp sand tightly into a small plastic cup until the cup is full.
Step 8
Press the back of a spoon firmly across the top to level and compact the sand in the cup.
Step 9
Turn the cup upside down onto the tray and tap the cup gently to release the sand form.
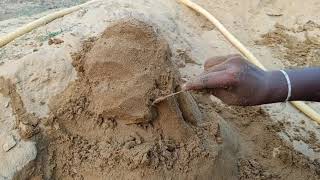
Step 10
Carve shapes and details into the sand form using plastic carving tools or a spoon.
Step 11
Brush the sculpture surface with a small brush or toothbrush to add fine texture.
Step 12
Gently press the top of your sculpture with one finger to test its stability.
Step 13
If the sculpture wobbles, add a little damp sand to the weak area and pack it firmly.
Step 14
Put tools away and wipe your hands and workspace with the towel.
Step 15
Share a photo and a short description of your finished sand sculpture on DIY.org.
Help!?
What can I use instead of a small plastic cup, spray bottle, or plastic carving tools if I don't have them?
Use a yogurt or paper cup as the mold for the 'pack the damp sand' step, sprinkle water from a cup or dab with a wet sponge instead of 'spray one or two pumps of water', and substitute a kitchen spoon or butter knife for 'plastic carving tools' while keeping a toothbrush or small paintbrush for fine texture.
My sand sculpture crumbles or won't come out of the cup — how do I fix that?
If the sand crumbles during the 'squeeze the sand in your hand' test, add a little more water and mix until it feels like 'damp putty', and if the form sticks when you 'turn the cup upside down', tap the cup firmly and run warm water over the outside or rub the cup rim before tapping to release the sand form.
How can I adapt this sand sculpting activity for younger children or older kids?
For younger children, use larger molds like muffin tins or yogurt cups and help with 'packing the damp sand' and flipping the cup, while older kids can use smaller cups, toothpicks or finer 'plastic carving tools' for detailed carving and spend extra time 'brushing the sculpture surface' for texture.
How can we extend or personalize the finished sand sculpture before sharing it on DIY.org?
Extend the activity by combining several packed cups to build multi-part sculptures, press shells or pebbles into the sand while you 'pack the damp sand', add fine brush textures with a toothbrush, and seal the finished piece with a thin layer of diluted white glue before photographing for DIY.org.
Watch videos on how to sculpt with sand
How to make a sand sculpture for beginners... easy sand art.. sand artbon save tree 🌴🌳🌲
3 Videos
How to make a sand sculpture for beginners... easy sand art.. sand artbon save tree 🌴🌳🌲
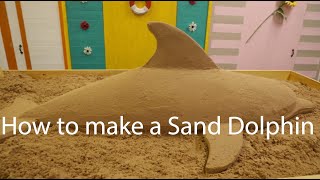
How to make sand sculpture of dolphin
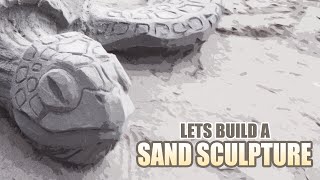
Let's build a SAND SCULPTURE! (Time lapse / speed sculpt)
Facts about sand play and sensory exploration
🏖️ Damp sand holds together because tiny water bridges between grains create suction (capillary action)—that’s why a little water helps your sculptures stay upright.
🏰 Builders often pack sand into cups or molds and flip them to form sturdy blocks and towers for carving.
🌊 Sand with mixed grain sizes and more angular particles locks together better than perfectly round sand, so some beaches are better for sculpting than others.
🧪 Sand sculpting is a real art—international competitions and professional teams use plastic tools and carving knives to create huge, detailed works.
🎨 Large sand sculptures can reach several meters tall and take teams days to build—moisture control and structure planning are key.
How do you sculpt small damp sand sculptures using cups, spoons, and plastic carving tools?
What materials do I need to make these damp sand sculptures?
What ages is sculpting damp sand suitable for?
What are the benefits and safety tips for this sand-sculpting activity?
