Roll a Clay Coiled Pot
Make a coiled clay pot by rolling long clay ropes, stacking and smoothing coils, shaping the walls, then decorating and air drying your creation safely.

Step-by-step guide to roll a clay coiled pot
Clay Coil Pots | Beginner-Friendly Craft for Kids
Step 1
Cover your work surface with wax paper or put your board down so you have a clean spot to work.
Step 2
Tear off a piece of clay about the size of your fist and place it on the board to make the base.
Step 3
Roll the base piece into a thick flat disc about the size of your palm using your hands or the rolling pin.
Step 4
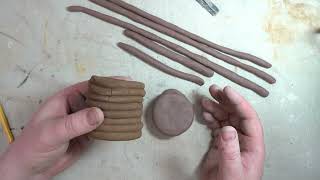
Take another piece of clay and roll it under your palms into a long even rope about as thick as your thumb.
Step 5
Use the wooden skewer to score (make little scratch lines) on the top edge of the base where the coil will sit.
Step 6
Dip a fingertip in the water and rub it over the scored area to make a little slip.
Step 7
Press the end of the coil onto the wet scored spot on the base and press firmly to attach it.
Step 8
Smooth the seam where the coil meets the base with a damp finger or sponge to blend them together.
Step 9
Keep rolling more coils and attaching them the same way until your pot reaches the height you want.
Step 10
Shape the pot walls by gently pinching or pressing the coils to make the sides thinner or wider.
Step 11
Use the skewer or plastic knife to carve patterns or press small clay pieces onto the surface to decorate.
Step 12
Leave your pot to air dry on the board or wax paper until it is completely hard (this can take 24 to 72 hours).
Step 13
Paint your dry pot with acrylic paints and let the paint dry completely.
Step 14
Take a photo of your finished pot and share it on DIY.org.
Help!?
What can we use if we don't have air-dry clay, a wooden skewer, or wax paper?
Use oven-bake polymer clay and follow package baking instructions instead of air-dry clay, substitute a toothpick or the blunt end of a paintbrush for the wooden skewer to score and carve, and replace wax paper with parchment paper or a plastic placemat under your board.
My coils keep falling off or the pot collapses — how do I fix that?
Be sure to score the top edge of the base with the wooden skewer and add slip (dip a fingertip in water) before pressing each coil, smooth the seam with a damp finger or sponge, keep coils an even thumb-thickness, and let lower coils firm slightly before adding more height.
How can I adapt the activity for different ages?
For toddlers, use soft play-dough on the board and have an adult do the scoring and attachment, for elementary kids let them roll thumb-thick coils and practice smoothing seams with a damp sponge, and for older kids challenge them to make thinner walls, carve detailed patterns with the skewer or plastic knife, and paint with acrylics after drying.
How can we personalize or extend the pot beyond the basic steps?
Attach handles or small clay pieces before drying, press natural items or stamps into the surface for texture, carve patterns with the skewer or plastic knife as in the instructions, then paint with acrylics and optionally seal with varnish before sharing the photo on DIY.org.
Watch videos on how to roll a clay coiled pot
Making a Simple Clay Coil Pot - Teaching Clay to Elementary Students - Episode 8 - Part 1
4 Videos
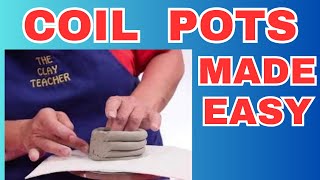
Making a Simple Clay Coil Pot - Teaching Clay to Elementary Students - Episode 8 - Part 1

How to Make a Coil Pot | Art Lessons for Kids

How to Make Coil Pots with Polymer Clay | CREATIVE BASICS Episode 9
How to Make Clay Coil Pots for Beginners
Facts about handbuilding clay and pottery for kids
🕰️ Coil pottery is an ancient technique — people have been coiling clay into pots for thousands of years.
🌀 Coiling lets you build wide or tall shapes without a potter's wheel by stacking long ropes of clay.
🌬️ Air-dry clay hardens as water evaporates so you don't need a kiln, but kiln-fired ceramics are stronger.
🐾 Tiny fingerprints or tool marks left in clay can help archaeologists learn about the maker and how the pot was made.
🎨 You can decorate coiled pots by carving, adding colored slips or paints, stamping patterns, or pressing textures into the clay.
How do you make a coiled clay pot?
What materials do I need to make a coiled clay pot?
What ages is coiled clay pottery suitable for?
What are the benefits and safety tips for making coiled clay pots?
