Ride That Camel
Build a small rocking camel toy from cardboard that rocks when pushed using tape, straws, and glue while exploring balance and motion.


Step-by-step guide to Ride That Camel
Step 1
Clear a flat workspace and lay out all the materials so you can reach them easily.
Step 2
Draw a simple side-view camel shape on the cardboard using the pencil and ruler.
Step 3
Draw two identical curved rocker shapes on the cardboard that are a little longer than the camel’s base.
Step 4
Cut out the camel shape and the two rocker shapes from the cardboard.
Step 5
Cut three straw pieces: two short pieces about the width of the camel and one longer piece for a handle.
Step 6
Tape one short straw piece along the top inner curve of each rocker so the straw runs where the camel will touch.
Step 7
Place the camel on the two rockers to check how it balances and mark where the short straw pieces meet the camel underside.
Step 8
Put glue on the taped straw pieces on the rockers and press the camel onto them aligning your marks; hold until the glue sets.
Step 9
Tape along the edges where the camel meets each rocker to reinforce the joints.
Step 10
Tape or glue the long straw to the camel’s back to make a little push handle.
Step 11
Decorate your camel with colouring materials to make it look fun and unique.
Step 12
Gently place your camel on a flat surface and give the straw handle a light push to test its rocking motion.
Step 13
Share a photo or video of your finished rocking camel on DIY.org.
Help!?
What can I use instead of cardboard or plastic straws if I can't find them?
Substitute thin foam-board, corrugated cereal-box cardboard, or a cereal-box doubled over for the camel and rockers, and use rolled-up paper tubes, wooden coffee stirrers, or slim dowels in place of the short straw pieces and long straw handle.
Why won't my camel rock smoothly or stay balanced after I tape and glue it to the rockers?
If it wobbles or sticks, check that the two rocker curves are identical length and curvature, reposition the taped short straw pieces so they line up with the mark made when you placed the camel in step 6, trim any rough cardboard edges, and reinforce the glued joints in step 7 with extra tape as described in step 8.
How do I adapt the steps for different ages so it's safe and fun?
For preschoolers have an adult do the cutting in steps 3–4 while the child tapes the short straw pieces in step 5 and decorates in step 10, for school-aged kids let them use safety scissors and do all steps with supervision, and for older kids challenge them to design more complex rocker curves and stronger glued joints in step 7 to carry small figures.
How can we personalize or make the camel project more challenging after finishing the basic rocker?
Decorate the camel in step 10 with painted patterns, glue on a fabric saddle or small pom-poms, add a weighted base under the camel to change the rocking motion from step 11, or attach tiny figures to test balance and then share the result on DIY.org as suggested in step 12.
Watch videos on how to Ride That Camel
Camel Riding Adventure in Moroccan Desert 🌵 Educational Videos for Kids 🐪 Animals for Kids
3 Videos

Camel Riding Adventure in Moroccan Desert 🌵 Educational Videos for Kids 🐪 Animals for Kids

Camels for Kids | Learn all about this adaptable animal
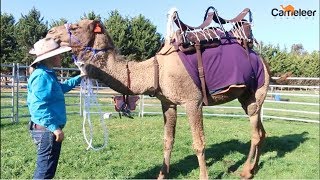
How to Saddle a Camel
Facts about toy making and simple machines for kids
🐫 Camels come in two main kinds: dromedaries with one hump and Bactrian camels with two humps.
🪀 Rocking toys have been enjoyed for centuries — rocking horses were popular in Europe as early as the 1600s.
⚖️ The spot where your cardboard camel balances is called its center of mass — move it and the rocking changes!
📐 The curve of the rocker controls motion: a deeper curve makes quicker rocking, a shallower curve makes it gentler.
♻️ Corrugated cardboard is lightweight, surprisingly strong when folded, and easy to recycle or reuse for crafts.
How do I build a rocking cardboard camel toy that rocks when pushed?
What materials do I need to make the Ride That Camel cardboard rocker?
What ages is the Ride That Camel cardboard rocking toy suitable for?
What are the benefits, safety tips, and fun variations for the Ride That Camel activity?
