Recreate Leaf Pop Up Card on Paper
Make a paper pop-up card featuring layered leaves using cutting, folding, and coloring techniques to learn symmetry and simple paper engineering.


Step-by-step guide to recreate a leaf pop-up card on paper
Step 1
Clear a workspace and lay out all your materials so everything is easy to reach.
Step 2
Fold a sheet of paper in half to make the card base and press the fold flat.
Step 3
Fold a piece of scrap paper in half and draw half of a leaf shape along the folded edge to make a symmetrical template.
Step 4
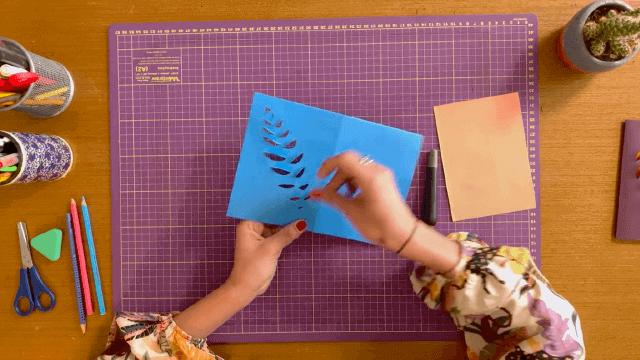
Cut along the drawn line through both layers and open the scrap paper to reveal your full symmetrical leaf template.
Step 5
Use the leaf template to trace at least three leaf shapes of different sizes onto colored paper.
Step 6
Cut out each traced leaf carefully following the outline.
Step 7
Draw veins and color each leaf using your coloring materials to make them look leafy and bright.
Step 8
Cut small rectangles from scrap paper and fold each rectangle in half to make pop-up tabs.
Step 9
Glue one half of a folded tab to the back center of each leaf and press to stick.
Step 10
Open the card and arrange the leaves inside from largest at the back to smallest at the front without gluing yet.
Step 11
Glue the other half of each folded tab to the inside of the card where you arranged the leaves so they pop up when the card opens.
Step 12
Let the glue dry completely so the pop-up leaves stay secure.
Step 13
Decorate the front of the card and write a message to finish your design.
Step 14
Take a photo of your pop-up leaf card and share your finished creation on DIY.org.
Help!?
What can we use if we don't have colored paper or white glue for the leaves and pop-up tabs?
If you don't have colored paper, color plain printer paper with markers or crayons for the traced leaf shapes, and swap white glue for double-sided tape, glue dots, or a glue stick when attaching the folded pop-up tabs.
Why won't my leaves stay upright when I open the card and how do I fix it?
If leaves flop down, make sure each folded tab has one half glued to the back center of the leaf and the other half glued to the inside card with the fold pointing outward, press the tab firmly while the glue sets, and let the glue dry completely or use stronger tape if needed.
How can I adapt this pop-up card activity for a 4-year-old and a 10-year-old?
For a 4-year-old, pre-cut the leaf templates and folded pop-up tabs so they can color and stick (steps: color, glue tabs to leaves, and press into the card), while a 10-year-old can trace more complex leaf shapes, add detailed veins, and arrange 5–8 layered leaves for a denser pop-up scene.
What are some fun ways to personalize or extend the finished pop-up leaf card?
After you arrange and glue the leaves and let the glue dry, personalize the card by drawing named veins on each leaf, adding stickers or sequins, using patterned scrapbook paper for some leaves, or tucking a tiny folded message or seed packet behind the largest leaf for a surprise.
Watch videos on how to recreate a leaf pop-up card on paper
Easy Pop Up Friendship Cards How To - 3d Children's Day Card DIY
4 Videos
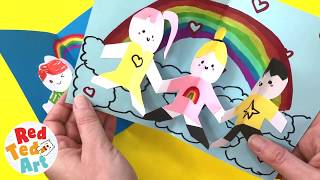
Easy Pop Up Friendship Cards How To - 3d Children's Day Card DIY
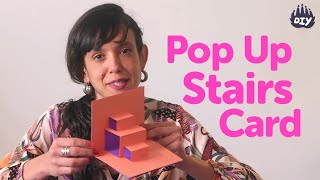
How to Make a Pop Up Stairs Card! | Paper Craft | DIY.org
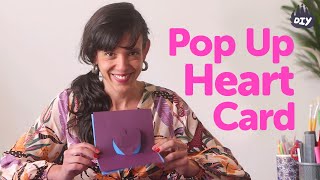
How to Make a Pop Up HEART Card! | Paper Craft | DIY.org
Easy Halloween Pop Up Cards (with Halloween Jokes for Kids) - Easy Paper Crafts DIY
Facts about paper crafting and basic paper engineering for kids
🍃 Leaves come in lots of shapes—some are perfectly symmetrical, others are not, which makes great templates for pop-up layers.
✂️ Kirigami is the art of folding and cutting paper; a few smart cuts can turn a flat card into a surprising 3D scene.
📚 Pop-up paper engineering uses tabs, slots, and folds so parts lift when you open the card—these are called mechanisms.
📐 Folding paper in half before drawing helps you make matching leaf halves quickly—an easy trick to learn symmetry.
🎨 Stacking 3–5 differently colored or textured leaf layers creates a strong depth effect without complicated steps.
How do you make a leaf pop-up card on paper?
What materials do I need to make a layered leaf pop-up card?
What ages is a leaf pop-up card suitable for?
What are the benefits of making a layered leaf pop-up card?
