Recreate First Letter of Your Name With Negative/Positive Technique
Create your name's first letter using positive and negative space with paper, paint, and scissors, then compare color contrasts and composition outcomes.


Step-by-step guide to recreate the first letter of your name using the negative/positive technique
Step 1
Clear a table and cover it with scrap paper or cardboard to protect the surface.
Step 2
Choose the first letter of your name and pick two strong contrasting paint colors to use.
Step 3
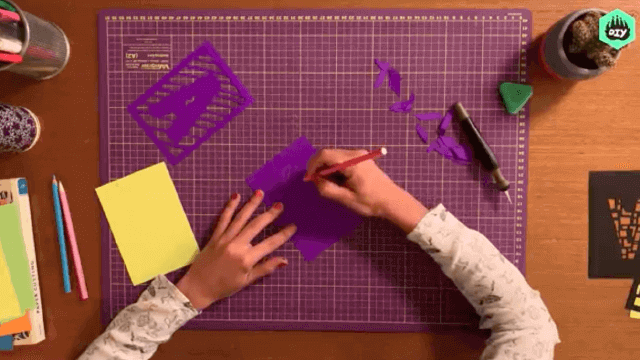
Take one sheet of paper and draw a large bold block version of your letter in the center with a pencil.
Step 4
Carefully cut out the letter from that sheet to make a letter-shaped stencil.
Step 5
Place the cutout stencil on a second sheet and trace around it with your pencil to mark the letter outline.
Step 6
Paint the cutout stencil with your first color to make the positive-version letter and let it dry.
Step 7
Paint the area around the traced outline on the second sheet with your second color leaving the letter shape unpainted so the letter appears as negative space and let it dry.
Step 8
Glue the dry painted cutout onto a blank sheet to create the mounted positive composition.
Step 9
Put the positive and negative pieces side-by-side and compare which color and composition makes the letter stand out more and why.
Step 10
Take a photo of your finished pieces and share your creation on DIY.org.
Help!?
If I don't have acrylic paint or scrap cardboard, what can I use instead?
Use washable tempera or poster paint for the paint steps and substitute scrap cardboard with a cereal box or thick construction paper to protect the table and to cut your stencil from during the cut-and-paint steps.
My stencil keeps tearing or the paint bleeds under it—how can I fix that?
Reinforce the pencil-drawn letter by tracing it onto thicker cardboard before cutting, tack the cutout stencil down with small pieces of tape when tracing or painting, and let each painted layer fully dry before gluing the cutout in the mounting step to prevent tearing and bleed.
How can I adapt this letter negative/positive activity for different ages?
For preschoolers, use pre-cut foam letters and washable paint and skip cutting, for elementary kids follow all steps with safety scissors, and for teens add precise block-letter designs, finer brushes, or layered stencils for more complex compositions before photographing the final pieces.
What are some ways to extend or personalize the finished positive/negative pieces?
Before gluing the cutout in the mounting step, add patterned paper, textured paint, metallic accents, or a painted border to the blank sheet, create a series of the same letter in different contrasting color pairs, then photograph and share the set on DIY.org as a mini-exhibit.
Watch videos on how to recreate the first letter of your name using the negative/positive technique
Negative Name Art Tutorial - Art With Trista
3 Videos
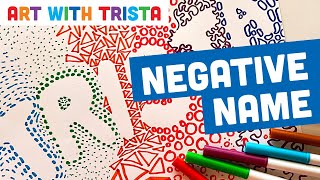
Negative Name Art Tutorial - Art With Trista
How to write your name ✍ Kindergarten Handwriting for kids in English
How to Write Letters A-Z - Learning to Write the Alphabet for Kids - Uppercase and Lowercase Letters
Facts about negative and positive space in visual art for kids
🎨 Negative space can trick your brain — people often 'see' a missing shape just from the areas around it.
✂️ Papercutting is an ancient art with examples over 2,000 years old, used in decorations and storytelling around the world.
🔤 Typography tips: fonts with thick, even strokes (like bold sans-serifs) create strong positive shapes for letter art.
🌈 High-contrast color pairs (black and white, blue and yellow) make letters jump out, while low-contrast pairs feel softer and subtler.
🧠 Our brains can recognize letters even when parts are missing, which is why negative/positive techniques work so well for names.
How do you recreate the first letter of your name using the negative/positive technique?
What materials do I need to make a positive/negative first-letter art project?
What ages is this activity suitable for?
What are the benefits, safety tips, and fun variations for this name-letter activity?
