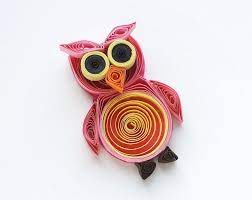
Quill to Create an Owl
Make a feathered owl craft using a quill, paper, glue, and paint; design eyes, wings, and patterns while learning about bird features.


Step-by-step guide to Quill to Create an Owl
Quilling Owl Tutorial | 14 easy Designs for Beginners 🦉
Step 1
Gather all your materials and set them on a clean flat workspace.
Step 2
Use your pencil to draw a big oval shape on the paper for the owl’s body.
Step 3
Carefully cut out the oval shape with scissors.
Step 4
Paint a solid base color onto the owl body using your paintbrush.
Step 5
Wait quietly until the paint is completely dry.
Step 6
Use the quill to paint short feather strokes across the owl’s body to make feather texture.
Step 7
Draw two wing shapes and a small triangle beak on another piece of paper.
Step 8
Cut out the wings and the beak with your scissors.
Step 9
Glue the wings and the beak onto the owl’s body in the right places.
Step 10
Add eyes by gluing on small craft eyes or drawing and coloring round eyes with your marker.
Step 11
Use markers or colouring materials to add patterns and details like speckles eyebrows and wing lines.
Step 12
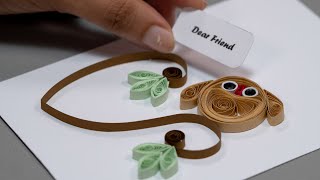
Write three small labels that say "eyes" "wings" and "beak" on little scraps of paper.
Step 13
Glue each label next to the matching feature on your owl to show what they are.
Step 14
Share a photo of your finished feathered owl craft on DIY.org.
Help!?
What can we use if we don't have a quill or small craft eyes?
Use a clean feather, thin paintbrush, or cotton swab to make the short feather strokes in step 6, and draw and color round eyes with your marker as a substitute for the craft eyes in step 10.
My paint keeps smudging when I try to add quill strokes — what should I do?
If the paint from step 4 is still wet and smears when you add the quill strokes in step 6, let it air-dry longer or speed drying with a hair dryer on low before continuing.
How can I adapt this activity for younger children or older kids?
For younger children, pre-cut the owl oval, wings, and beak (steps 2–3 and 8) and let them paint and glue the labels, while older kids can add layered paper feathers, detailed marker patterns in step 11, and replace the simple labels in step 13 with short owl facts.
How can we extend or personalize the owl craft once it's finished?
Personalize and extend the project by gluing on real feathers or felt in step 6 for extra texture, attaching the wings with a paper fastener at step 9 so they move, and making a decorated background to photograph and share on DIY.org (step 15).
Watch videos on how to Quill to Create an Owl
How to make Kids Quilling- Owl PAPER simple QUILLING PROJECTS FOR CHILDREN beginner|svhandmades
4 Videos
How to make Kids Quilling- Owl PAPER simple QUILLING PROJECTS FOR CHILDREN beginner|svhandmades
How to Make Easy Quilled Owl - Quilling Art - DIY Paper Crafts
How to quill OWLs Easy Quilling Tutorial Quilling Easy Birds Episode 1:
How to make a cute quilled animals - Easy paper quilling owl tutorial
Facts about bird features and owls
🦉 Owls can turn their heads about 270° — their necks have 14 vertebrae (twice as many as humans) to help them look around without moving their bodies.
🪶 Feathers are made mainly of keratin, the same protein in our hair and nails, and they help with flying, insulation, and display.
✒️ Quill pens were usually made from large flight feathers (often goose) and were the main writing tool in Europe for over 1,000 years.
👀 Many owls have forward-facing eyes and a facial disk that helps funnel sound to their ears — great for spotting and hearing prey at night.
🌬️ Owl flight is nearly silent because their special wing feathers reduce air noise, letting them sneak up on prey.
How do you make a feathered owl craft using a quill?
What materials do I need for the Quill to Create an Owl craft?
What ages is the Quill to Create an Owl activity suitable for?
What are the benefits and fun variations of this owl quill craft?
