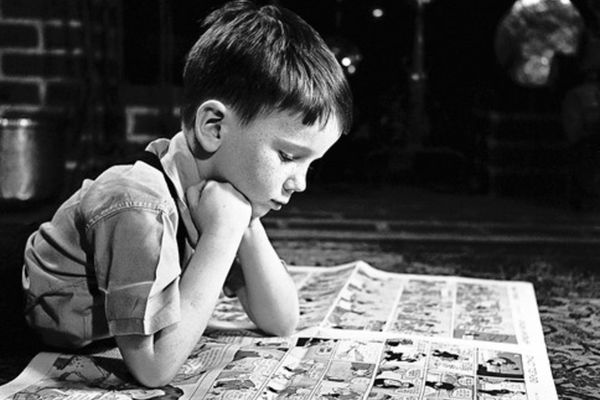
Publish a comic
Write, illustrate, and assemble a short comic book, plan panels and dialogue, create a cover, then share copies with friends or family.


Step-by-step guide to publish a comic
How to Make Your Own Comic | Toontorial | @cartoonnetworkuk
Step 1
Find a quiet workspace and lay out all your materials so you’re ready to make your comic.
Step 2
Think of one simple idea for your story and decide on the main character and the problem they face.
Step 3
Decide how many pages your comic will have (try 4 to 8 pages) and choose how many panels per page.
Step 4
Sketch tiny thumbnail layouts of each page to plan where the panels and action will go.
Step 5
Write one or two short sentences of dialogue or captions for each panel to plan what characters will say.
Step 6
Design a cover by drawing the title and one big picture of your main character on a separate sheet of paper.
Step 7
Use your ruler to draw neat panel borders on each full-size page following your thumbnails.
Step 8
Lightly pencil-sketch the scenes and characters inside each panel on the full-size pages.
Step 9
Trace over your pencil drawings with a black pen or darker pencil to make the final lines.
Step 10
Carefully erase the extra pencil marks so your inked drawings look clean.
Step 11
Colour the pictures in each panel using your colouring materials to make the comic bright and fun.
Step 12
Neatly write the dialogue and captions into speech bubbles and caption boxes on each panel.
Step 13
Stack the pages in order and staple or fold and glue them to assemble your comic book; make extra copies by redrawing or ask an adult to help photocopy or scan and print.
Step 14
Share your finished comic book on DIY.org so friends and family can see your story.
Help!?
What can we use if we don't have a ruler, black pen, or a stapler mentioned in the materials?
If you don't have a ruler, use the straight edge of a book or piece of cardboard to draw neat panel borders with pencil and trace with a dark pencil or marker instead of a black pen, and bind pages by folding them in half or using tape if you don't have a stapler.
My pages look messy after inking and erasing—how can I fix smudges or leftover pencil marks?
To prevent smudges after you trace with a black pen, let the ink dry completely and then erase gently with a soft eraser, and if small mistakes remain you can cover them with a tiny dot of white correction fluid or carefully redraw the area.
How should I change the project for younger kids versus older kids?
For younger kids, simplify the process to 4 pages with 2–3 large panels, help them sketch thumbnails and write dialogue aloud, and for older kids encourage 6–8 pages, detailed thumbnails, neat ruler-drawn borders, and fine inking with a black pen.
What are some creative ways to improve or personalize our finished comic?
Personalize your comic by designing a special cover with a big picture of your main character, adding sound-effect lettering in panels before colouring with your colouring materials, creating extra copies by scanning or photocopying the assembled book, and sharing it on DIY.org for feedback.
Watch videos on how to publish a comic
How To Make A Comic? Step By Step Comic Creation Guide For Beginners To Draw And Publish
4 Videos

How To Make A Comic? Step By Step Comic Creation Guide For Beginners To Draw And Publish
How to make a comic strip in canva (step-by-step in 2024)
Create a Children's Book to Sell on Amazon KDP | Step by Step Tutorial to Self-Publish in 2024
How To Create A Graphic Novel: Step By Step For Beginners
Facts about comic book creation for kids
🎨 Many comic pages use 6–9 panels as a common layout — but you can mix sizes to make action feel fast or slow.
🗨️ Speech balloons started appearing in 19th-century cartoons and became the standard way to show characters talking.
📚 Famous Funnies (1930s) is often called the first modern American comic book.
✂️ Homemade comics (zines) are easy to self-publish: photocopy, fold, and staple to share with friends and family.
🌍 Comics are global: Japan’s manga industry is huge, and many comics are translated into dozens of languages.
How do I help my child write, illustrate, assemble, and publish a short comic book?
What materials do I need to create and publish a homemade comic book?
What ages is making and publishing a comic book suitable for?
What are the benefits of my child creating and sharing a comic book?
