Pour It Out
Practice pouring water and safe liquids into different containers to measure volume, compare flow rates, and learn about capacity and steady hand coordination.


Step-by-step guide to Pour It Out
How to Pour Liquid From a Bottle
Step 1
Put the tray on a flat table and place the towel next to it.
Step 2
Set out several different containers on the tray so you can reach each one.
Step 3
Fill the measuring cup to the 1 cup or 250 ml mark with water.
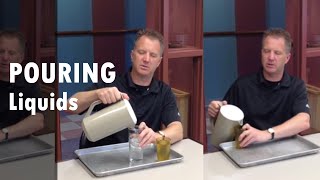
Step 4
Pour the water from the measuring cup into Container A using a steady hand while you count seconds out loud until the pour stops.
Step 5
Refill the measuring cup to the same mark and pour into Container B the same way while you count seconds out loud again.
Step 6
Say which pour was faster and point to the container that emptied first.
Step 7
Put the funnel on a narrow container and pour the same measured water through the funnel while you count seconds.
Step 8
Fill the largest container to the top with water.
Step 9
Pour the large container into the smallest cup repeatedly and count how many full small cups you make.
Step 10
Try adding a drop of food coloring to the measuring cup and pour again to watch the flow more clearly.
Step 11
Pour any remaining water into the sink carefully.
Step 12
Dry the tray and containers with the towel and put everything away.
Step 13
Share your finished Pour It Out practice and what you discovered on DIY.org.
Help!?
What can we use instead of the 1 cup (250 ml) measuring cup if we don't have one?
If you don't have a 1 cup (250 ml) measuring cup, use any clear cup or jar and measure 250 ml on a kitchen scale or by pouring half of a labeled 500 ml bottle and mark that 250 ml line with masking tape so you can still 'Fill the measuring cup to the 1 cup or 250 ml mark' for the pours.
My pours keep spilling or are uneven—how can we make steadier pours?
Rest your elbow on the table, hold the measuring cup with both hands, pour slowly over the tray edge or use the funnel when pouring into narrow containers, and keep the towel next to the tray to catch drips as you 'count seconds' during each pour.
How can I adapt the steps for different age groups?
For toddlers, simplify by letting them pour larger amounts into the biggest container with supervision and skip counting, for early elementary follow the instructions exactly with counting and small-cup repeats, and for older kids turn the funnel and food-coloring step into a timed experiment and record which container emptied first.
What are some fun ways to extend or personalize the Pour It Out activity?
Add the suggested drop of food coloring to make flows easier to see, decorate and label Containers A and B, test different liquids like soapy water or oil when refilling the measuring cup, and create a chart or take photos to 'Share your finished Pour It Out practice' on DIY.org.
Watch videos on how to Pour It Out
Intro to Liquids with Teacher Yazz - Part 1
4 Videos
Intro to Liquids with Teacher Yazz - Part 1
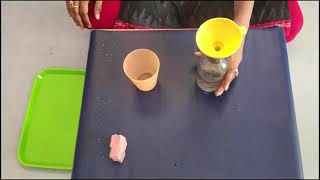
Pouring Of Water Using A Funnel - Experiment - Focus
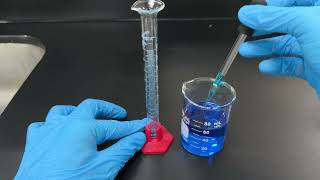
How to Transfer Liquid Reagents Correctly | SHS Chemistry Lab Skills (Wide vs Narrow Containers)
Pouring liquids when low vision or blind
Facts about measuring volume and capacity
🧪 A teaspoon is about 5 milliliters — a tiny pour perfect for practicing precision!
🚰 Doubling a spout's diameter increases the opening area about fourfold, so flow can jump a lot!
🐝 Honey and syrup are much more viscous than water — they can take minutes to pour the same scoop!
🎯 Practicing steady pours builds fine motor skills and hand-eye coordination used in writing and dressing.
📏 A standard US measuring cup is 240 mL — try filling it with smaller containers to add up volumes!
How do I set up and run the 'Pour It Out' activity with my child?
What materials do I need for the 'Pour It Out' activity?
What ages is the 'Pour It Out' activity suitable for?
What are the benefits and safety tips for the 'Pour It Out' activity?
