Pop your desserts with oil pastels
Create bright, pop-art dessert illustrations using oil pastels, practicing blending, layering, and highlights to make cakes, ice cream, and pastries look tasty and bold.


Step-by-step guide to Pop your desserts with oil pastels
Step 1
Arrange your drawing paper and oil pastels on a clean flat table so everything is easy to reach.
Step 2
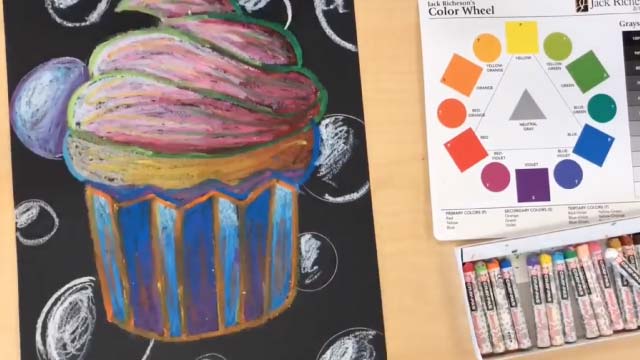
Lightly sketch one or more dessert shapes like a cake slice ice cream cone or pastry with your pencil.
Step 3
Choose 3–5 bright colors for one dessert to make it pop.
Step 4
Test each chosen color on the scrap paper to see how they look together and how they blend.
Step 5
Fill a dessert shape with a flat base color using even pressure from an oil pastel.
Step 6
Add a darker pastel along the bottom or one side of the dessert to create a shadow.
Step 7
Layer a mid-tone pastel between the base color and the shadow to build depth.
Step 8
Blend the layered colors by rubbing gently with a clean finger or a tissue until the transition looks smooth.
Step 9
Add bright highlights with the white gel pen or a very light pastel where light would hit the dessert.
Step 10
Outline the dessert shapes with a black oil pastel or black marker to make them bold and pop-art style.
Step 11
Decorate the background with bold patterns like polka dots or stripes using contrasting colors.
Step 12
Sign your name on the artwork in a corner to finish your piece.
Step 13
Share your finished creation on DIY.org
Help!?
What can I use if I can't find oil pastels or a white gel pen?
If you don’t have oil pastels, use soft crayons or chalk pastels to fill and blend dessert shapes on scrap paper, and replace the white gel pen with a white colored pencil or a tiny dab of white acrylic paint for highlights while using a black crayon or marker to outline.
My colors look streaky or muddy when I blend—what should I do?
Test each chosen color on the scrap paper, apply a flat base color with even pressure, add the darker shadow and mid-tone layers, then rub gently with a clean finger or tissue to create smooth transitions and avoid muddying the colors.
How can I adapt this activity for different age groups?
For younger kids pre-sketch large dessert shapes and limit to 2–3 bold colors with adult help for even base filling and gentle finger blending, while older children can use 3–5 colors, practice mid-tone layering and shadow placement, add detailed background patterns, outline with black oil pastel or marker, and sign and share on DIY.org.
How can we make the finished dessert art more special or advanced?
Try metallic or neon oil pastels for extra pop, experiment with a blending stump or tissue for different textures, add bold polka-dot or stripe backgrounds in contrasting colors, finish outlines with a black oil pastel or marker for a pop-art effect, and sign and post on DIY.org.
Watch videos on how to Pop your desserts with oil pastels
how to draw a dessert with oil pastel tutorial for beginners #art #drawing
4 Videos
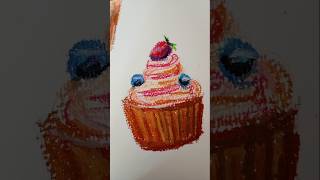
how to draw a dessert with oil pastel tutorial for beginners #art #drawing
Art Tips - 5 Tips For Using Oil Pastels
Oil Pastels for Beginners - Full Step by Step Tutorial

Easy Oil Pastel Drawing for Kids | Oil Pastel Art for Kids
Facts about oil pastel art for kids
🎨 Pop art turned everyday items into bold icons — Andy Warhol’s Campbell’s Soup Cans made soup look famous!
🖍️ Oil pastels are creamy sticks of pigment and oil that blend easily, layer well, and stay vividly colorful without fully drying.
🍭 Bright, contrasting colors can make desserts look more appetizing and even change how we think they’ll taste.
✨ Tiny white highlights and strong shadows are quick tricks that make cakes and ice cream look shiny and three-dimensional.
🧁 Artists have painted food for centuries to practice texture and color—desserts are perfect for playful experiments!
How do I create pop-art dessert illustrations with oil pastels?
What materials do I need to Pop your desserts with oil pastels?
What ages is this oil pastel dessert activity suitable for?
What are the benefits of making pop-art dessert illustrations with oil pastels?
