#PhotoFestival21 - Day 9 : School
Create a mini photo story of your school day using a camera or phone. Take, select, and arrange five pictures into a printed collage.


Step-by-step guide to create a mini photo story of your school day
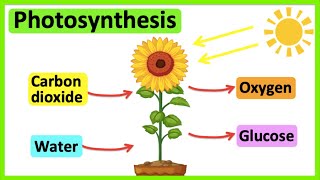
Photosynthesis
Step 1
Think of five moments from your school day that you want to tell with pictures.
Step 2
Write a one-word caption next to each moment on a small list.
Step 3
During your school day take photos that show each of your five moments.
Step 4
After school open your photo gallery and look through the pictures you took.
Step 5
Choose the best photo for each of your five moments.
Step 6
Edit each chosen photo to crop or adjust brightness so it looks great.
Step 7
Print the five edited photos onto printer paper.
Step 8
Lay your poster board flat and place the five printed photos on it to try different layouts.
Step 9
Trim any extra white edges from the photos with scissors.
Step 10
Glue the photos onto the poster board in your chosen layout.
Step 11
Write the one-word captions and a title under each photo using coloring materials.
Step 12
Add drawings or decorations around the photos to finish your collage.
Step 13
Share your finished collage on DIY.org
Help!?
What can we use if we don't have a printer or poster board?
If you don't have a printer, display the five edited photos on a phone or tablet during the layout step or print them at a library, and if you don't have poster board use a large sheet of cardboard or several taped-together printer papers to glue the photos onto.
What should we do if photos turn out blurry or the glue wrinkles the paper?
If a photo is blurry, retake that moment during the school day or choose a clearer picture from your gallery, and if the glue wrinkles the paper try a glue stick or double-sided tape and smooth each photo from the center outward when attaching to the poster board.
How can this activity be adapted for younger children or older kids?
For younger children, choose three big, simple moments, have a parent take and pre-print the photos and let the child glue and write large one-word captions, while older kids can capture more moments, do finer edits (crop/brightness), add typed captions or a short paragraph, and experiment with more complex layouts.
How can we enhance or personalize the finished collage before sharing on DIY.org?
After gluing and writing the one-word captions, personalize the collage by trimming photos into shapes, adding drawings, stickers, washi tape borders or dates, and writing a short explanation on the back to make it uniquely yours before photographing it to share on DIY.org.
Watch videos on how to create a mini photo story of your school day
Photosynthesis 🌷 | What is photosynthesis? | Step-by-step process
4 Videos
Photosynthesis 🌷 | What is photosynthesis? | Step-by-step process

Photosynthesis: Crash Course Biology #8
Photosynthesis | HHMI BioInteractive Video

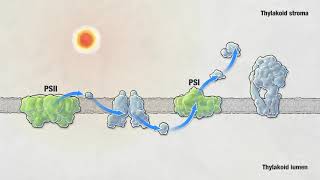
Photosynthesis - Light Dependent Reactions and the Calvin Cycle
Facts about photography for kids
📷 Over 80% of photos taken today are captured on smartphones, so your phone is a powerful storytelling tool.
🖼️ Collage became a famous art technique in the early 1900s — artists like Picasso and Braque helped invent it.
🧭 A simple five-photo story often follows: establish, detail, action, reaction, and ending — just like a tiny movie.
🖨️ Printing photos can reveal colors and details you might miss on a screen, making collages extra fun to tweak.
🎒 Kids typically spend about 6–7 hours at school each weekday — that's lots of little moments to capture.
How do I create a mini photo story of my school day?
What materials do I need to make a school day photo collage?
What ages is this mini photo story activity suitable for?
What safety and privacy tips should I follow when photographing at school?
