#PhotoFestival21- Day 5 : Little
Create a mini photo series of small everyday objects using a smartphone or camera, exploring close-up composition, lighting, and creative perspectives.


Step-by-step guide to create a mini photo series of small everyday objects
GCSE Biology - Photosynthesis
Step 1
Pick a fun theme for your mini photo series such as round things tiny tools or favorite snacks.
Step 2
Gather five small everyday objects that match your theme and put them on a tray.
Step 3
Set up a plain background on a flat surface using paper or fabric so your objects stand out.
Step 4
Place the first object on the background and tape or use sticky putty to keep it steady.
Step 5
Position your lamp or torch to light the object from the side or above to make it look dramatic.
Step 6
Open your smartphone or camera and switch to close-up or macro mode if it has one.
Step 7
Take at least two photos of the object using different angles and distances so you get lots of choices.
Step 8
Move the lamp to a new position to make interesting shadows or highlights.
Step 9
Take one more photo of the object with the new lighting to see how it changes the mood.
Step 10
Repeat Steps 4 to 9 for each of the other objects until you have several photos for each item.
Step 11
Look through all your photos and pick the five images that look best together as a set.
Step 12
Edit the five chosen photos on your phone by cropping and adjusting brightness if you want.
Step 13
Arrange the edited photos into an order that tells a tiny visual story.
Step 14
Write a short caption for each photo in your notebook to explain your idea.
Step 15
Share your finished mini photo series on DIY.org
Help!?
What can we use if we don't have a tray, lamp, or sticky putty?
If you don't have a tray, use a cereal bowl or hardcover book for step 2, substitute a desk lamp or window sunlight for the torch in step 5, and replace sticky putty with a small piece of blu-tack or rolled modeling clay to steady objects in step 4.
My photos are coming out blurry or the objects keep falling over—what should I try?
If shots are blurry or items move, press the tape or sticky putty firmer (step 4), rest the phone on a stack of books for steadier close-up/macro shots (step 6), and wipe the lens before shooting.
How can I adapt this activity for different ages?
For younger kids pick three very safe objects and have an adult set the lamp and take photos (steps 1–6), while older kids can explore manual focus, more lighting positions (step 7), and fuller phone edits to build the five-photo story (steps 11–13).
How can we make the mini photo series more creative or personalized?
To enhance the set, add colored cellophane over the lamp for different moods (step 7), craft tiny paper props or textured backgrounds for step 3, and print the final five edited photos into a mini zine or slideshow to share on DIY.org (steps 11–13).
Watch videos on how to create a mini photo series of small everyday objects
Photosynthesis in plants for children - Natural Science for kids
4 Videos
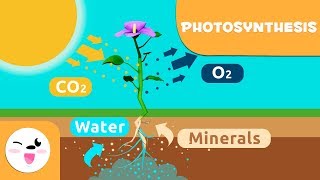
Photosynthesis in plants for children - Natural Science for kids
SPOTLIGHT: Photosynthesis | Encyclopaedia Britannica
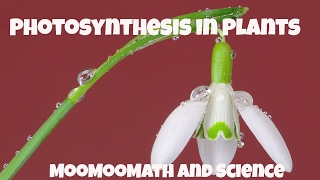
Photosynthesis in Plants- Learn how plants make food

GCSE Biology Revision "Photosynthesis"
Facts about photography for kids
📱 Most photos today are taken on smartphones — they put a powerful camera in your pocket for quick mini series.
🔬 In photography, "macro" usually means 1:1 magnification, where the subject appears life-size on the camera sensor.
💡 Soft window light is a favorite trick: it creates gentle, even lighting that’s perfect for close-ups of small objects.
🎯 Placing tiny objects off-center using the rule of thirds often makes compositions feel more dynamic and interesting.
🌈 A simple single-color background (paper or fabric) helps small items stand out and keeps the viewer’s eye on the subject.
How do I create a mini photo series of small everyday objects with a smartphone?
What materials do I need for a mini close-up photo series?
What ages is this mini photo series activity suitable for?
What are the benefits, safety tips, and variations for this photography activity?
