Paper Rose Challenge!
Fold, cut, and roll colored paper to create a realistic paper rose, practicing fine motor skills, measurements, and decorating with safe glue and scissors.


Step-by-step guide to make a paper rose (Paper Rose Challenge)
Step 1
Gather all the materials and clear a small workspace on a table.
Step 2
Choose a color for your rose and choose green for the stem.
Step 3
Use the pencil and ruler to draw a circle about 10–12 cm across on the colored paper.
Step 4
Cut out the circle carefully with the scissors.
Step 5
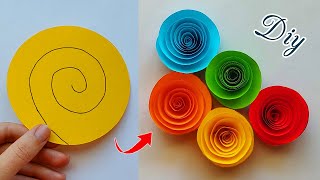
Draw a spiral from the outer edge toward the center, leaving a small circle in the middle for the bud.
Step 6
Cut along the spiral line to make one long paper strip.
Step 7
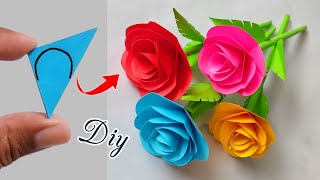
Start at the outer end and roll the spiral tightly toward the center to form the rose petals.
Step 8
Let the rolled paper loosen slightly until it looks like a natural rose bloom.
Step 9
Put a small dot of glue on the flat base and press the rolled rose down to secure it.
Step 10
Cut a long thin strip of green paper and roll it tightly to make a stem, then glue the end to hold it.
Step 11
Glue the stem to the base of the rose so it stays in place.
Step 12
Cut a leaf shape from leftover green paper.
Step 13
Glue the leaf onto the stem near the rose.
Step 14
Take a photo of your paper rose and share your finished creation on DIY.org.
Help!?
What can we use if we don't have colored paper, a ruler, or white glue for this paper rose activity?
If you don't have colored paper, color plain printer paper with markers before step 2, use a bowl or lid to trace a 10–12 cm circle instead of a ruler in step 2, and swap white glue for a glue stick or double-sided tape to secure the base in step 8.
My spiral tore or the rose won't stay rolled—how do I fix that?
If the spiral rips while cutting in step 4, cut more slowly or reinforce the back with a small piece of tape, and if the roll won't hold in step 7 add a tiny dot of glue to the flat base in step 8 and hold firmly until set, using stronger glue if the stem from step 9 won't stick.
How can I adapt this project for different ages or skill levels?
For ages 3–5, have an adult pre-cut the 10–12 cm circle and spiral in steps 2–4 so the child can focus on rolling and gluing in steps 6–8, for 6–8 year olds let them draw and cut with supervision, and for 9+ encourage larger circles, multiple spirals, or wired stems in step 9.
What are some ways to extend or personalize the paper rose after it's finished?
To personalize and extend the activity, color or paint petal edges before rolling in step 6, add glitter or patterned paper after step 7, glue several roses together after step 11 to make a bouquet, or attach the finished rose to a card before photographing for DIY.org.
Watch videos on how to make a paper rose (Paper Rose Challenge)
Easy and Beautiful Paper Rose Making 🌹| How To Make Rose Flower
4 Videos
Easy and Beautiful Paper Rose Making 🌹| How To Make Rose Flower
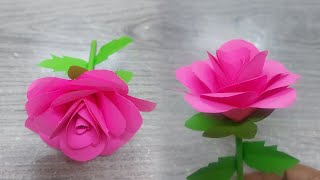
How to Make a Paper Rose | Easy DIY Paper Flower | rose flower making idea #craft #diy
Easy and Beautiful Paper Rose Making 💐| How To Make Flower Rose, Origami Rose
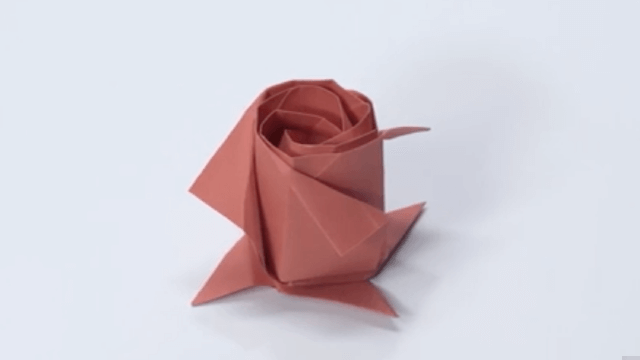
🌹 Origami Rose: Easy Paper Craft DIY Tutorial for Kids & Beginners 💖 @CreativeImmersionStudio
Facts about paper flower crafts
🌹 Many paper roses are made from a single spiral cut of paper that’s rolled up — some designs need no glue at all!
✂️ Crepe paper stretches and holds curves, which makes it perfect for shaping realistic petals.
📏 Matching petal sizes practices measuring skills — just a few millimeters can change how a flower looks.
🧠 Folding, cutting, and rolling paper helps build fine motor skills and concentration for kids.
🎨 There are over 300 wild species of roses, so you can invent endless color combinations for your paper garden.
How do you make a paper rose in the Paper Rose Challenge?
What materials do I need for the Paper Rose Challenge?
What ages is the Paper Rose Challenge suitable for?
What are the benefits of doing the Paper Rose Challenge?
