Mold a shoe last
Make a simple shoe last model using air-dry clay or papier-mâché over a traced foot, shaping and smoothing to learn about shoe design.

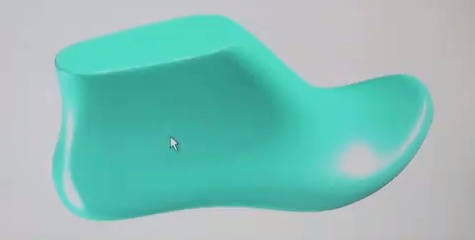

Step-by-step guide to make a simple shoe last model
How Bespoke Shoe Lasts are Made | By Dominic Casey
Step 1
Stand on a sheet of paper and trace your foot outline with a pencil.
Step 2
Cut out the paper foot shape carefully with scissors.
Step 3
Cut a piece of cardboard slightly larger than the paper foot to make a sole.
Step 4
Tape the paper foot outline to the cardboard sole to make a stable base.
Step 5
Choose whether to build your last with air-dry clay or with papier-mâché.
Step 6
If using air-dry clay take a lump of clay big enough to cover the paper and cardboard base.
Step 7
If using air-dry clay press the clay over the base to build up heel and toe shapes into a last form.
Step 8
If using air-dry clay smooth the clay with your fingers or a damp sponge to refine the shape.
Step 9
If using papier-mâché mix paste in a bowl using white glue and water in equal parts or flour and water at a 1 to 2 ratio until smooth.
Step 10
If using papier-mâché tear newspaper into strips about one to two inches wide.
Step 11
If using papier-mâché apply three to four layers of soaked strips to the base shaping the toe and heel as you go and smoothing each layer.
Step 12
Let your shoe last dry completely for 12 to 24 hours until it is hard.
Step 13
Lightly sand any rough spots to smooth the finished shape.
Step 14
Decorate your shoe last with paint or colouring materials to show your design.
Step 15
Share your finished shoe last model on DIY.org.
Help!?
What can we use instead of air-dry clay or white glue for papier-mâché if those materials are hard to find?
If you don't have air-dry clay, use salt‑dough or oven‑bake clay to press over the paper/cardboard base, and for papier‑mâché substitute a flour‑and‑water paste (1:2) or wallpaper paste in place of white glue and use tissue paper if newspaper is unavailable.
My clay keeps falling off the cardboard base or the papier-mâché layers sag—what should we do?
If the material separates from the paper/cardboard base, re-tape the paper outline to the cardboard sole, press the clay firmly when you 'press the clay over the base', apply thinner papier‑mâché strips in more layers, and allow extra drying time beyond the 12–24 hours before sanding.
How can I adapt this shoe-last activity for younger children or make it more challenging for older kids?
For younger children have an adult 'stand on a sheet of paper and trace' and pre-cut the shapes, then let them press soft play‑dough onto the taped base, while older kids can follow the full steps to 'build up heel and toe', apply three to four papier‑mâché layers, sand, and add detailed paintwork.
How can we extend or personalize the finished shoe last beyond just painting it?
To enhance the project, lightly sand the dried last, add a glued fabric or foam insole, experiment with different heel heights when you 'build up heel and toe', seal with varnish, and then share the finished shoe last model on DIY.org.
Watch videos on how to make a simple shoe last model
Shoemaking Lesson 1 - Choosing a Last
3 Videos
Shoemaking Lesson 1 - Choosing a Last
Shoe last making | Journey as a shoemaker
What Is a Shoe Last ?
Facts about shoe design and shoemaking for kids
👣 A shoe last is a 3D model of the foot that shoemakers have used for centuries to shape and size shoes.
🥿 Shoe sizing systems differ around the world — the same foot can be several numbers apart in US, UK, and EU sizes.
🛠️ Traditional lasts were carved from wood; modern lasts can be made from plastic, metal, or even 3D-printed materials.
🧱 Papier-mâché becomes surprisingly strong when several layers are glued and dried, making it great for kid-safe molds.
🌬️ Air-dry clay hardens without firing in a kiln, so kids can make and finish simple lasts at home.
How do I make a simple shoe last model using air-dry clay or papier-mâché over a traced foot?
What materials do I need to mold a shoe last model at home?
What ages is this shoe last activity suitable for?
What are the benefits and safety tips for making a shoe last model?
