Modularize your origami
Fold multiple paper units and assemble them into a modular origami structure like a cube or star, learning precise folding and patience.


Step-by-step guide to modularize your origami
[DETAILED TUTORIAL] Origami Penguin: Simple and Easy Step-by-Step for Beginners
Step 1
Place one square sheet color side down on your table so the white or plain side faces up.
Step 2
Fold the paper in half left to right and press the crease firmly, then open it back flat.
Step 3
Fold the left edge so it lines up with the center crease and press the fold flat.
Step 4
Fold the right edge so it lines up with the center crease and press the fold flat.
Step 5
Fold the paper in half top to bottom so the two folded strips are on the outside and press the crease.
Step 6
Fold the top layer’s right corner down diagonally so the point meets the outer edge and press to make a small triangular flap.
Step 7
Fold the top layer’s left corner down the same way so you have two little triangular flaps, then flip the unit over and smooth it flat.
Step 8
Repeat Steps 1 through 7 to make a total of six identical Sonobe units.
Step 9
Hold two units at right angles and slide a triangular flap from one unit into the pocket formed at the end of the other unit until snug.
Step 10
Add a third unit by tucking its flap into the two open pockets at the corner to make a firm three-unit corner.
Step 11
Make three of these three-unit corners by repeating Step 10 until you have three corners.
Step 12
Join the three corners by sliding their remaining flaps into the matching pockets on the other corners until the cube is closed and all flaps are snug.
Step 13
Take a photo of your modular origami cube and share your finished creation on DIY.org
Help!?
What can we use if we don't have square origami paper for Step 1?
Cut regular A4 or letter printer paper into a square and place it color side down as in Step 1, or substitute with wrapping paper or sticky notes cut to the same square size.
My triangular flaps keep coming loose when I join units in Steps 10–12—how can I fix that?
Ensure all creases from Steps 2–7 are very sharp by pressing with a fingernail or bone folder and, if the joints are still loose, use slightly thicker paper or a tiny dab of glue or tape inside the pockets when assembling in Steps 10–12.
How can I adapt this activity for younger children or for older kids looking for more challenge?
For younger children, pre-fold Steps 1–7 so they only handle the simpler tucking in Step 10, and for older kids use larger or smaller squares and challenge them to build multiple cubes to combine into a bigger structure.
What are some ways to personalize or extend the modular origami cube after making the six units in Step 8?
Make the six Sonobe units from different colored or patterned sheets to create face designs, add stickers or drawings before folding, or build and photograph multiple cubes as in Step 13 to share on DIY.org.
Watch videos on how to modularize your origami
Origami Lily Tutorial 🌷 Step-by-Step Instructions
4 Videos

Origami Lily Tutorial 🌷 Step-by-Step Instructions
How to Make an Easy Origami Butterfly - Perfect for Kids & Beginners! 🦋✨

DIY Origami Turtle 🐢 | Easy Paper Turtle | Simple Origami for Beginners
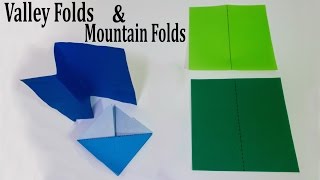
Origami Basics - Valley Folds and Mountain Folds Tutorial
Facts about origami and paper crafts
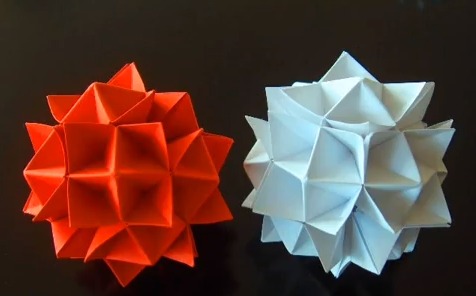
🧩 Many modular origami models are built from repeating units — a classic kusudama ball often uses 30 identical pieces to form a sphere.
✂️ Modular origami usually needs no glue: folded flaps and pockets lock units together by tucking and friction.
🌟 The Sonobe unit is a simple, popular module that can combine into cubes, stars, and many polyhedral shapes.
🧠 Robert J. Lang is a well-known origami artist who applies math and engineering to design intricate modular and single-sheet models.
⏱️ Precision and patience matter: tiny folding errors multiply as you add more units, so neat creases help assemblies fit perfectly.
How do you modularize origami into a cube or star step by step?
What materials and tools do I need for modular origami units?
What ages is modular origami suitable for and when should adults help?
What are the benefits of modular origami and how can we vary the designs safely?
