Make Your Own Ventriloquist Advanced Sock Puppet
Build an advanced ventriloquist sock puppet with a moving mouth, removable face pieces, simple controls, then learn basic silent speaking techniques and puppet manipulation.


Step-by-step guide to Make Your Own Ventriloquist Advanced Sock Puppet
Step 1
Gather all the materials from the list and lay them out on a clear work surface.
Step 2
Cut two jaw pieces from craft foam or thin cardboard about as wide as the sock toe.
Step 3
Round off one long edge of each jaw piece so one looks like an upper mouth and one looks like a lower mouth.
Step 4
Glue a popsicle stick to the back of the lower jaw piece to act as the mouth control.
Step 5
Glue a short elastic band or fabric strip to the back edges of both jaw pieces to join them so the mouth can open and close.
Step 6
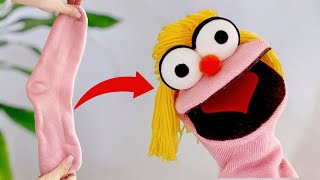
Slide the jaw assembly into the toe of the sock so the jaw sits where the puppet’s mouth will be.
Step 7
Make a small slit in the sock where the popsicle stick will come out to control the mouth.
Step 8
Pull the popsicle stick through the slit so you can move the lower jaw from outside the sock.
Step 9
Cut eyes nose and other removable face pieces from felt and attach a Velcro dot to the back of each piece.
Step 10
Stick the matching Velcro dots onto the sock where you want each removable face piece to go.
Step 11
Stuff the head area with stuffing or spare fabric and secure the open end with needle and thread or glue.
Step 12
Press each felt face piece onto its matching Velcro spot to build the puppet’s face.
Step 13
Practice silent speech in front of a mirror for five minutes by forming words while keeping your lips still.
Step 14
Put the puppet on your hand and practice opening the mouth with the stick while moving the head and pointing its eyes for five minutes.
Step 15
Share a photo or video of your finished ventriloquist sock puppet and a short performance on DIY.org
Help!?
What can I use instead of craft foam, thin cardboard, or a popsicle stick if they’re hard to find?
Cut the jaw pieces from a cereal box or two layers of stiff felt glued together and use a wooden chopstick, sturdy tongue depressor, or reinforced straw taped to the lower jaw in place of the popsicle stick.
My puppet’s mouth won’t open or the jaw assembly slips—what should I check and fix?
Check that the elastic band or fabric strip joining the jaw pieces isn’t glued too tightly and that the popsicle stick glued to the lower jaw can move freely through the slit—loosen or reattach the elastic, reglue the stick, or widen the slit slightly so the jaw opens and stays in place.
How can I adapt this ventriloquist sock puppet activity for different age groups?
For younger children have an adult pre-cut the jaw pieces and make the slit, use fabric glue and larger Velcro dots instead of sewing, and for older kids let them hand-sew the head, install a small hinge or brad for a stronger jaw, and design more detailed felt face pieces.
How can we extend or personalize the puppet beyond the basic instructions?
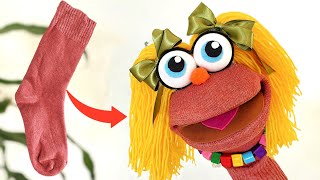
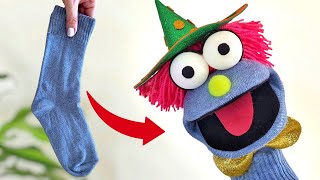
Personalize it by gluing yarn hair to the stuffed head, sewing on a fabric outfit, adding a small squeeze sound box behind the stuffing, or installing tiny LED 'eyes' and extra Velcro-backed felt accessories for interchangeable looks.
Watch videos on how to Make Your Own Ventriloquist Advanced Sock Puppet
How To Make a Sock Puppet?
4 Videos
How To Make a Sock Puppet?
How to Make a Sock Puppet Easily?
How to Make a Fun Sock Puppet | Easy Making Tutorial
What Are Some Advanced Sock Puppet Techniques? - Raising A Toddler
Facts about puppetry and ventriloquism for kids
🗣️ Ventriloquism comes from the Latin ventriloquus, meaning "speaking from the belly" — that's why ventriloquists are sometimes called belly-talkers!
🧦 Sock puppets are one of the simplest puppet types — famous TV puppets like Shari Lewis's Lamb Chop started as hand/sock puppets.
🎛️ Many moving-mouth puppets use a simple hinge-and-lever inside the head so one hand can open and close the jaw while the other controls removable face pieces.
🤫 Ventriloquists learn to reduce lip movement by substituting lip-heavy sounds (B, P, M) with similar no-lip sounds and using tongue/throat placement.
🧠 Puppetry boosts storytelling, empathy, and fine motor skills, which is why teachers and therapists often use puppet play with kids.
How do you make an advanced ventriloquist sock puppet with a moving mouth and removable face pieces?
What materials do I need to build an advanced ventriloquist sock puppet?
What ages is making an advanced ventriloquist sock puppet suitable for?
What are the benefits and safety tips for making and performing with a ventriloquist sock puppet?
