Make your own gear
Build cardboard or plastic gears, assemble a working gear train, and investigate how gear size, teeth, and arrangement change speed and direction.


Step-by-step guide to make your own gear
School Science Projects | Gear Working Model
Step 1
Cut a rectangular base from cardboard about the size of a shoebox lid so you have a flat work surface.
Step 2
Use three different sized lids or a compass to trace three circles on cardboard or plastic for small medium and large gears.
Step 3
Mark evenly spaced dots around each circle for teeth and count out these tooth numbers like this small 12 medium 20 large 40 so you can compare gear ratios.
Step 4
Draw little rectangular teeth connecting the dots around each circle so each dot becomes a tooth shape.
Step 5
Cut out each gear carefully along the outer edge to make three separate gears.
Step 6
Make a center hole in each gear slightly wider than your skewer or pencil so the gear can spin freely.
Step 7
Slide the small gear onto a wooden skewer or pencil so the gear spins easily on it.
Step 8
Tape or secure the small gear skewer upright to the base so the gear stays in place but can rotate.
Step 9
Slide the medium gear onto another skewer or pencil so it spins easily on its axle.
Step 10
Tape or secure the medium gear skewer to the base and position it so the medium gear teeth touch the small gear teeth.
Step 11
Slide the large gear onto a third skewer or pencil so it spins easily on its axle.
Step 12
Tape or secure the large gear skewer to the base and position it so the large gear teeth touch the medium gear teeth.
Step 13
Turn the small gear steadily for 10 seconds as your trial input.
Step 14
Count and write down how many times the large gear turned in 10 seconds and note whether it turned the same or opposite direction to the small gear.
Step 15
Share your finished gear train and what you discovered about size teeth and direction on DIY.org
Help!?
What can we use instead of wooden skewers, pencils, or different lids if we don't have them?
If wooden skewers or pencils aren't available, substitute straight chopsticks or thin dowels as axles and use a compass, round jars, or food container lids to trace circles, making each center hole slightly wider than your substitute so the gear still spins freely.
My gears skip or wobble when I turn the small gear—what should I check or fix?
If teeth skip or gears wobble, recheck that you 'mark evenly spaced dots' and cut uniform rectangular teeth, make each center hole only slightly wider than the skewer as instructed, and retape or secure the skewers upright to the base so the teeth mesh cleanly.
How can I adapt this gear activity for younger children or older kids?
For younger children, simplify by tracing large lids and cutting 8–12 big teeth with adult help on the cardboard base, while older kids can use the 12, 20, 40 tooth counts from the instructions to make finer gears, add more stages, and calculate gear ratios from the 10-second trial.
How can we extend or personalize the finished gear train project?
To extend the activity, paint and label each cardboard gear, add a fourth gear or a small hobby motor to the small gear, and repeat the 10-second trials to compare rotation counts and directions as suggested for sharing on DIY.org.
Watch videos on how to make your own gear
Gear Box DIY
4 Videos
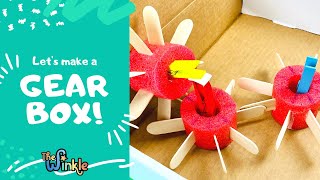
Gear Box DIY
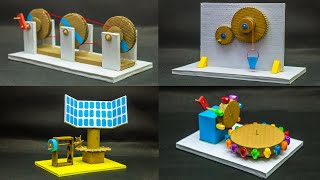
Gear Science Projects
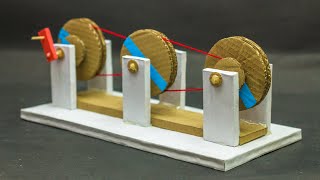
Gear Motor Working Model | Science Projects
Top 30 Science Project Ideas
Facts about gears and simple machines
⚙️ A gear ratio equals the number of teeth on the driven gear divided by the number of teeth on the driver — it tells you how speed and torque change.
🕰️ The Antikythera mechanism (around 100 BCE) is one of the oldest known devices to use complex gears to model astronomical motions.
🚗 Modern car transmissions use multi-gear trains so engines can run efficiently while giving high speed or extra torque for climbing.
🔁 When two gears mesh the second turns the opposite direction; add an idler gear and the final gear keeps the original direction.
📏 Doubling the teeth on the driven gear (compared to the driver) halves its speed but roughly doubles its torque — that’s mechanical advantage!
How do you build a working gear train from cardboard or plastic?
What materials do I need to make my own gears and a gear train?
What ages is this gear-building activity suitable for?
What are the benefits of having children build and test gear trains?
