Make the Flap Card
Make a flap card by folding cardstock, cutting a flap, decorating with markers and stickers, and writing a secret message inside.


Step-by-step guide to make a flap card
Step 1
Fold the cardstock in half and press along the fold to make a sharp crease.
Step 2
Use the ruler and pencil to draw a rectangle on the front with its top side sitting on the folded edge.
Step 3
Cut along the three open sides of the rectangle with scissors and leave the top side uncut so the rectangle becomes a flap.
Step 4
Open the flap to make sure it swings up and down easily.
Step 5
Press along the folded top edge of the flap with your finger to make a strong crease.
Step 6
Decorate the front of your card with your colouring materials using drawings and colors you love.
Step 7
Put stickers onto the flap and around the front to make the card bright and fun.
Step 8
Lift the flap and write a secret message inside the card with your pencil or markers.
Step 9
Add small drawings or extra decorations around your secret message if you want.
Step 10
Share a photo of your finished flap card on DIY.org
Help!?
What can we use if we don't have cardstock, a ruler, or stickers?
Use heavy-weight construction paper or a flattened cereal-box for cardstock, the straight edge of a book or a printed paper edge instead of a ruler, and glued-on magazine pictures or cut colored paper in place of stickers.
My flap won't swing freely or I accidentally cut the top hinge—how can I fix it?
If the flap sticks, trim the three open sides again so the rectangle can move, press the folded top edge firmly with your finger or a ruler to re-crease it, and if you cut the top hinge by mistake tape the top back on with clear tape and crease the fold again.
How can I change the activity for different ages?
For preschoolers, pre-draw and pre-cut the rectangle and let them color and stick stickers and write a short word under the flap, while older kids can measure and cut their own rectangle with the ruler, add detailed drawings and multiple flaps, or use a craft knife with adult supervision.
How can we personalize or extend the flap card once it's finished?
Personalize it by adding layered flaps, a small photo or secret drawing under the flap, extra decorations around your secret message with markers and stickers, or make a set to photograph and share on DIY.org.
Watch videos on how to make a flap card
How to make unique handmade birthday card || Flap Card Tutorial
4 Videos
How to make unique handmade birthday card || Flap Card Tutorial
Easy Fun Fold Card Tutorial | Flip Flap Card with Cheers & Sips
How To Make A Top Flap Fun Fold Card
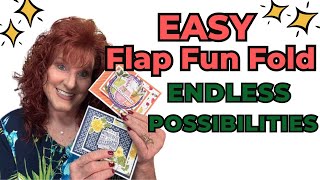
EASY Flap Fun Fold Tutorial YOU MUST TRY!🧡
Facts about cardmaking and paper crafts for kids
✂️ A single straight cut and a fold can make a flap that hides a surprise—simple pop-up tricks power many flap cards!
🎨 Cardstock is thicker than regular paper so it keeps crisp folds and bright marker colors without wrinkling.
🎩 Handmade greeting cards became huge in Victorian times when cheaper postage made sending cards popular.
🔐 Flap cards are a kid-favorite because the little reveal moment (opening the flap) feels like finding a secret.
♻️ You can upcycle old magazines or scrap paper to decorate flap cards—creative and planet-friendly!
How do you make a flap card?
What materials do I need for a flap card?
What ages is this flap card activity suitable for?
What are the benefits of making flap cards?
