Make snow goggles
Make simple snow goggles from cardboard, felt, string, and narrow slits to reduce glare; measure, cut, assemble, and test them safely outdoors.


Step-by-step guide to make snow goggles
How to make night vision goggles out of cardboard
Step 1
Measure across your face from the outer edge of one eye to the outer edge of the other eye with the ruler and write down that number.
Step 2
Draw a rectangle on the cardboard that is your measured width plus 2 centimetres and 6 centimetres tall using the pencil and ruler.
Step 3
Cut out the rectangle from the cardboard with the scissors.
Step 4
Hold the cardboard gently against your forehead and mark the center of each eye on the cardboard with the pencil while looking in a mirror.
Step 5
Draw two horizontal slit outlines centered on the eye marks that are about 4 millimetres tall and 3 to 4 centimetres long using the ruler and marker.
Step 6
Ask an adult to carefully cut the two horizontal slits along your outlines using the craft knife while you hold the cardboard steady.
Step 7
Cut felt pieces to make a soft lining: one long strip to cover the inside edge and two small patches to place around each slit.
Step 8
Glue the felt pieces to the inside of the cardboard so the felt covers the edges and surrounds the slits; press until the glue sets.
Step 9
Make a small hole near each end of the cardboard with the tip of the scissors or ask an adult to make the holes.
Step 10
Thread the string through the two holes and pull the ends so the goggles sit centered on the cardboard.
Step 11
Tie the string ends together behind your head and adjust the knot so the goggles fit snugly but comfortably.
Step 12
Put the goggles on outdoors in the snow or on a bright surface and look around to check if the glare is reduced.
Step 13
If the slits need changing, ask an adult to carefully widen or narrow them a little with the craft knife and then try the goggles again.
Step 14
Share a photo or description of your finished snow goggles on DIY.org
Help!?
What can we use instead of felt or a craft knife if those are hard to find?
Use a soft piece of fleece or an old sock cut into patches for the lining and have an adult cut the slits with a sharp utility knife or carefully use small pointed scissors while you hold the cardboard steady.
My slits don't line up with my eyes or the glare isn't reduced—what should I do?
Re-mark the center of each eye on the cardboard while looking in a mirror, then have an adult carefully widen or narrow the two horizontal slits with the craft knife and press new felt patches around the adjusted slits so the edges stay covered.
How can I change the activity for younger or older kids?
For younger children, pre-measure and pre-cut the rectangle and punch the holes so they only draw slits and glue felt under supervision, while older kids can do all measuring, cutting the slits with a craft knife under adult supervision, and add decorations after fitting.
What are simple ways to improve or personalize the snow goggles once they're made?
Glue an extra strip of thin black foam or felt along the inside edge for comfort, swap the string for elastic threaded through the holes for a snug fit, and decorate the cardboard with waterproof markers or paint before testing them outdoors.
Watch videos on how to make snow goggles
DIY safety goggles ! |very easy!
4 Videos
DIY safety goggles ! |very easy!
How To Make Your Own Snow Globe?

How to Make Instant Snow
Make Homemade Snow
Facts about winter safety and eye protection
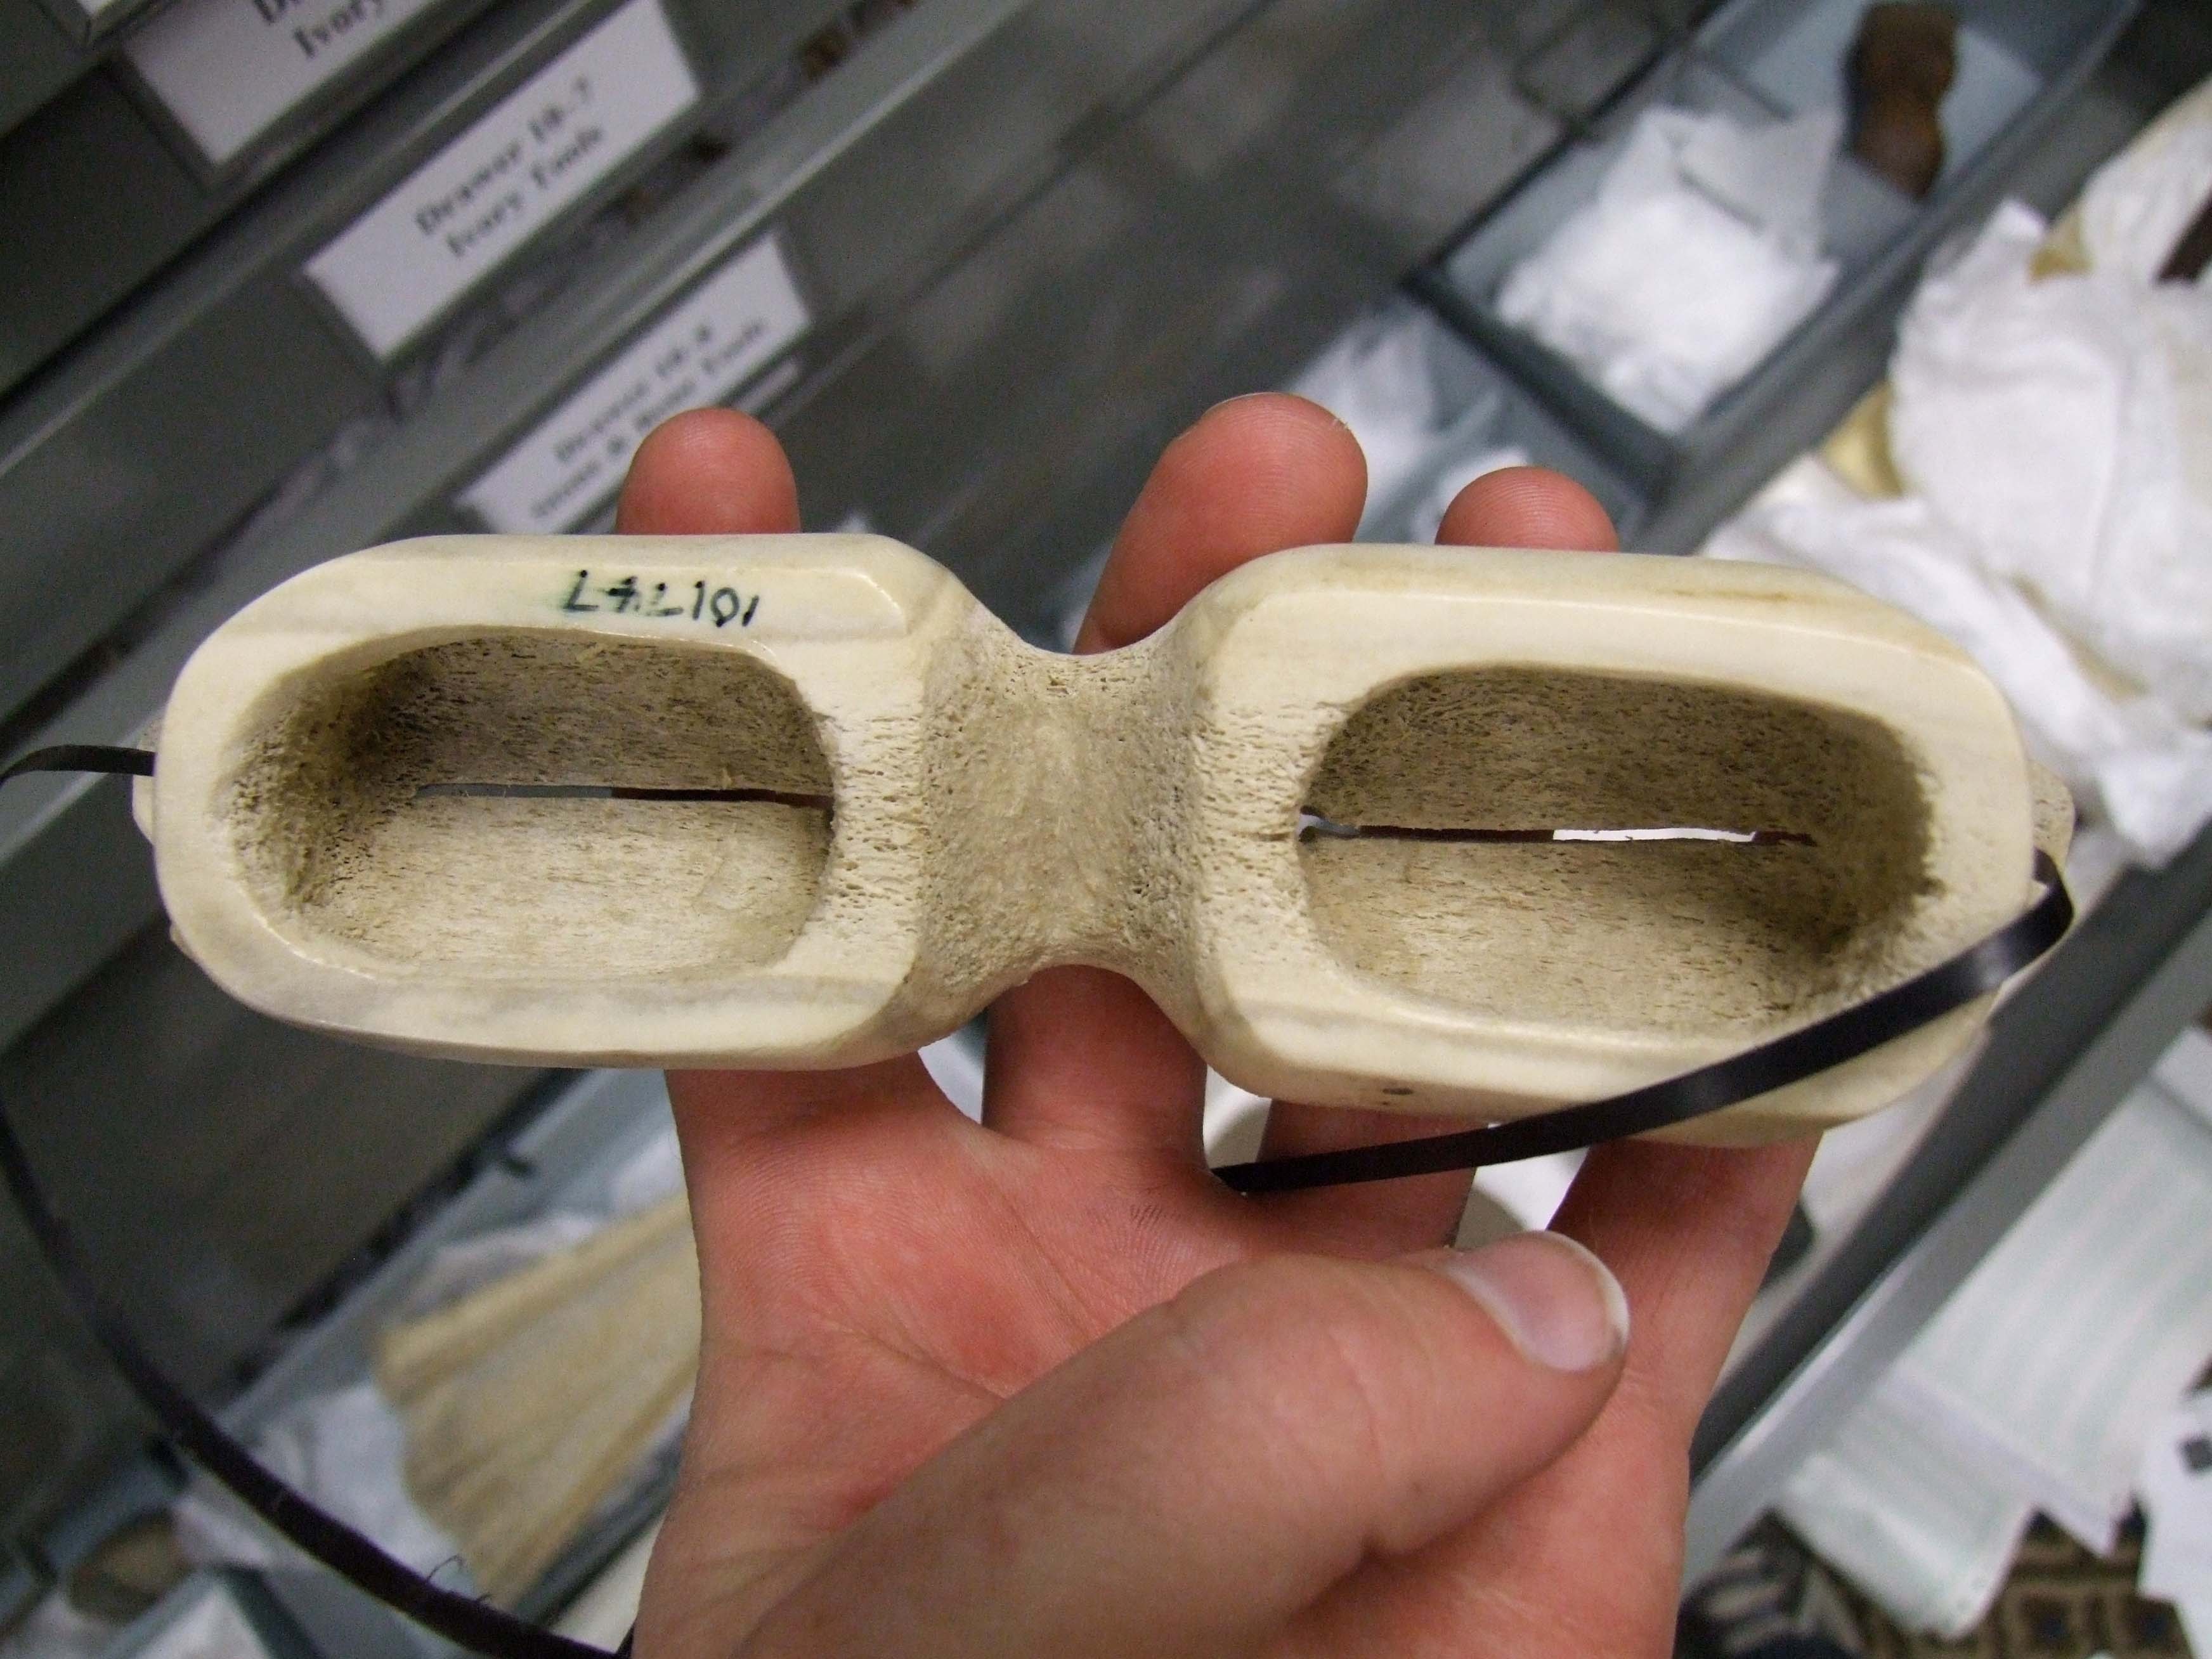
❄️ Traditional Inuit snow goggles were carved from bone, wood, or antler and used narrow slits to prevent snow blindness for centuries.
🕳️ Narrow slits act like tiny pinhole cameras—reducing glare and sharpening what's in focus without lenses.
👀 Snow blindness (photokeratitis) is a painful, temporary 'sunburn' of the eye caused by UV reflected off snow.
🧵 Felt or soft padding around homemade goggles keeps them comfy and helps block stray light and wind.
🌞 Homemade cardboard goggles are great for short outdoor testing and learning, but certified UV sunglasses are best for long exposures.
How do I make simple snow goggles from cardboard to reduce glare?
What materials do I need to make cardboard snow goggles?
What ages are cardboard snow goggles suitable for?
What safety tips should I follow when testing homemade snow goggles?
