Make Post-it Stop Motion Film
Make a stop-motion movie using Post-it notes, a camera or phone, and simple frame-by-frame animation to bring paper characters and scenes to life.


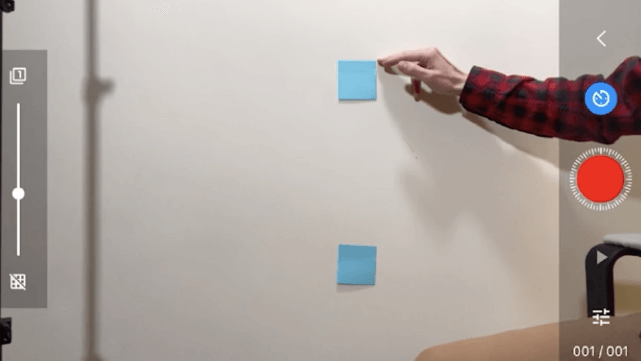

Step-by-step guide to Make Post-it Stop Motion Film
Step 1
Gather all the materials listed and clear a flat table space to work on.
Step 2
Choose a simple story idea for your movie like "a Post-it walks across the page" or "a cat finds a hat."
Step 3
Decide how many small moves or frames you want for your story (aim for 20 to 40 frames).
Step 4
Draw the main character and any props on individual Post-it notes with your colouring materials.
Step 5
Carefully cut out the characters and props you drew on the Post-its.
Step 6
Lay the plain paper down as your background and tape the corners so it stays flat.
Step 7
Add large background Post-its to the paper to build your scene like trees houses or clouds.
Step 8
Place your phone or camera on a steady surface or stand above the scene and open the camera app.
Step 9
Take one test photo to check framing and lighting and fix anything that looks off.
Step 10
Stick your first character Post-it in the starting spot for the scene.
Step 11
Take the first photo of your starting scene.
Step 12
Move the character a tiny bit to the next position.
Step 13
Take another photo; repeat moving a tiny bit then taking a photo until your story is finished.
Step 14
Use a stop-motion app or your phone's video editor to assemble the photos into a video and export the movie.
Step 15
Share your finished stop-motion movie on DIY.org
Help!?
What can we use if we don't have Post-it notes or enough sticky paper?
If Post-it notes aren't available, draw your characters on small scraps of paper or index cards and attach them with small pieces of tape or a removable glue dot when you 'Stick your first character Post-it' and move them between frames.
My phone images keep shifting or the characters fall off between photos—how do I fix that?
If framing shifts or Post-its move, redo the test photo, secure your phone on a steady surface or stand as directed in step 'Place your phone or camera on a steady surface,' tape the background corners, and use tiny pieces of tape on the cut-out Post-its so they stay put between frames.
How should we change the activity for younger kids or older kids?
For younger kids simplify the project by choosing 10–15 frames, drawing bigger characters on Post-its and having an adult help with cutting and phone setup, while older kids can aim for 40+ frames, add detailed background Post-its, and do their own editing in the stop-motion app.
How can we make the stop-motion movie more creative or professional-looking?
To enhance your movie, add recorded voiceovers or sound effects in the stop-motion app, layer extra Post-it background pieces and props you 'cut out' to create depth, and tweak lighting after the test photo to change the mood.
Watch videos on how to Make Post-it Stop Motion Film
How to make stop motion videos, for kids, easy, get you started!!!
4 Videos
How to make stop motion videos, for kids, easy, get you started!!!
Stop Motion | STEP1 Film-maker Lesson
Easy Stop Motion Animation: Step by Step for Beginners
Make a Stop Motion Animation I Activities for Children
Facts about stop-motion animation for kids
🎬 Stop-motion is made one frame at a time — at 24 fps a minute of film needs 1,440 photos, so even short movies add up fast!
🗒️ Post-it Notes came from a 'failed' adhesive discovered by a 3M scientist in 1968 and were launched as Post-it Notes in 1980.
✂️ Cutout animation is a classic stop-motion technique using paper shapes — perfect inspiration for animating Post-it characters.
📱 Most smartphones can shoot 24–60 fps video; for stop-motion, many creators use 12–24 fps to balance smoothness and effort.
🐑 Aardman Animations (Wallace & Gromit) moves models tiny amounts per frame — feature shorts often take months to complete.
How do you make a Post-it stop-motion film?
What materials do I need to make a Post-it stop-motion movie?
What ages is this activity suitable for?
What are the benefits of making Post-it stop-motion films?
