Make Clay DIY Ornaments
Make colorful clay ornaments using air-dry or oven-bake clay with adult help, shape with cutters, add textures, paint and hang with ribbon.


Step-by-step guide to make clay DIY ornaments
How to make Ornaments out of Clay | Christmas Art Project for Kids
Step 1
Lay wax paper or parchment on your table to keep the surface clean.
Step 2
Choose which clay to use and tell an adult if you picked oven-bake clay.
Step 3
Break off a small piece of clay and knead it with your hands until it feels soft and smooth.
Step 4
Flatten the clay with your rolling pin to about a quarter-inch thick.
Step 5
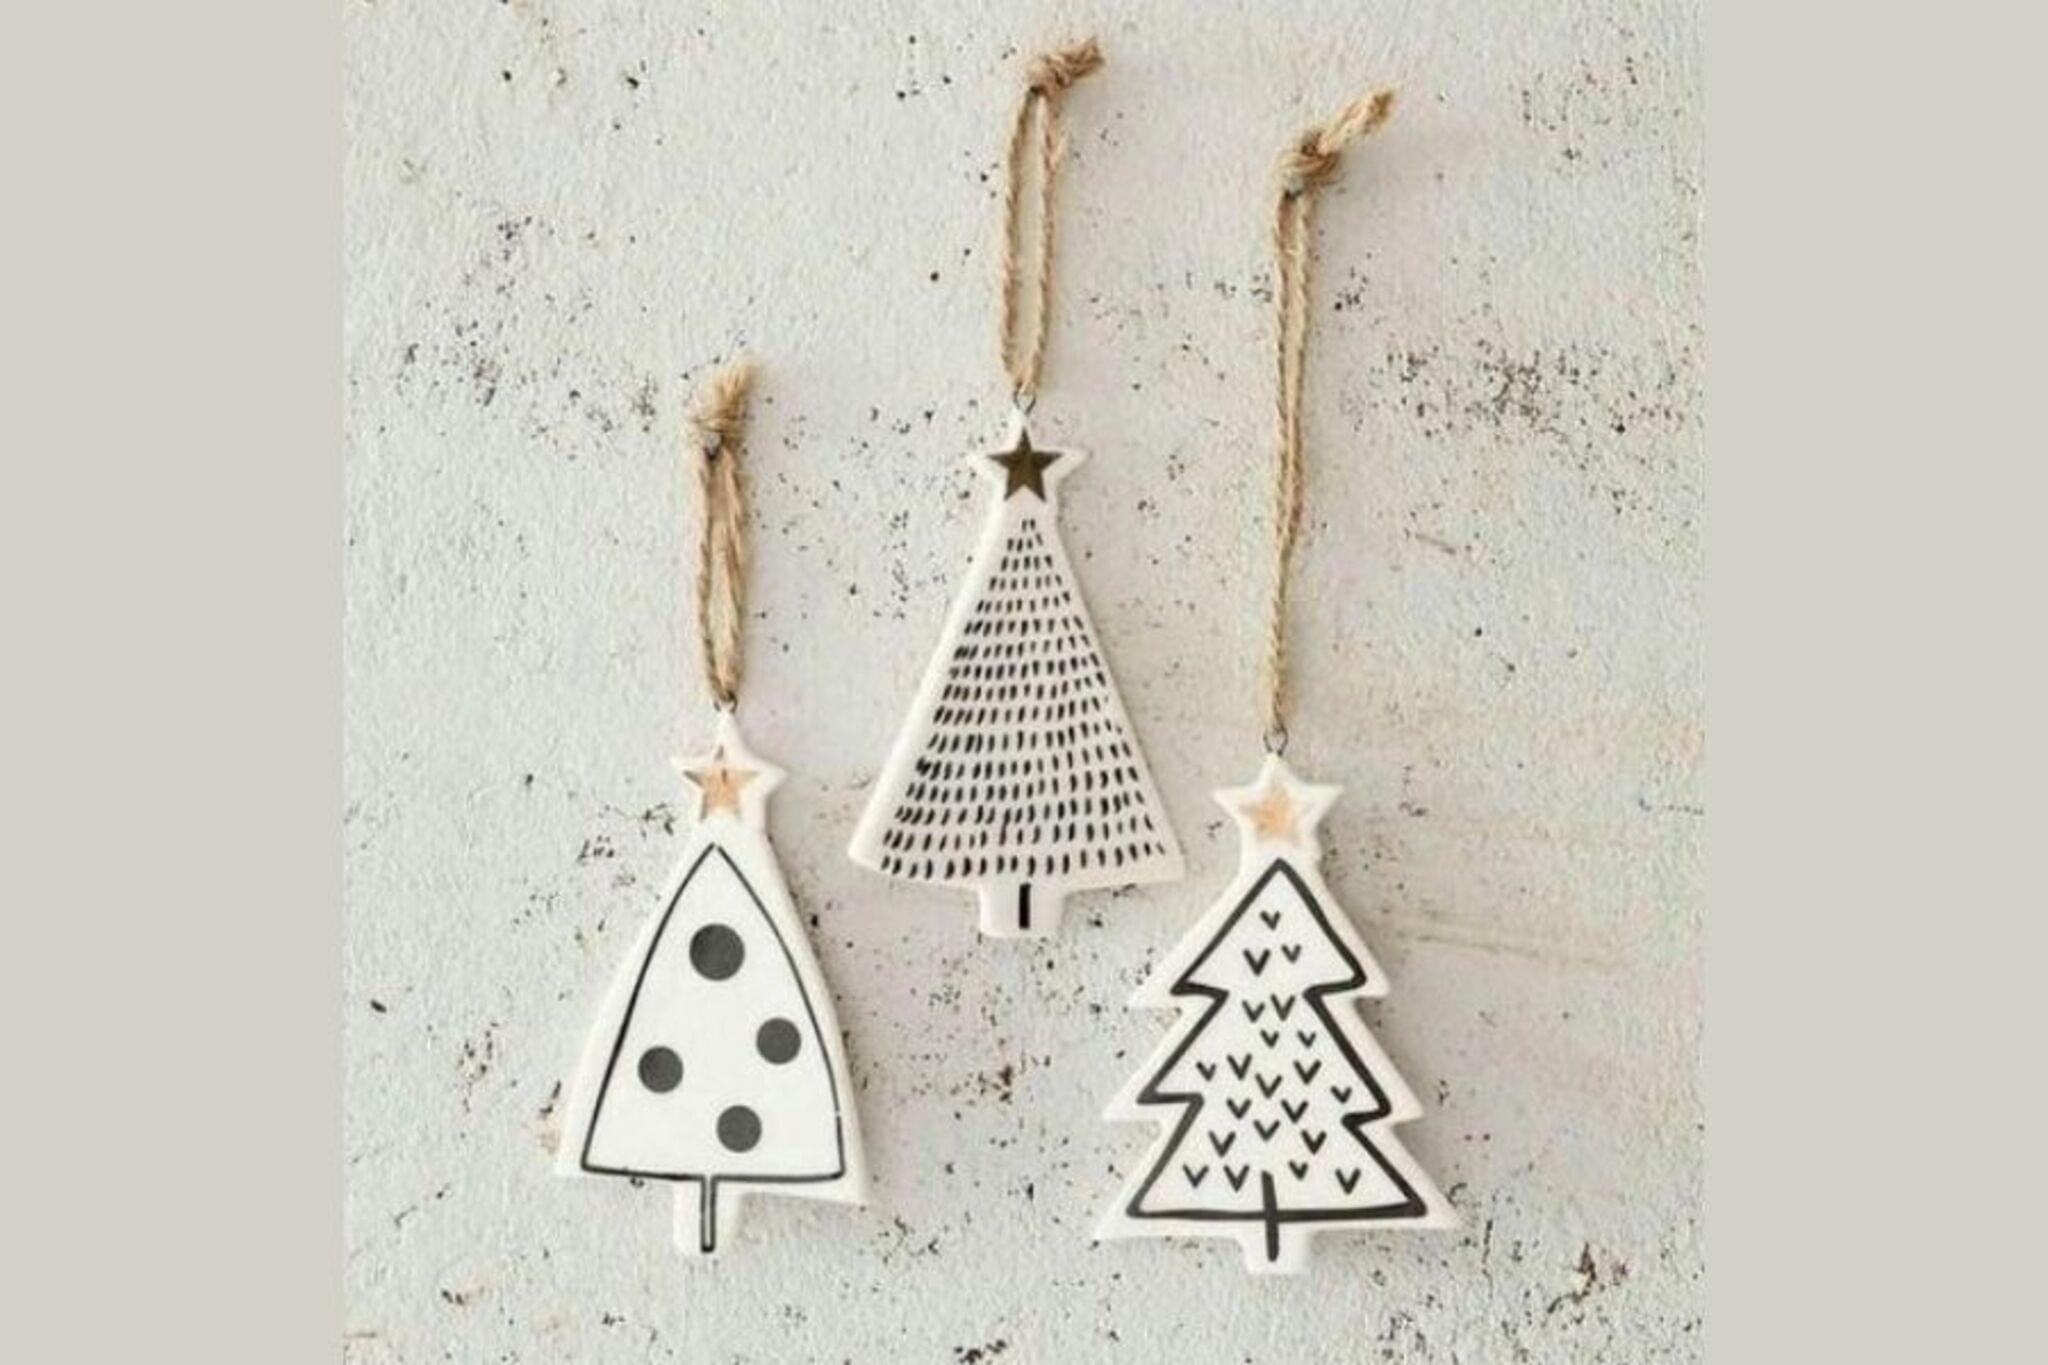
Press a cookie cutter into the flattened clay to cut out a fun shape and lift the extra clay away.
Step 6
Press textured objects like a leaf or button onto the shape to make a pattern.
Step 7
Poke a hole near the top of the shape with a toothpick so you can hang it later.
Step 8
Smooth the edges and any fingerprints gently with your finger.
Step 9
Have an adult follow the clay package directions to either bake the pieces in the oven or let them air-dry on the wax paper until hard.
Step 10
Wait until the ornaments are completely cool and hard before touching them again.
Step 11
Paint your ornaments with bright colors using a paintbrush and let the paint dry fully.
Step 12
Thread ribbon or twine through the hole and tie a knot to make a hanger.
Step 13
Share a photo of your finished clay ornaments on DIY.org.
Help!?
What can we use if we don't have oven-bake clay, a rolling pin, or cookie cutters?
Use air-dry clay and follow its drying step instead of baking, roll the clay flat with a clean glass bottle or sturdy water bottle in place of a rolling pin, and press bottle caps or carefully cut cardboard shapes instead of cookie cutters.
What should we do if the ornament cracks, sticks to the wax paper, or the hole closes up?
To prevent cracking, roll the clay to about a quarter-inch as the instructions say and knead until smooth, dust the wax paper lightly with cornstarch or flour to stop sticking, and re-poke the hole near the top with the toothpick right before baking or while still slightly damp so it stays open.
How can I adapt this project for different ages?
For preschoolers have an adult lay out the wax paper, pre-roll the clay, press the cookie cutters and make the toothpick hole while they press textures, and for older kids let them roll to a quarter-inch, create detailed textures with small tools, paint detailed designs, and thread their own ribbon hangers.
How can we personalize or upgrade the finished ornaments?
Before baking or air-drying, press initials or dates into the shape, then after the paint dries add glitter or metallic paint and a clear varnish for shine, and finish by threading beads onto the ribbon or twine before tying the hanger.
Watch videos on how to make clay DIY ornaments
DIY Clay Ornaments with Cookie Cutters | Easy Charms & Decorations
4 Videos
DIY Clay Ornaments with Cookie Cutters | Easy Charms & Decorations
HOW TO MAKE DIY CLAY CHRISTMAS ORNAMENTS! | Oven Baked Polymer Terrazzo + Stamping Techniques

9 Easy Christmas Ornaments from clay | Christmas Home Decoration Ideas | Christmas Clay Craft Ideas

Air Dry Clay Ornaments | DIY Christmas Ornaments
Facts about clay modeling for kids
🎨 Air-dry clay hardens by losing water to the air — no oven required!
🔥 Polymer clay is a plastic-based modeling material that cures and firms up when baked in a home oven.
🍪 Salt-dough ornaments are made from flour, water, and salt — fun to make but not something to eat!
🌿 Everyday items like leaves, buttons, cookie cutters, or forks make great texture tools for clay.
🎄 Tuck a loop of ribbon or a small eye pin into the top before it dries so your ornaments are ready to hang.
How do I make clay DIY ornaments with my child?
What materials do I need to make colorful clay ornaments?
What ages are clay ornament crafts suitable for?
What safety tips and fun variations can we try for clay ornaments?
