Make an Explosion Card
Make an explosion pop up greeting card using folded paper, scissors, glue, and decorations; design, assemble, and test the surprise when opened.


Step-by-step guide to make an explosion card
Step 1
Fold the cardstock in half to make your card base.
Step 2
Use the ruler and pencil to draw a 4 centimeter square on scrap paper.
Step 3
Cut out the square with scissors.
Step 4
Place the cut square on scrap paper and trace around it seven times to make seven matching squares.
Step 5
Cut out the seven traced squares.
Step 6
Fold each square diagonally from one corner to the opposite corner to make triangles.
Step 7
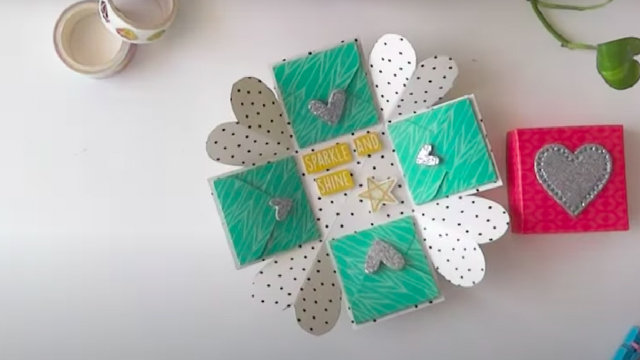
Arrange the triangles in a circle with their long straight edges touching and the points facing outward.
Step 8
Glue the touching straight edges together to form a round star ring.
Step 9
Put a small dab of glue in the center of the inside of your folded card.
Step 10
Press the glued star ring onto the center dab and hold briefly so it sticks in place.
Step 11
Decorate the card outside and the pop up petals with colouring materials and stickers.
Step 12
Slowly open the card to watch the explosion pop and see how it moves.
Step 13
Share your finished explosion card on DIY.org
Help!?
I don't have cardstock or scrap paper—what can I use instead?
Use a cereal-box panel or thin cardboard trimmed and folded to make the card base in place of cardstock, and use magazine pages, printer paper, or origami paper cut into 4 centimeter squares for the seven pieces.
My star ring keeps coming apart or the triangles slip—how can I fix that?
Make sure each 4 centimeter square is folded crisply along the diagonal (use the ruler edge or a butter knife to crease), glue only the long straight edges one at a time, and hold each seam until the glue sets so the round star ring stays together before you press it onto the center dab inside the card.
How can I adapt this activity for different age groups?
For younger children pre-cut the 4 centimeter squares and pre-fold the diagonal triangles so they can arrange and glue the petals, while older kids can measure and cut their own squares, experiment with more than seven petals, or add layered paper patterns before gluing the ring to the center dab.
How can we personalize or enhance the explosion effect?
Use patterned or glittered paper for the seven traced squares, write a hidden note under the star ring before you press it onto the center dab, and strengthen the card spine or petal folds with a bit of clear tape so the pop opens more dramatically when you slowly open the card.
Watch videos on how to make an explosion card
How To Make a Fun Explosion Card
4 Videos
How To Make a Fun Explosion Card
Make This Easy Origami Explosion Card | Origami Tutorial
Explosion Card Tutorial - How to Make a Pop-Up Exploding Card COMIC BOOK STYLE!
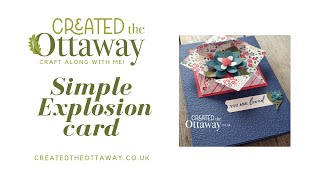
How to make a simple but beautiful explosion card @createdtheottaway
Facts about pop-up cards and paper engineering
🎉 Pop-up books are made using paper engineering — the art of designing moving paper parts to surprise readers.
✂️ Kirigami adds cutting to folding (kiru = cut) so you can create tabs, flaps, and surprising pop shapes.
🎨 Robert Sabuda is a modern master of pop-up books, famous for intricate paper mechanisms and playful surprises.
📐 The V-fold is one of the simplest pop-up tricks — glue two pieces in a V and it opens into a 3D element.
🧪 Paper prototyping helps — tiny changes in glue placement or fold angles can make a pop-up work or flop, so test on scrap first.
How do I make an explosion pop-up greeting card?
What materials do I need to make an explosion card?
What ages is an explosion pop-up card suitable for?
What are fun variations for explosion cards?
