Make an egg drop protector
Build an egg drop protector with household materials like straws, tape, and padding; safely test from a low height to explore impact and cushioning.


Step-by-step guide to make an egg drop protector
Step 1
Gather all Materials Needed.
Step 2
Inspect the egg for cracks to make sure it is whole.
Step 3
Draw a simple plan on paper showing where the egg will sit and where padding and straws will go.
Step 4
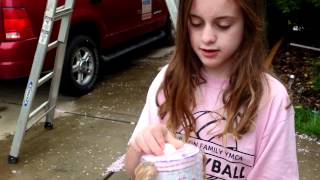
Line the inside of your cup or box with padding to create a snug nest.
Step 5
Gently place the egg into the padded nest.
Step 6
Use scissors to cut straws to the lengths you want.
Step 7
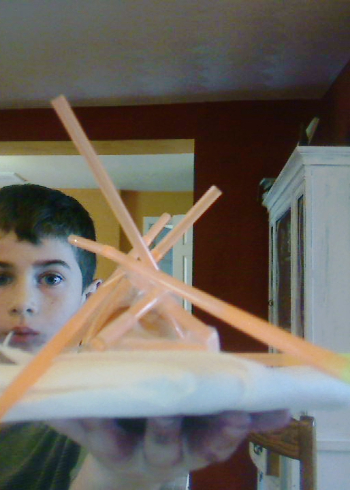
Tape the straws around the outside of the cup or box to form a protective cage.
Step 8
Wrap extra padding around the outside of the cage and tape it securely.
Step 9
Fasten any loose pieces with extra tape or a rubber band.
Step 10
Lay a towel on the floor under the drop spot.
Step 11
Have an adult hold your protector at about 1 meter high and drop it straight down without pushing.
Step 12
Check the egg for cracks after the drop.
Step 13
Make one change to your protector to try to improve the result.
Step 14
Share your finished creation on DIY.org.
Help!?
What can we use if we don't have drinking straws or bubble wrap for the cage and padding?
Instead of straws you can tape together rolled-up paper, chopsticks, or coffee stirrers to form the cage, and replace bubble wrap padding inside the cup or box with cotton balls, socks, or crumpled paper.
My egg moved or cracked after the drop—what step did I miss and how do I fix it?
Make sure the inside of your cup or box is lined snugly with padding so the egg doesn't shift, firmly tape the straws around the outside to form a rigid protective cage, and use extra tape or a rubber band to fasten any loose pieces before repeating the 1 meter drop.
How can I adapt this egg drop for different age groups?
For younger children have an adult pre-cut straws and lower the drop height below 1 meter while guiding the drawing and taping, and for older kids raise the challenge by increasing drop height, allowing them to cut with scissors and redesign the cage after each test.
How can we improve or personalize our protector beyond the basic instructions?
Try adding a parachute made from a plastic bag taped to the straw cage, wrap extra padding around the outside as described in the steps, decorate the cup or box, record whether the egg cracked, make one change, and then share your design on DIY.org.
Watch videos on how to make an egg drop protector
How to Keep an Egg from Breaking Project Egg Drop
4 Videos
How to Keep an Egg from Breaking Project Egg Drop
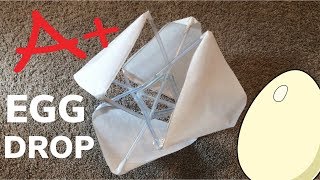
DIY First Place Winning Egg Drop
Egg Drop Challenge | Camp GPB
How To Make Egg Drop Project With Just Paper And Tape!
Facts about basic physics and engineering for kids
🥚 An eggshell is shaped like an arch, which helps it stay surprisingly strong when pressure is spread evenly!
⏱️ Cushioning protects an egg by lengthening the time of impact — more time means less force on the yolk.
🪂 Even a small parachute or a floppy plastic bag can cut your drop speed a lot by increasing air resistance.
📐 Triangles are super strong: using straw triangles makes light but sturdy frames for protectors.
🧩 Crumple zones absorb crash energy — folded paper, foam, or bubble wrap can act like tiny shock absorbers.
How do I make and test an egg drop protector at home?
What materials do I need to build an egg drop protector?
What ages is the egg drop protector activity suitable for?
How can I keep the egg drop activity safe and low‑mess?
